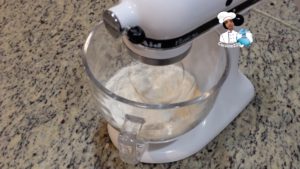
Start by measuring flour into large bowl. Add cold, cubed butter.
Using a pastry blender, cut the butter into the flour. (You also use your hands or food processor.
Once the butter is incorporated set aside.
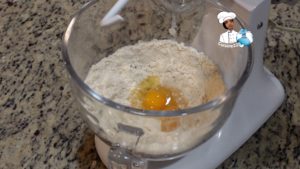
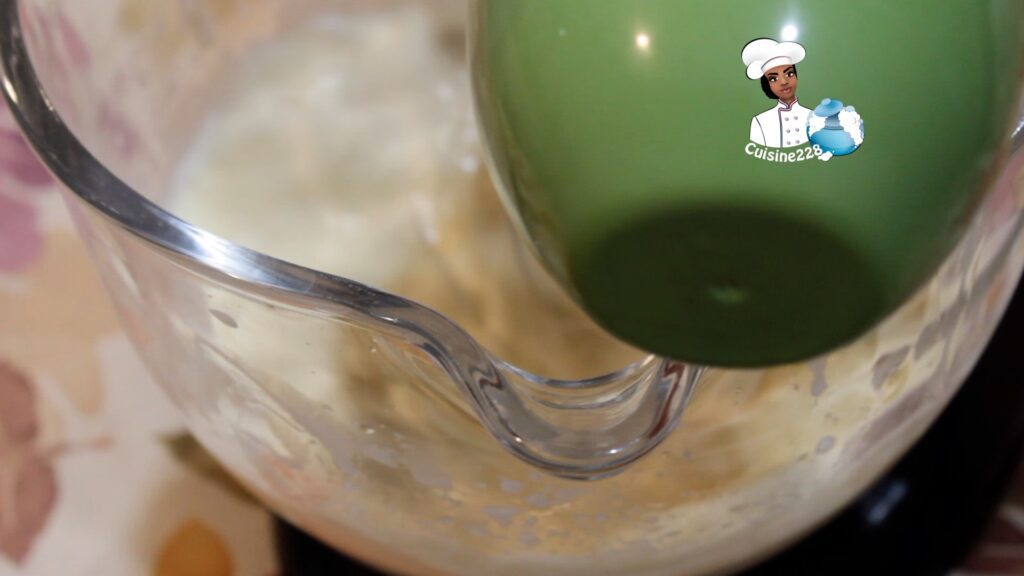
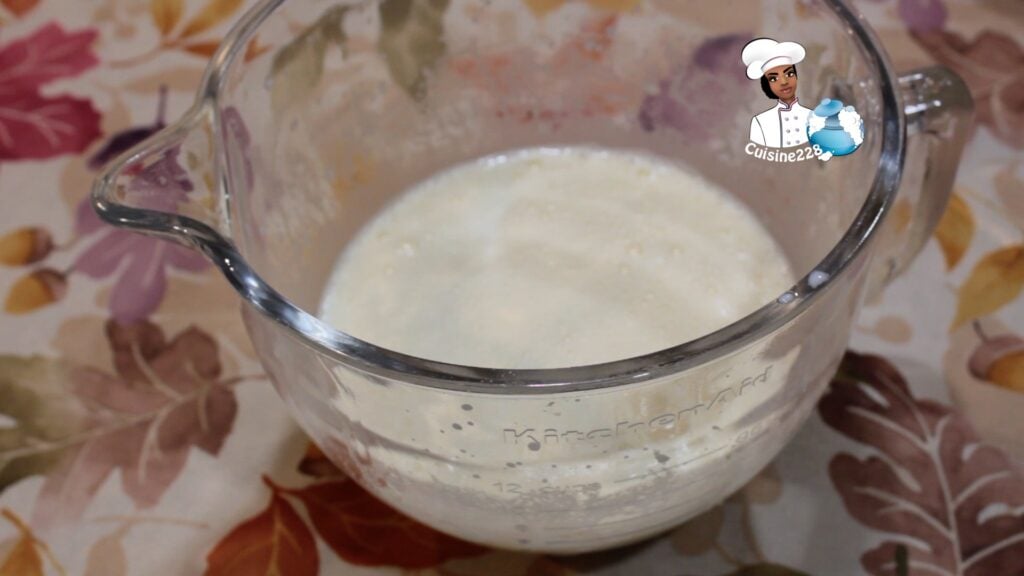
In another bowl mix the milk, eggs, nutmeg, baking powder and sugar.
Create a well in the middle of the flour
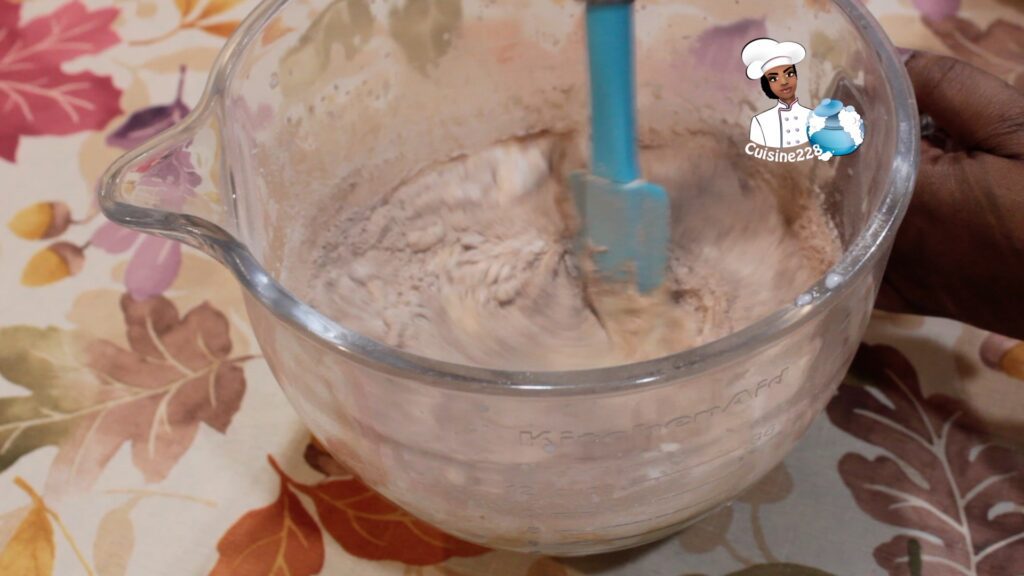
Pour all the wet ingredients into the well
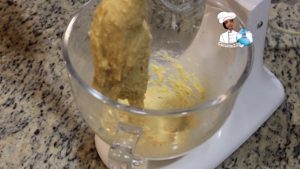
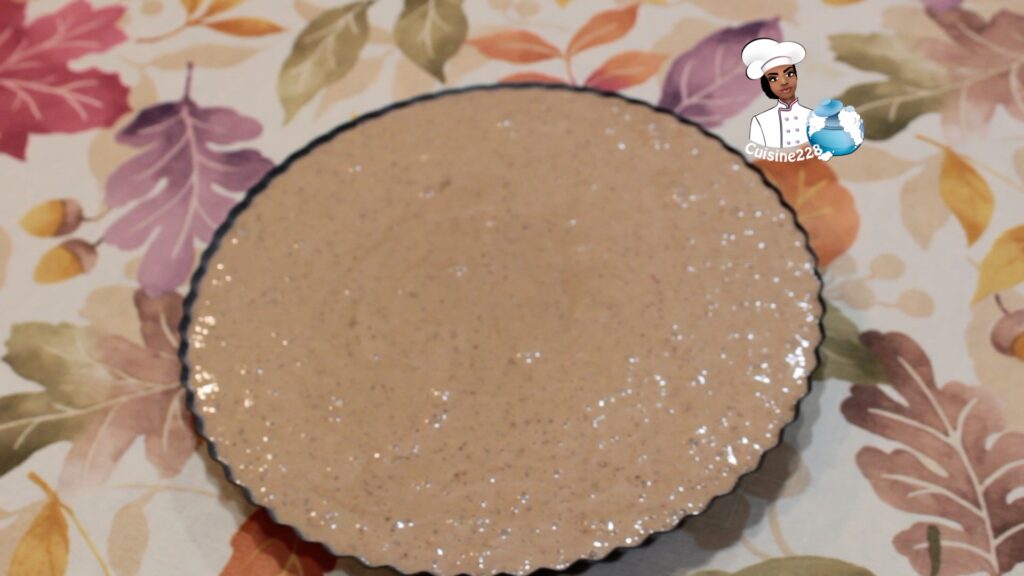
Mix until it all comes together. Batter should be thick
Allow batter rest for 5 mins.
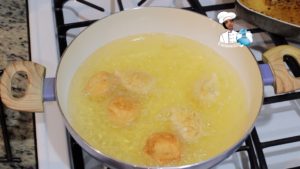
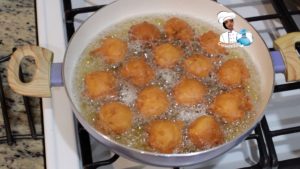
Place a medium deep saucepan over medium heat, adding to 3-4 cups of oil. Your oil should be hot enough now, use your hands or spoon to pick up the dough in the oil (You want the scoop to be a kind of round, but not perfect).
Frying the rolls itself requires some patience and technique, because you work with a thick dough, you want to make sure the rolls are cooked all the way through.
Turn the loaves often while he is in the oil, use a strong one to drill holes in while he is in the oil. Fry until golden brown; 2-3 minutes on each side.
Ingredients to make the bread for the Chicken Shawarma?
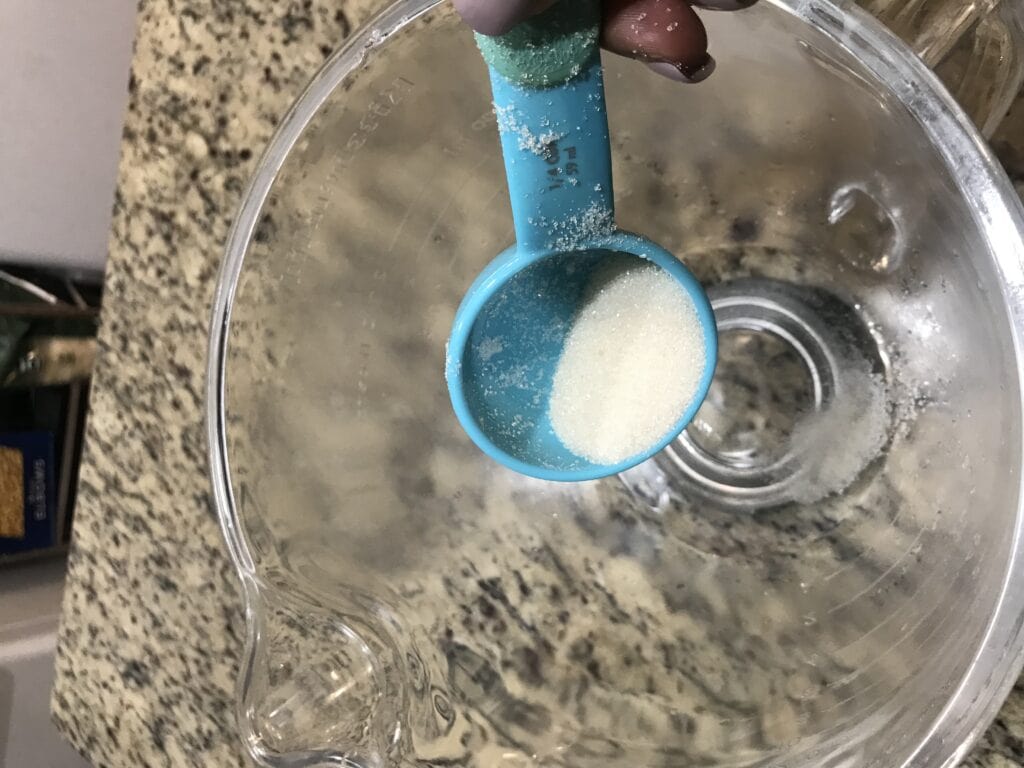
1 teaspoon sugar
1/2 cup warm water
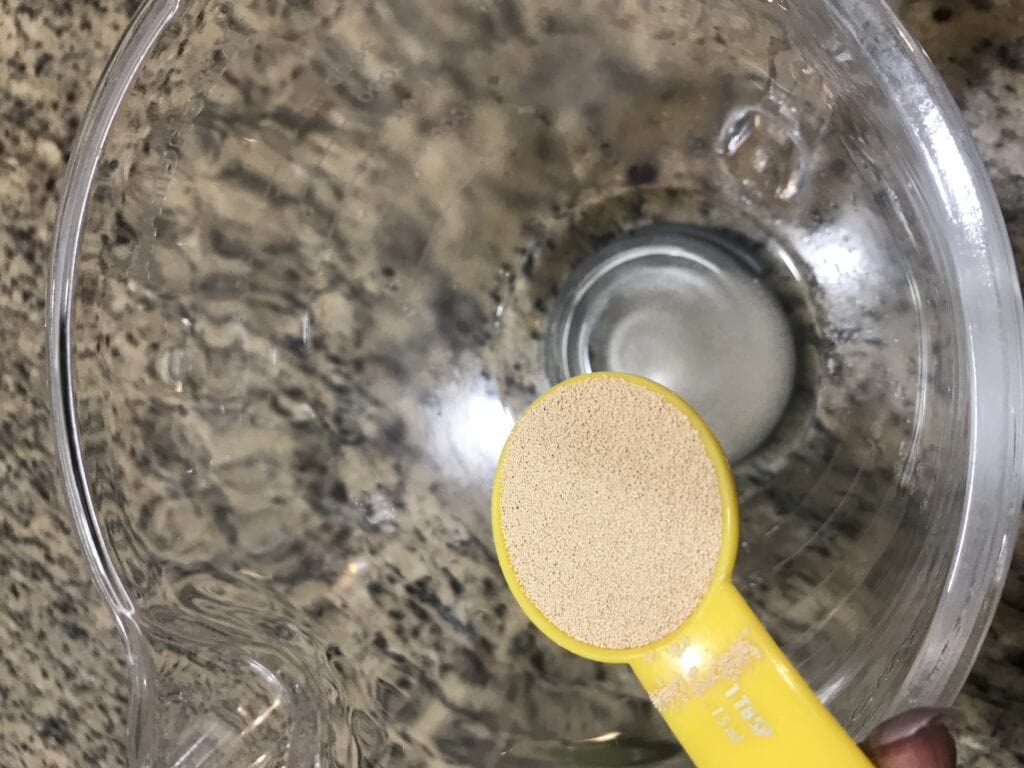
1/4 oz active dry yeast (~1 tablespoon)
2-1/4 cups all-purpose flour
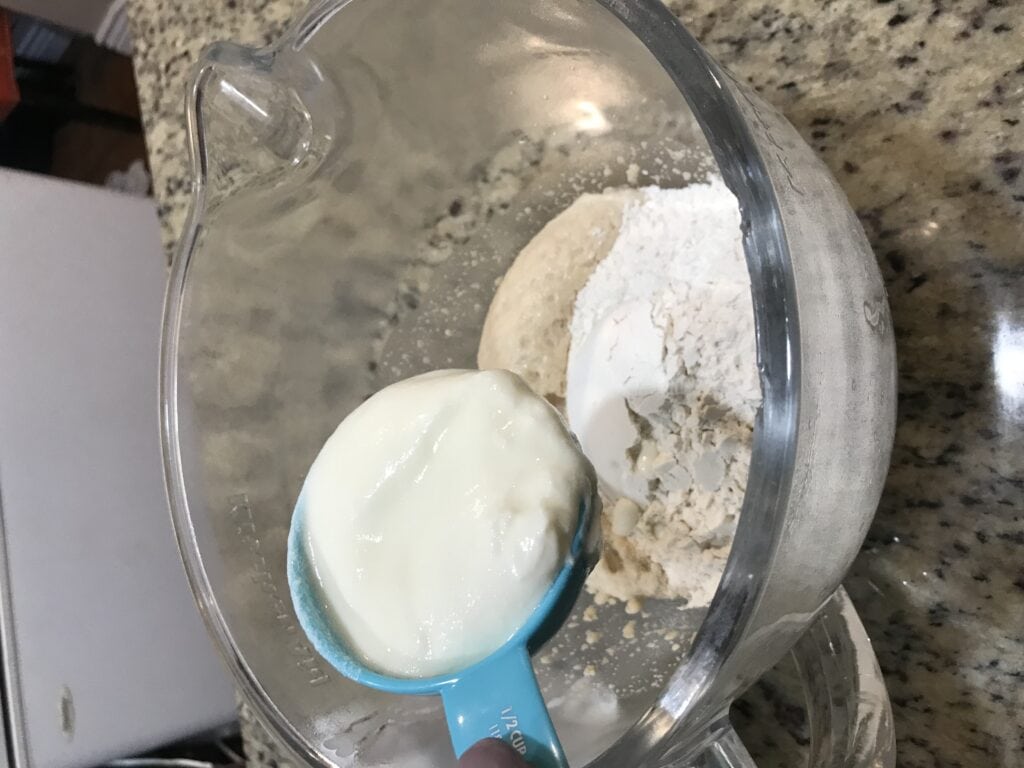
1/2 cup plain yogurt
1 tablespoon oil
some oil, for greasing the skillet
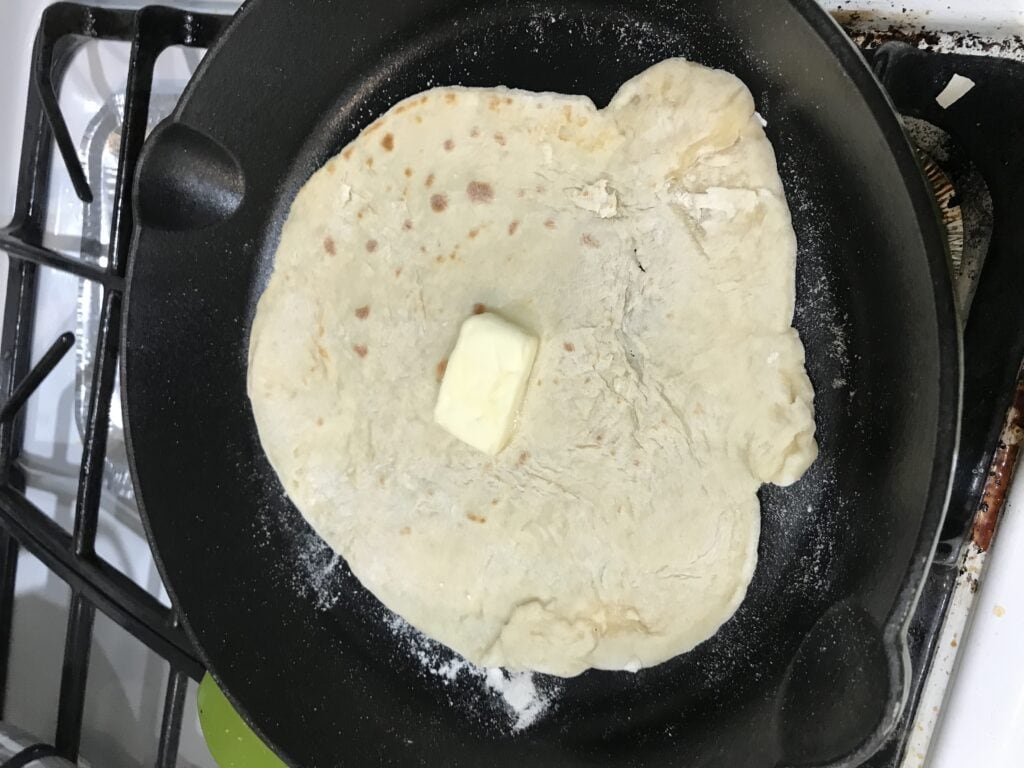
1 stick butter
How to make the bread for the Chicken Shawarma?
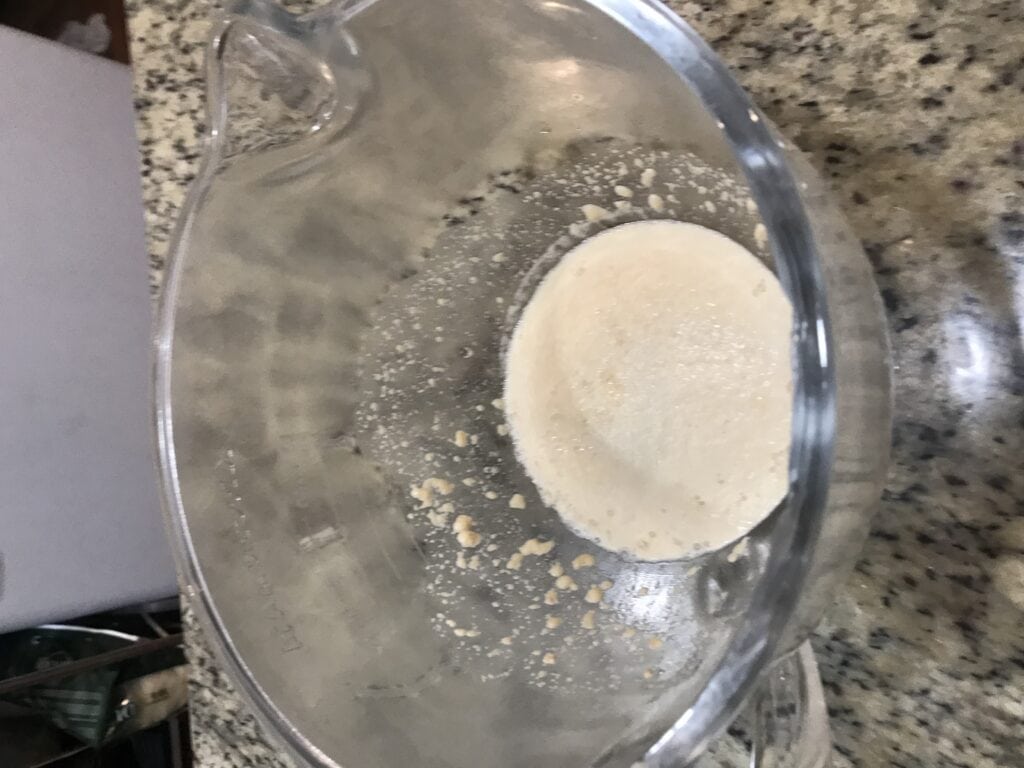
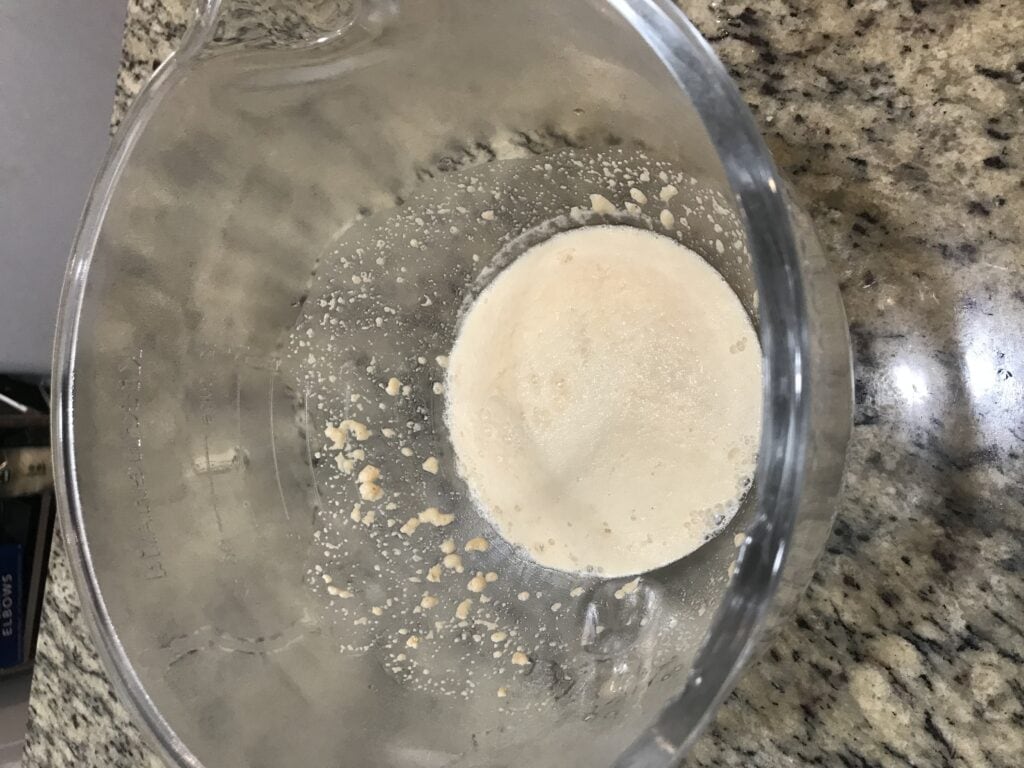
In a small bowl, add the sugar, warm water, and yeast together. Stir to combine well. The yeast should be activated when it becomes foamy, about 10 minutes.
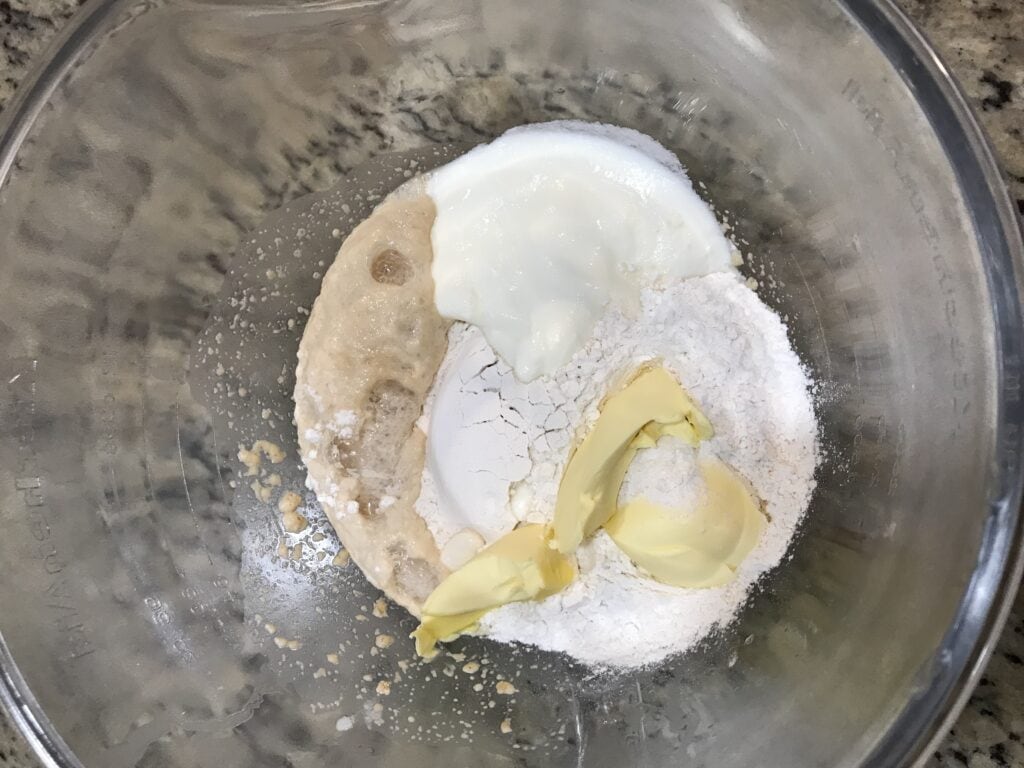
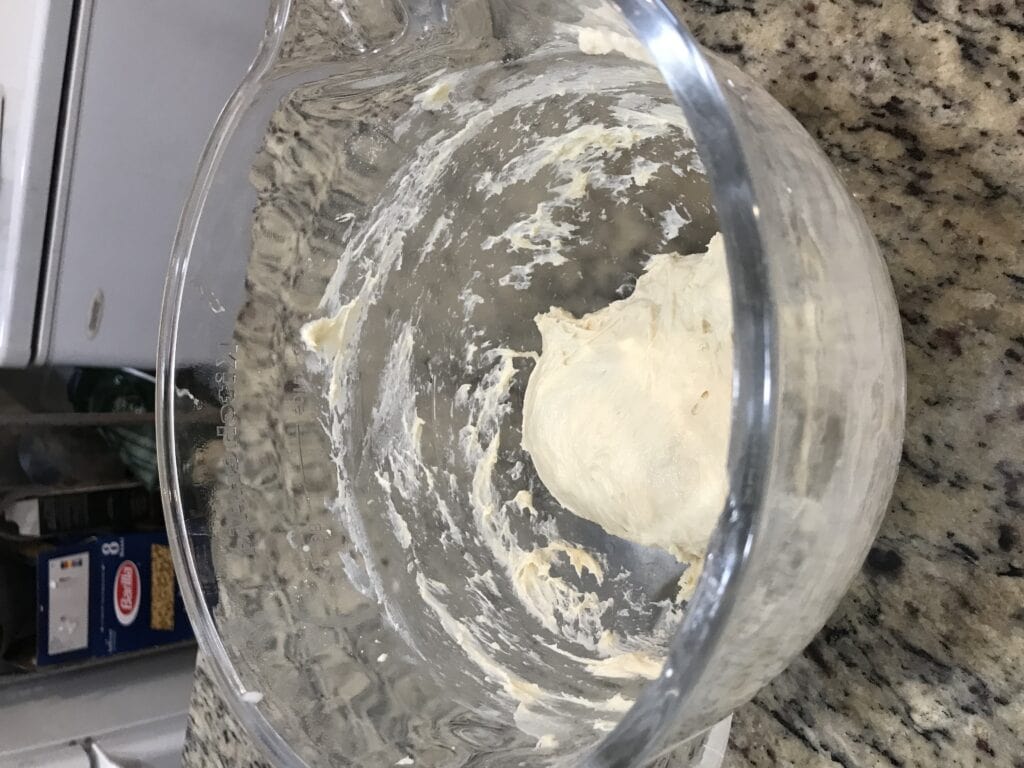
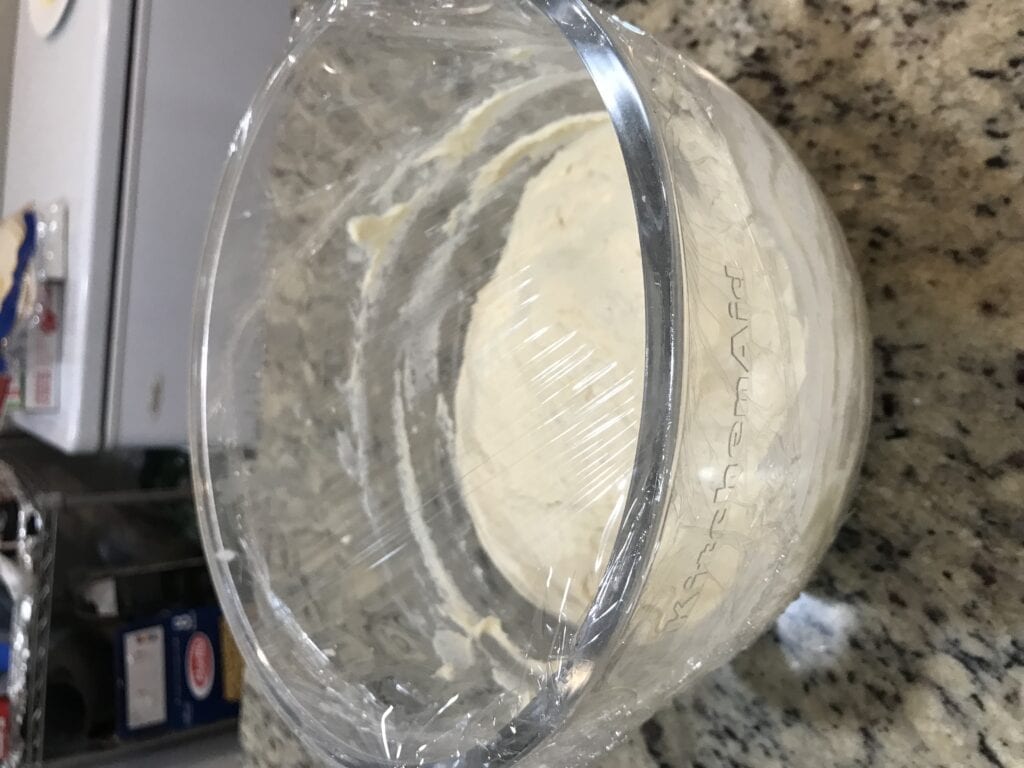
Mix the flour, yeast mixture, yogurt, and oil, knead the dough until the surface becomes smooth and shiny, about 10 minutes. Cover the dough with a damp cloth and let it rise in a warm place. The dough should double in size, about 1 hour.
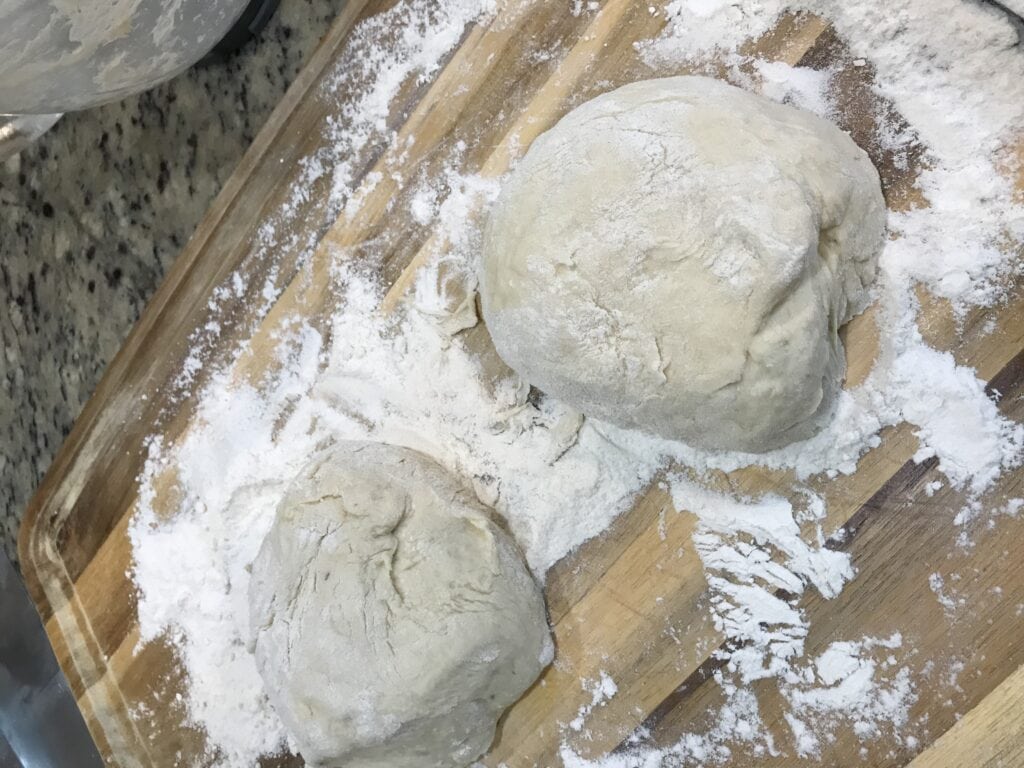
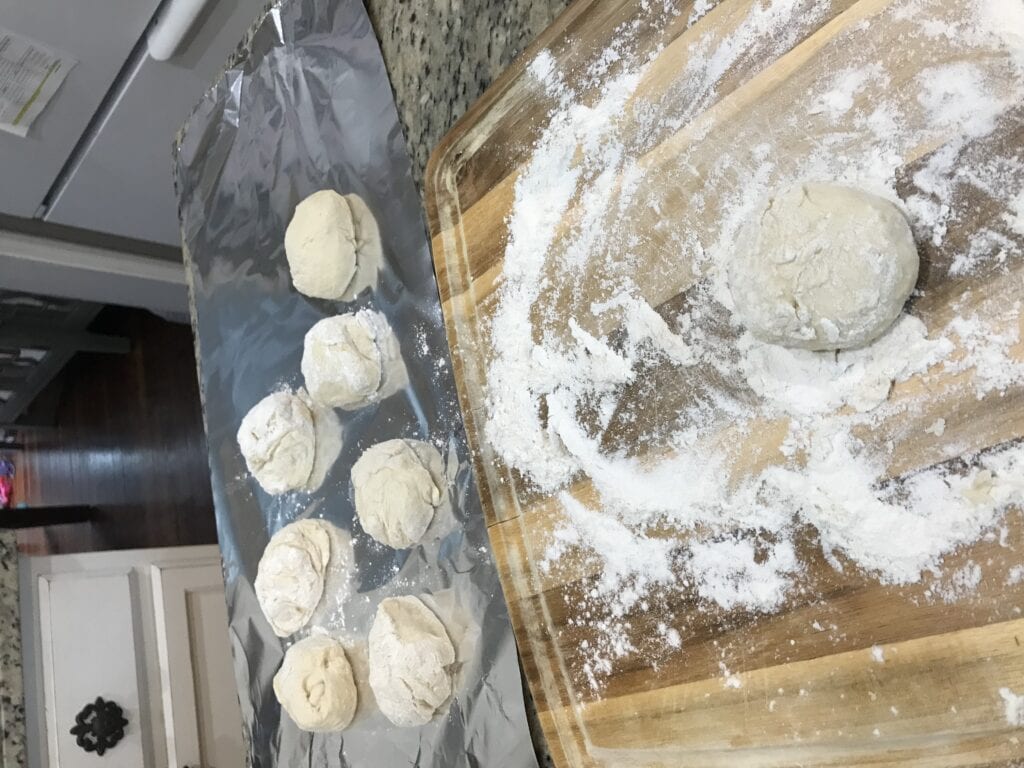
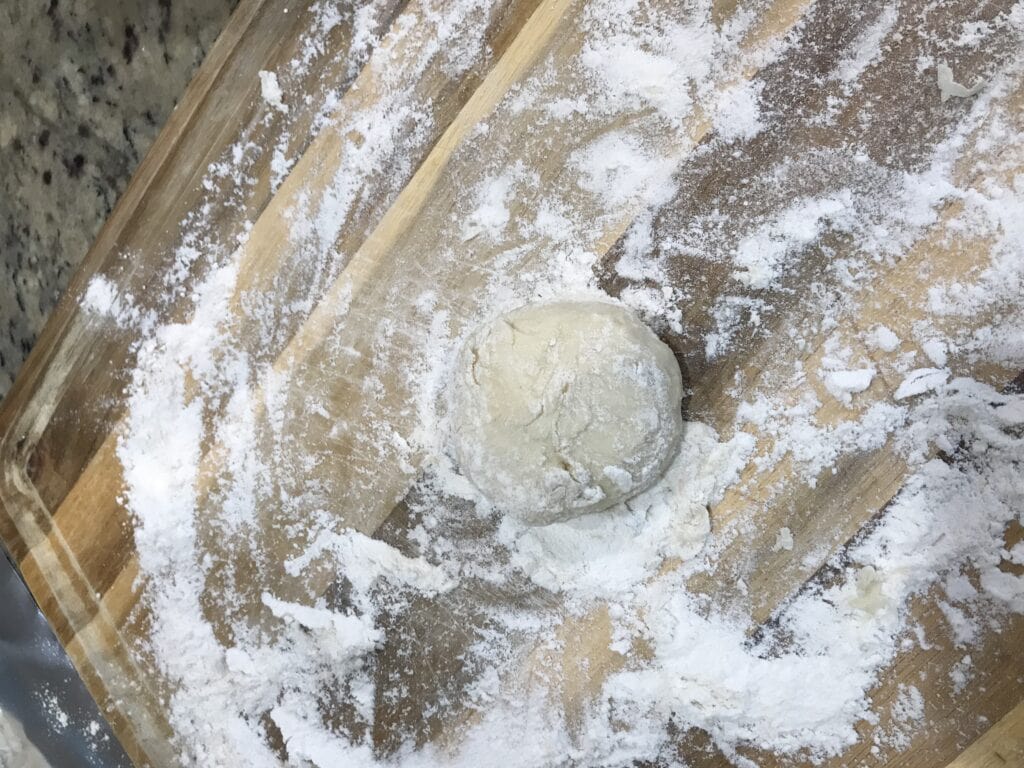
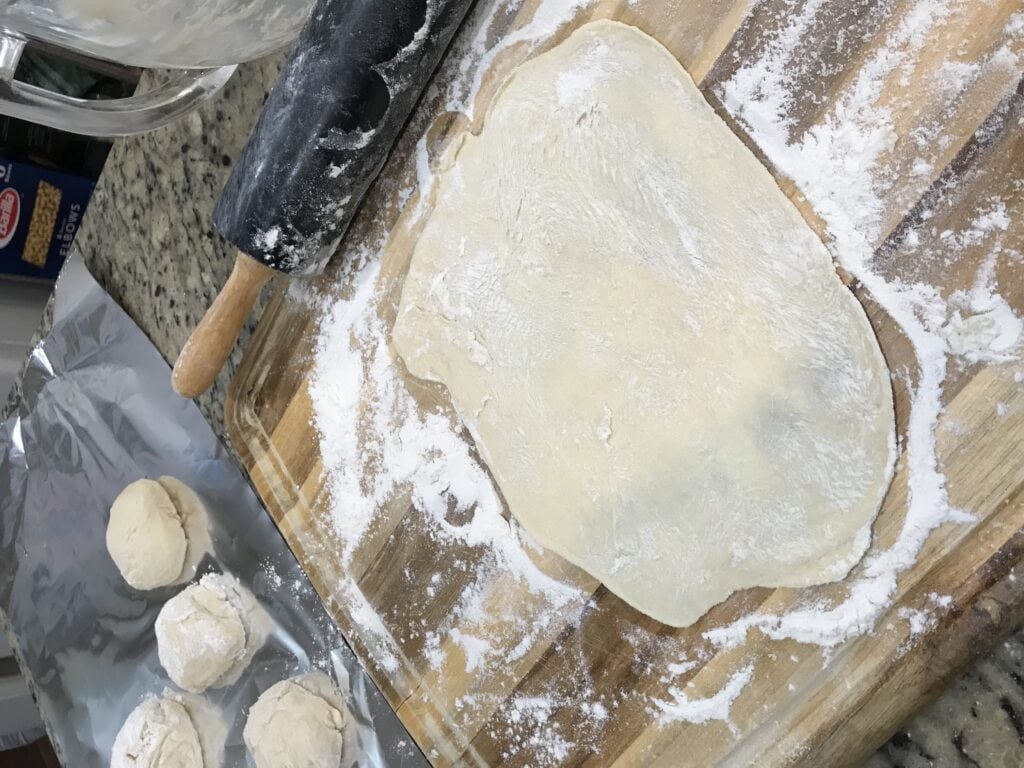
Divide the dough into 8 equal portions. Roll the dough to a 8” circle using a rolling spin.
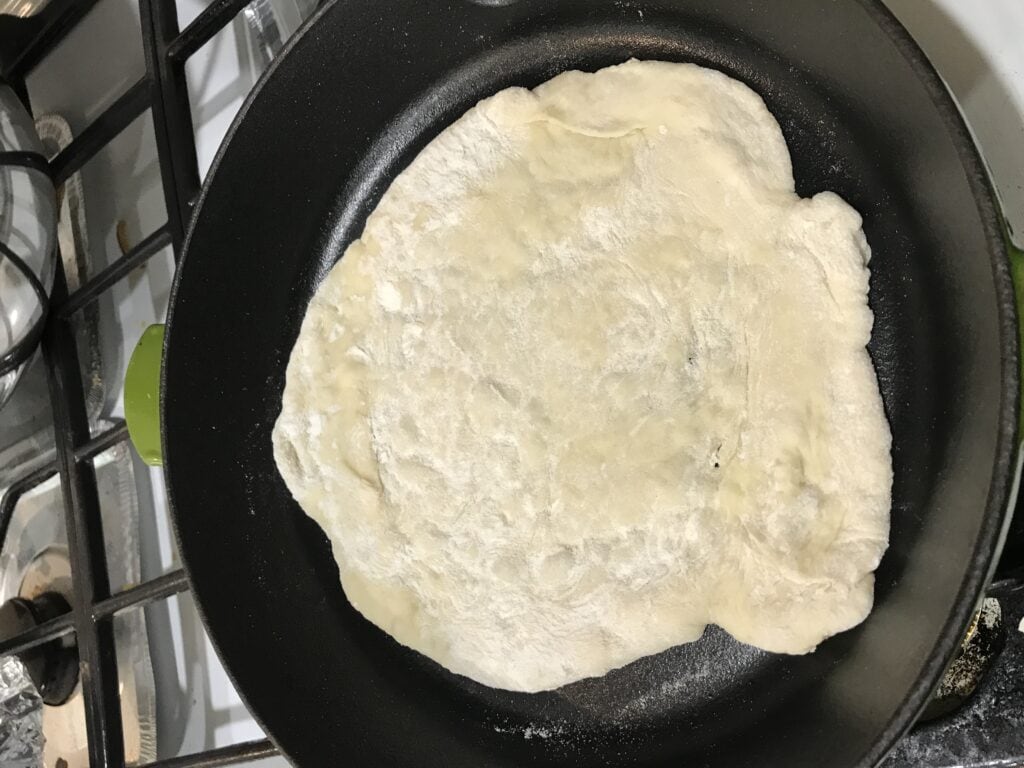
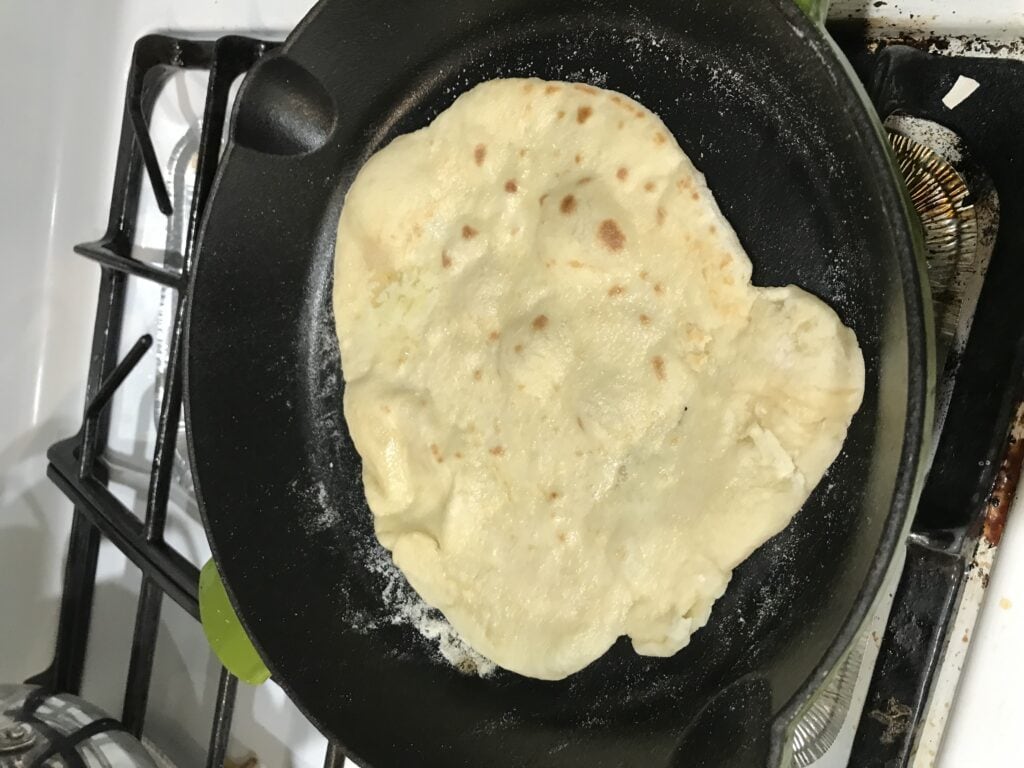
Heat up a skillet (cast-iron preferred) over high heat and lightly grease the surface with some oil to avoid the dough from sticking to the skillet. Place the dough on the skillet. When it puffs up and bubbles and burnt spots appear, flip it over and cook the other side. Repeat the same until all dough are done.
Brush the naan with the melted butter, serve warm.
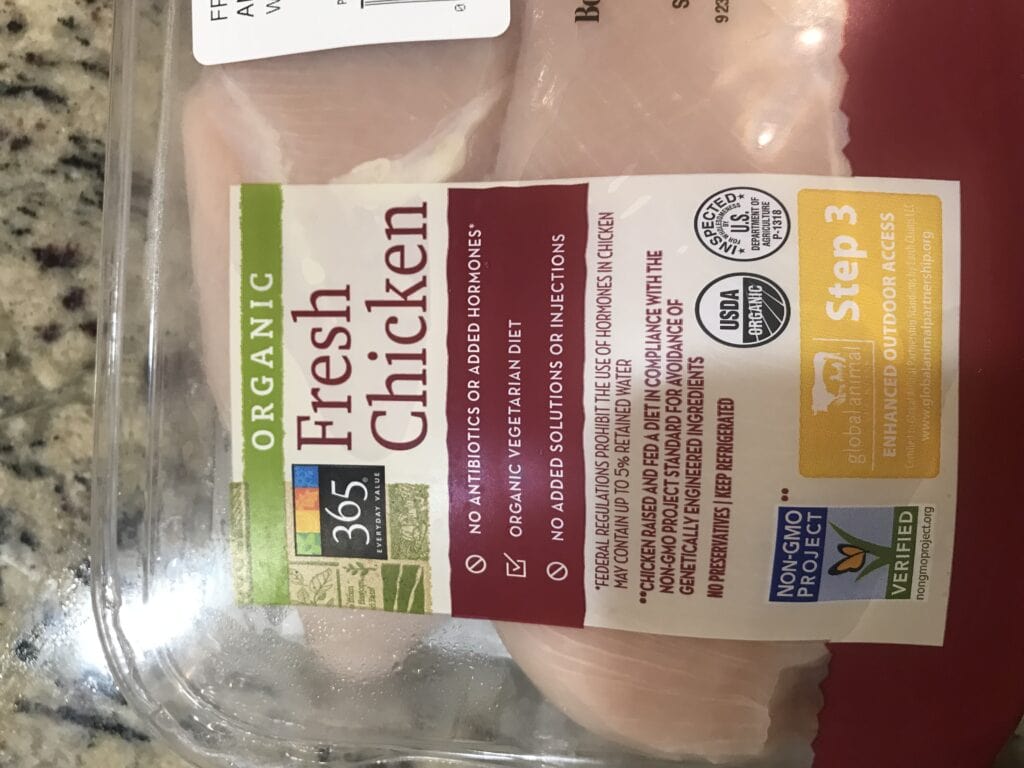
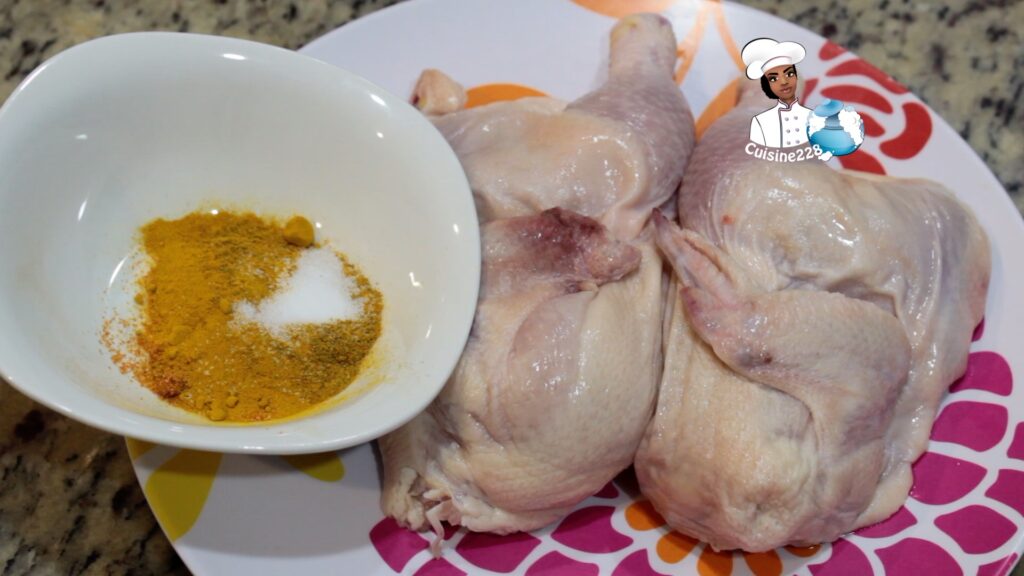
Ingredients the Chicken and Vegetables Shawarma
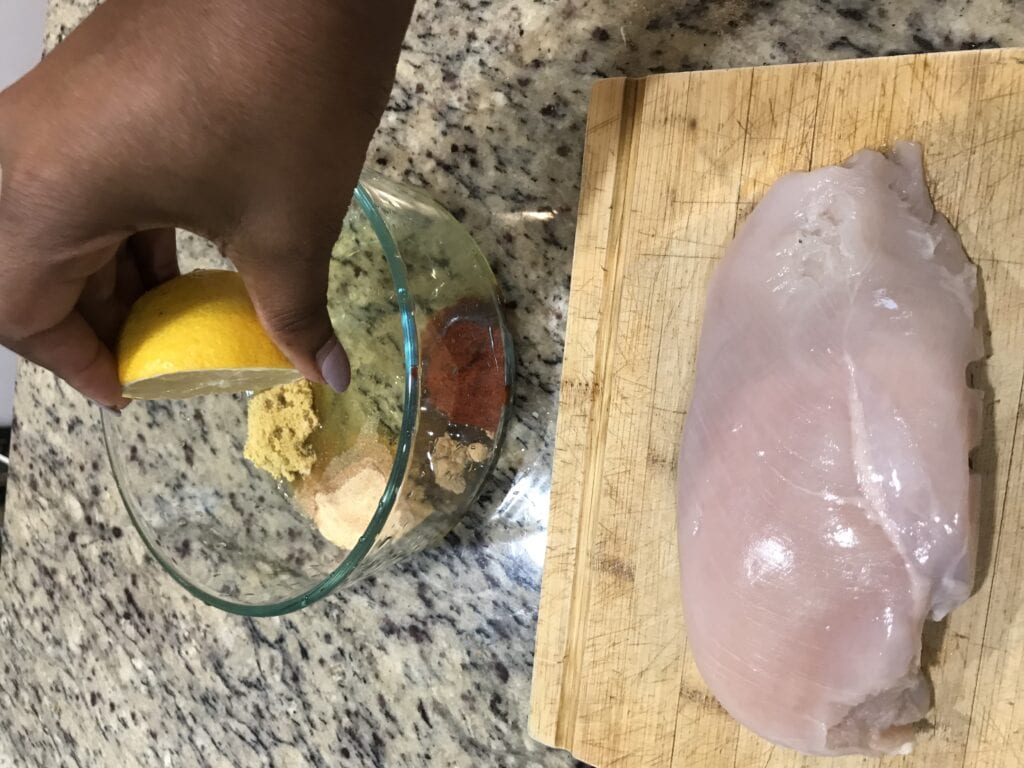
2 pounds Chicken, thinly sliced
2 tablespoons cumin
2 tablespoons paprika
1 tablespoon ginger
1 tablespoon salt
2 tablespoons garlic powder
1/4 cup lime juice
3 large onions, one thinly sliced and one whole
1 Green bell peppers, thinly sliced
1 red bell peppers, thinly sliced
1 Orange bell peppers, thinly sliced
1 big mushroom, sliced
1/4 cup olive oil
How to make the Chicken and Vegetables Shawarma ?
Preheat oven to 425 degrees.
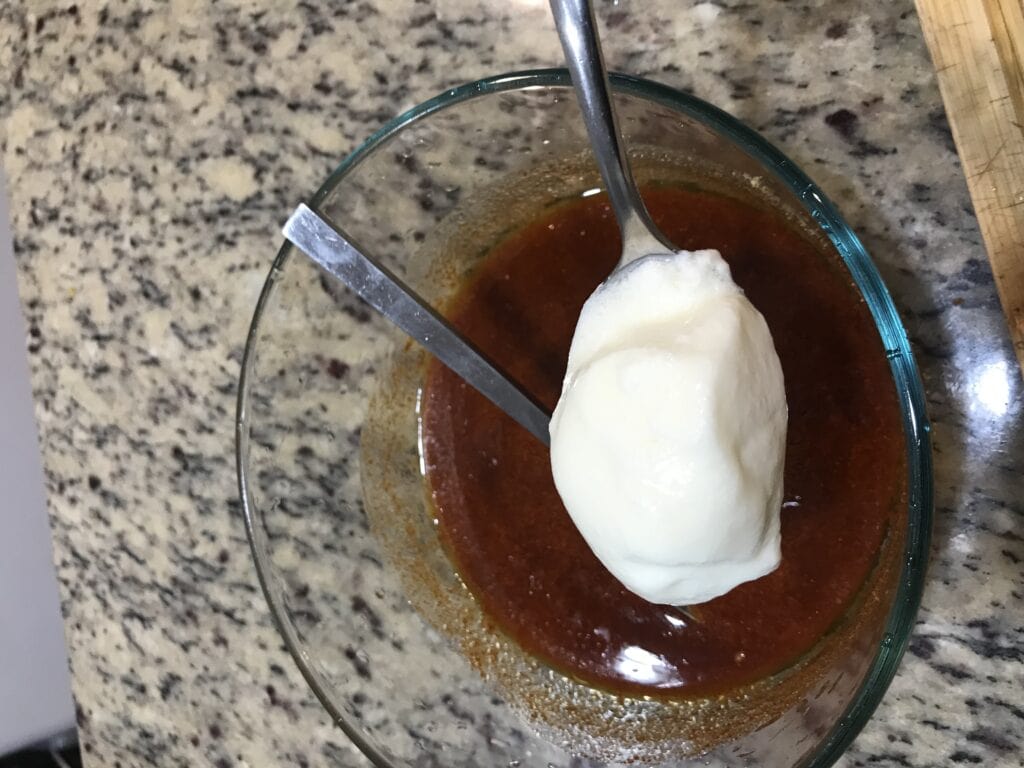
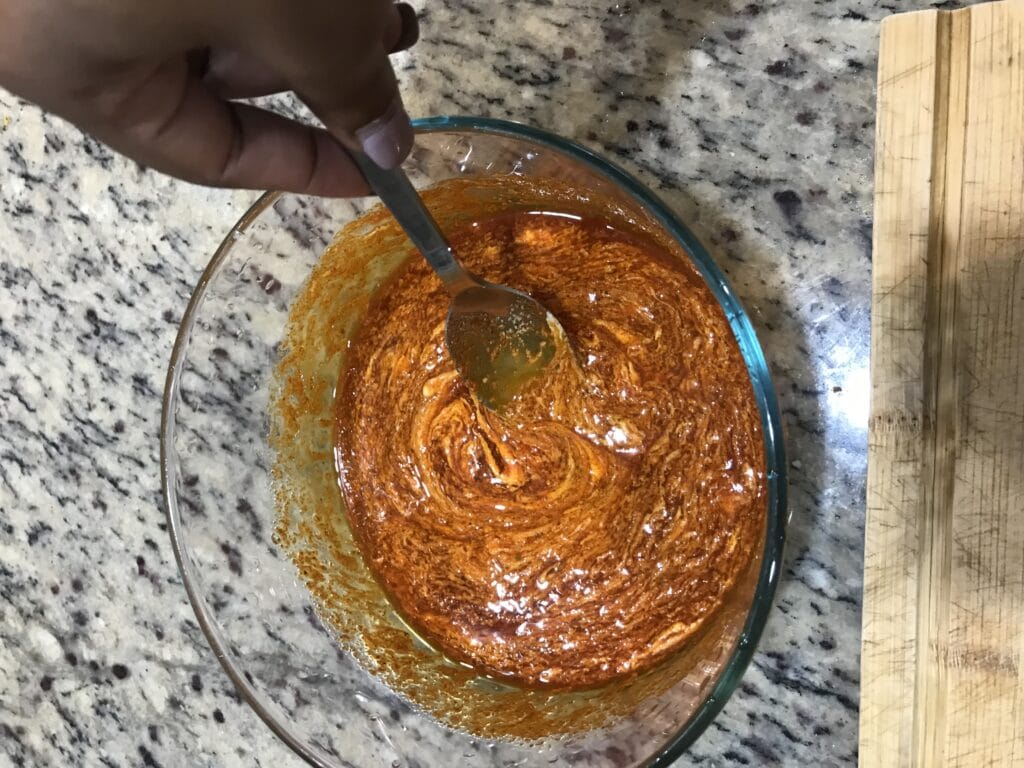
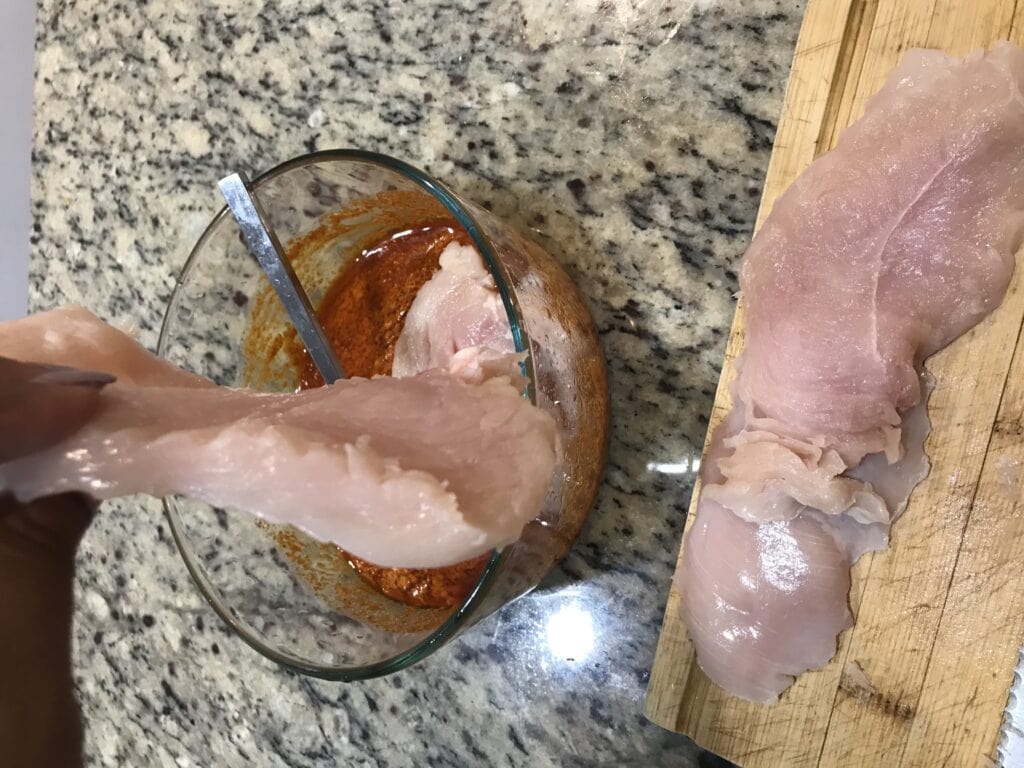
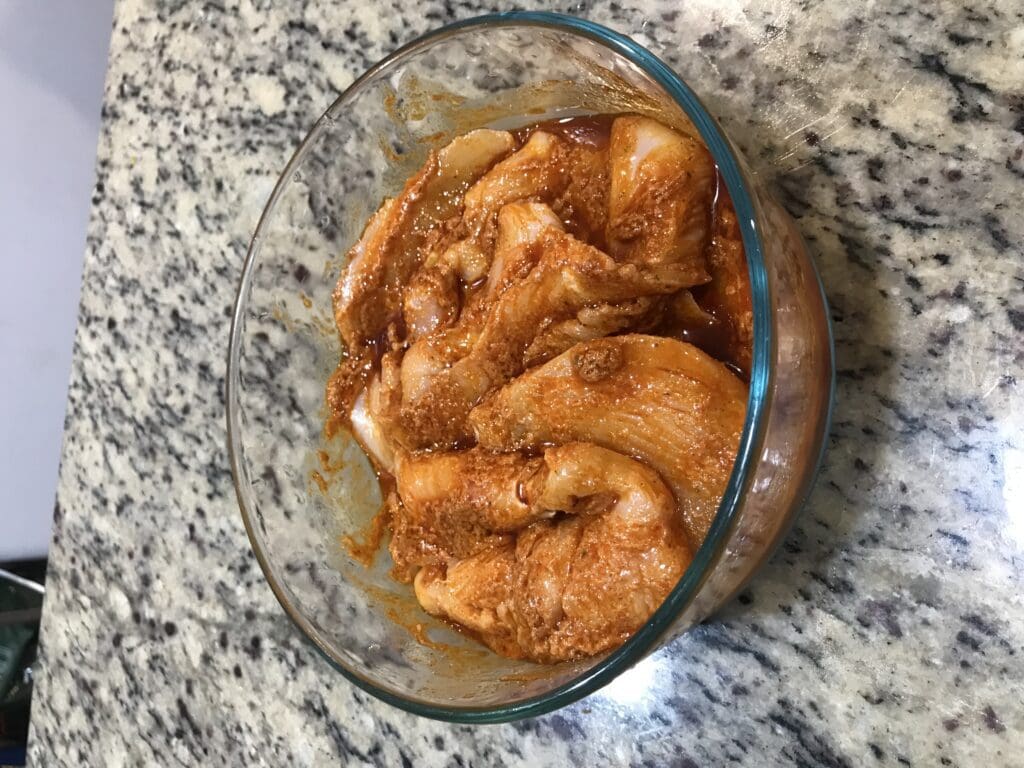
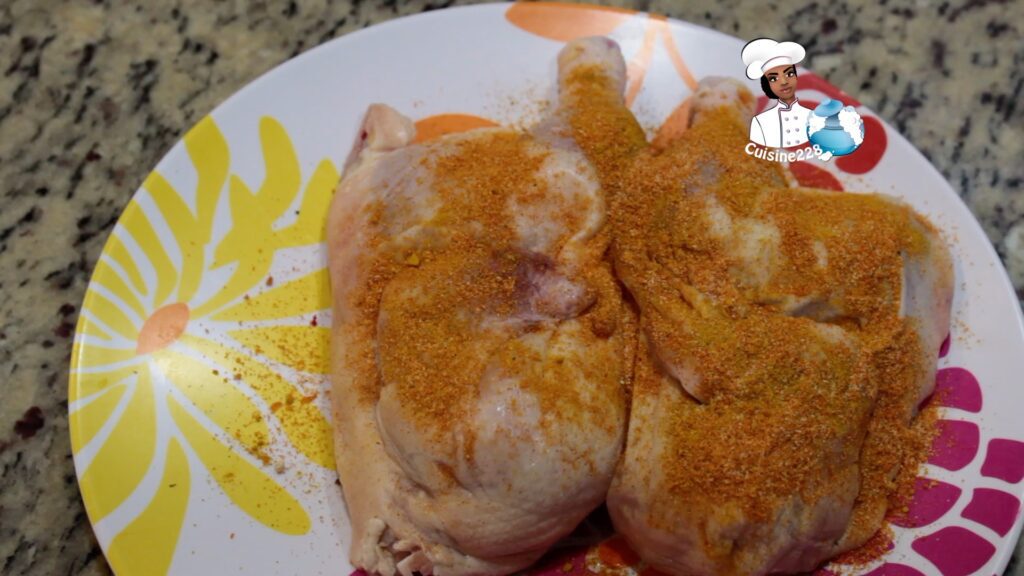
In a large bowl, add chicken, cumin, paprika, salt, garlic powder and ginger. Pour in the lime juice. Massage onto chicken until coated. Set aside.
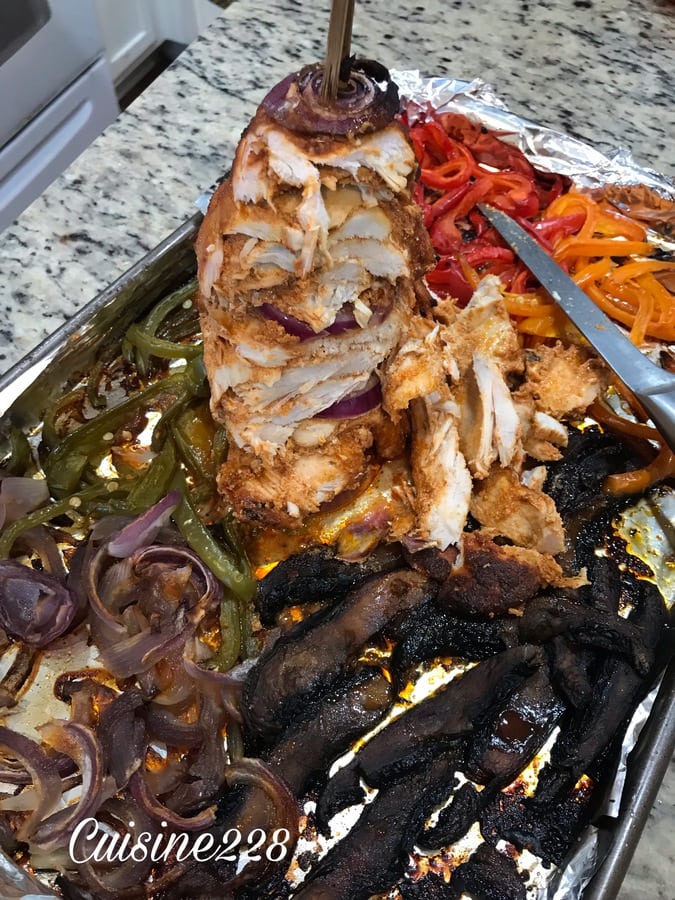
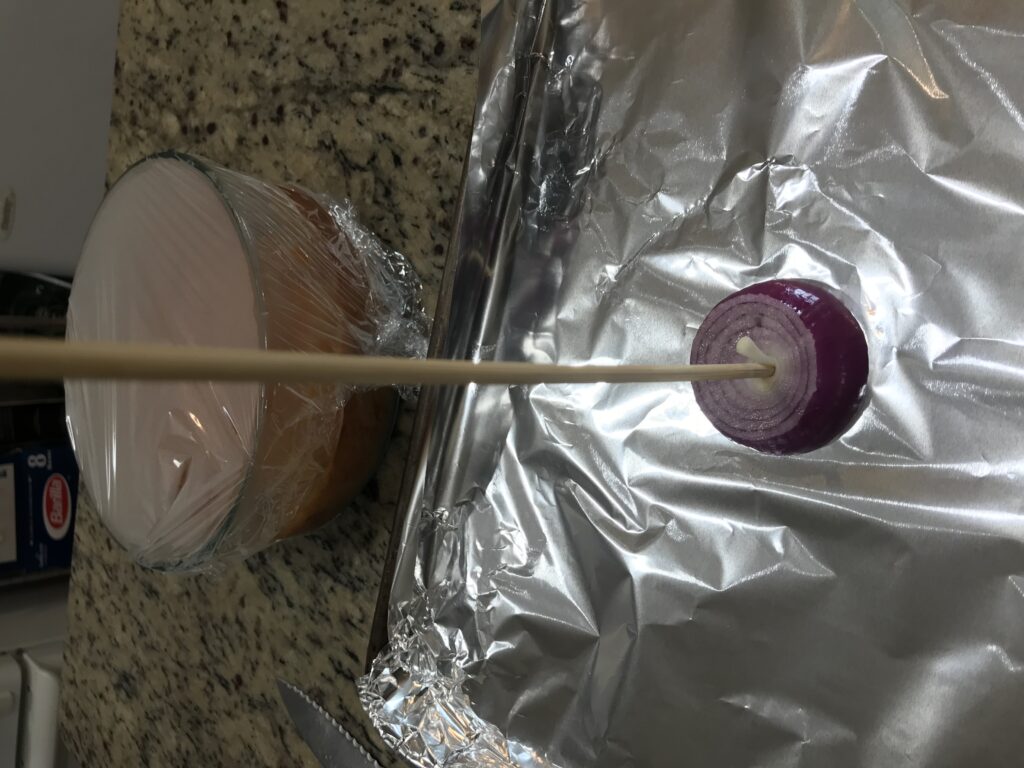
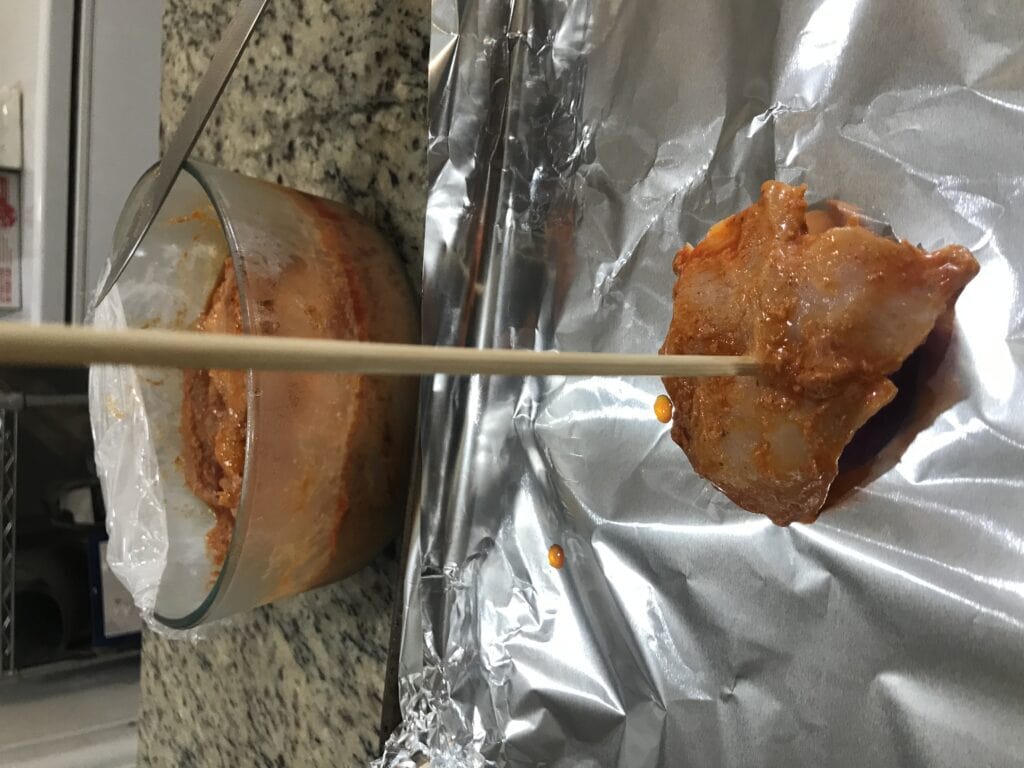
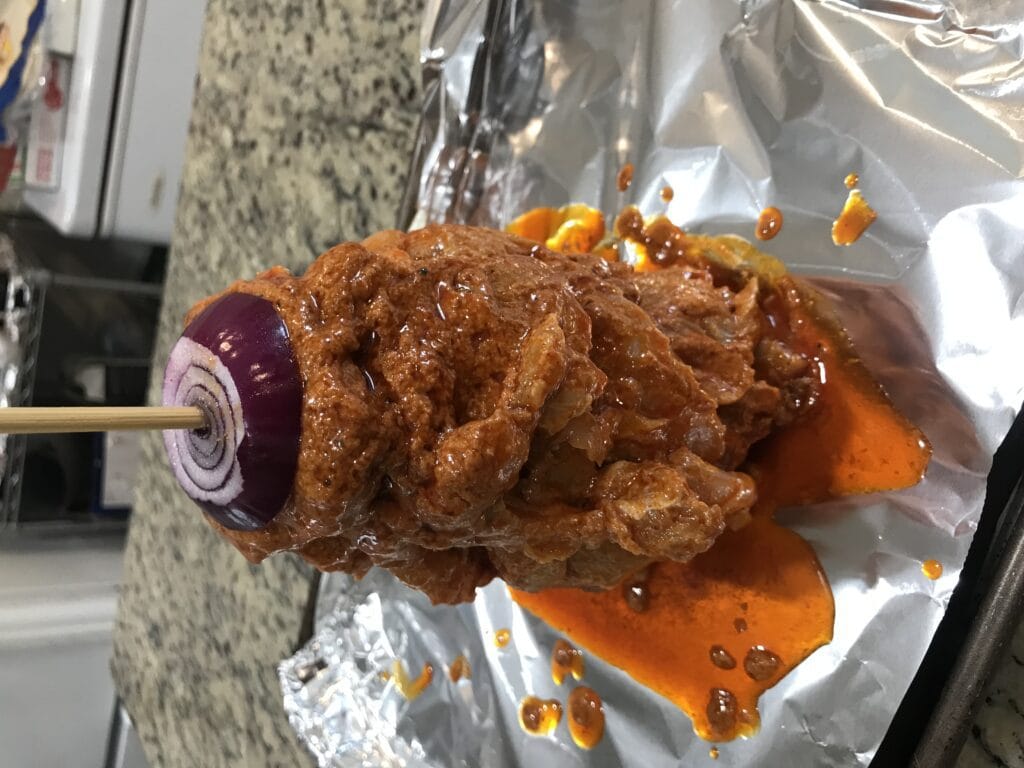
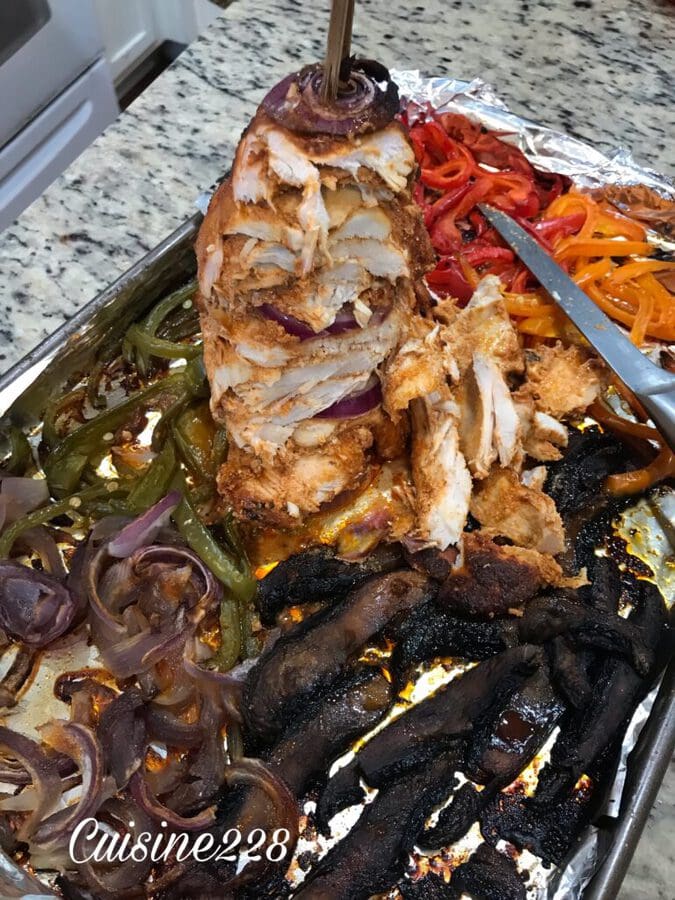
Cut onion in half and place one side down in the center of a rimmed baking sheet. Place a large bamboo skewer in the center of the onion. Layer the chicken up the skewer and top with remaining half of onion.
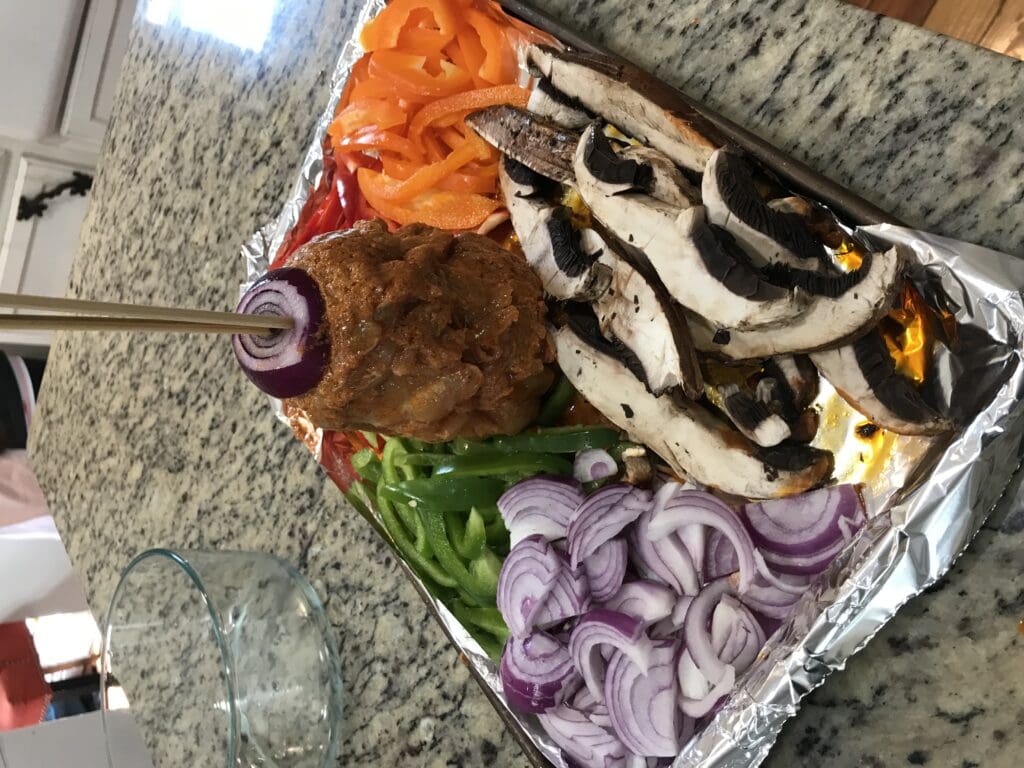
Lay out sliced mushroom, onion and peppers on the baking sheet and drizzle with salt.
Bake 35 to 40 minutes or until cooked through.
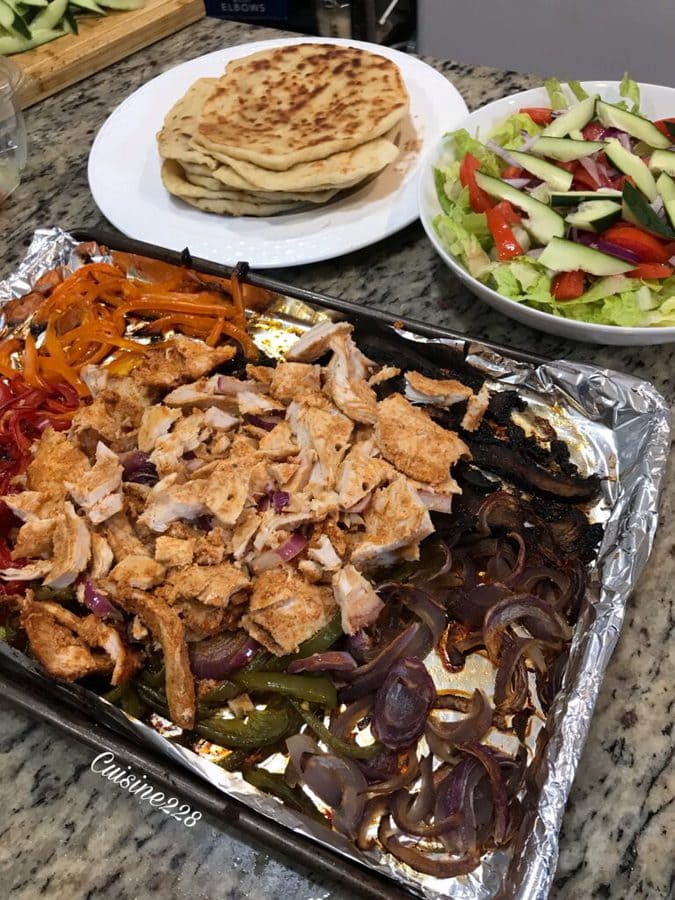
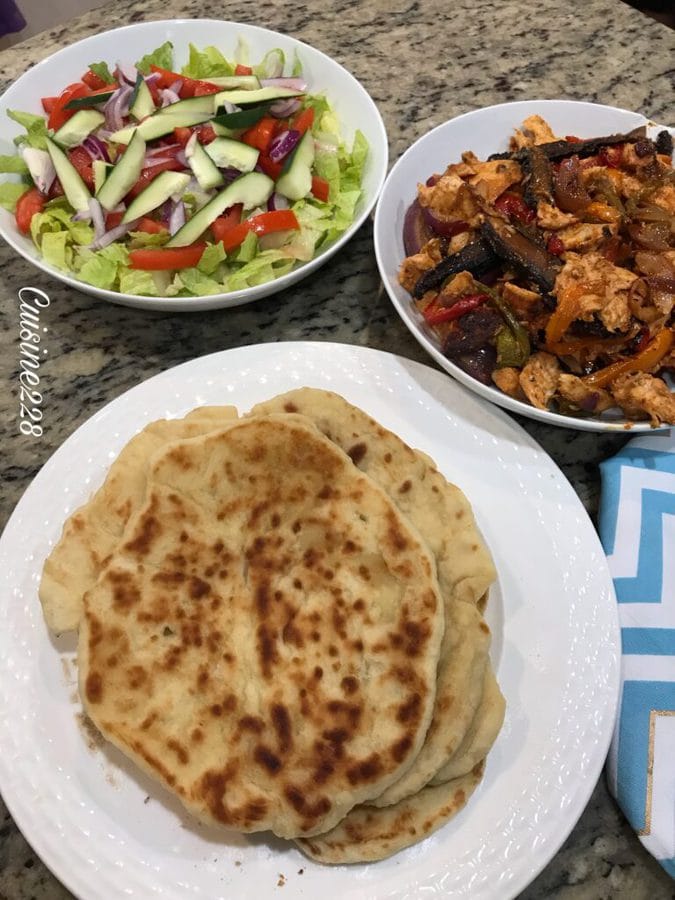
Remove from oven and slice of meat.
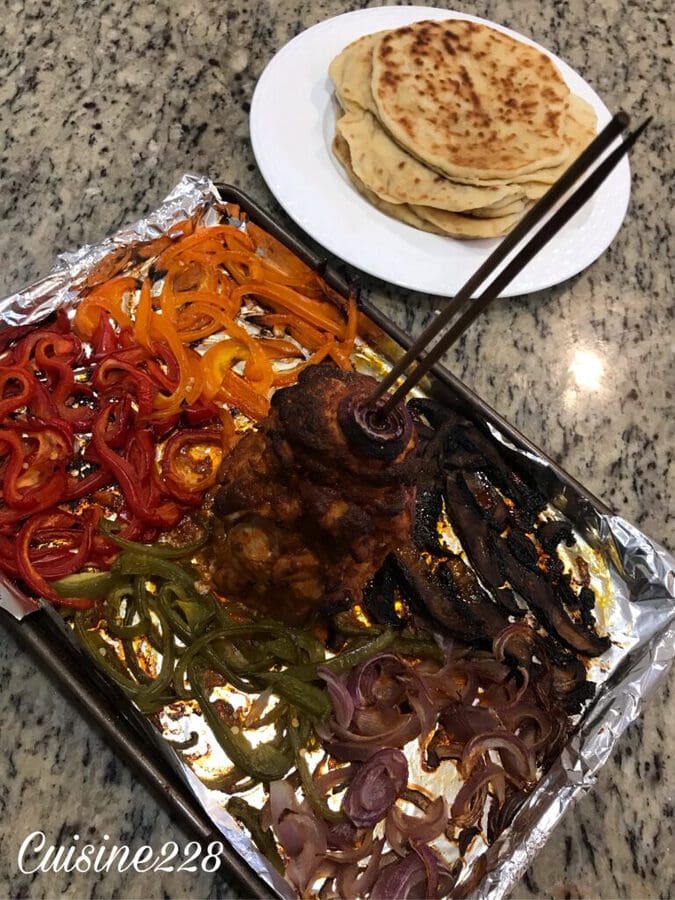
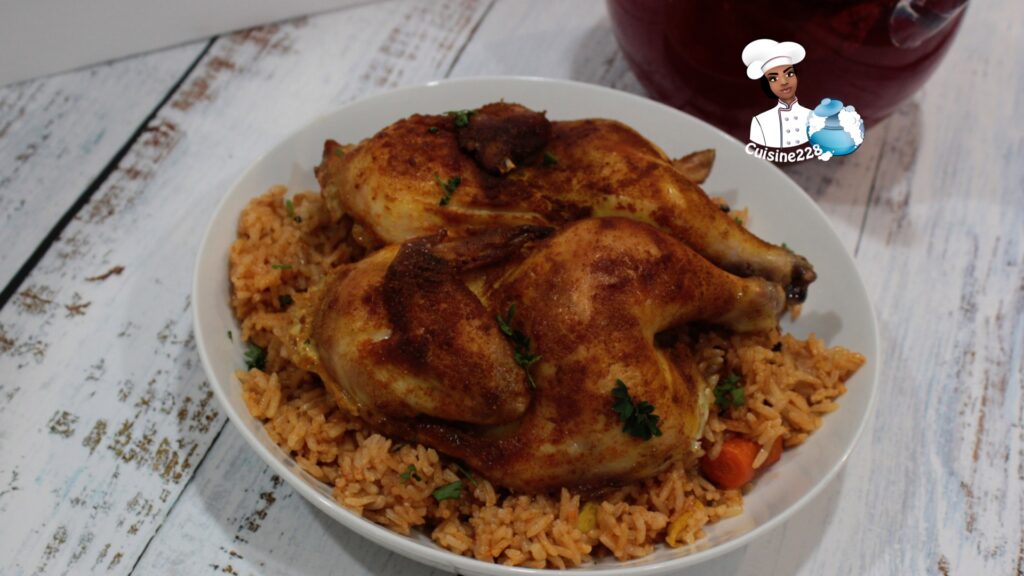
Homemade Chicken Shawarma
Add meat to a warmed previously made bread. Top with peppers and onions and garnish with cilantro and fresh lime juice.
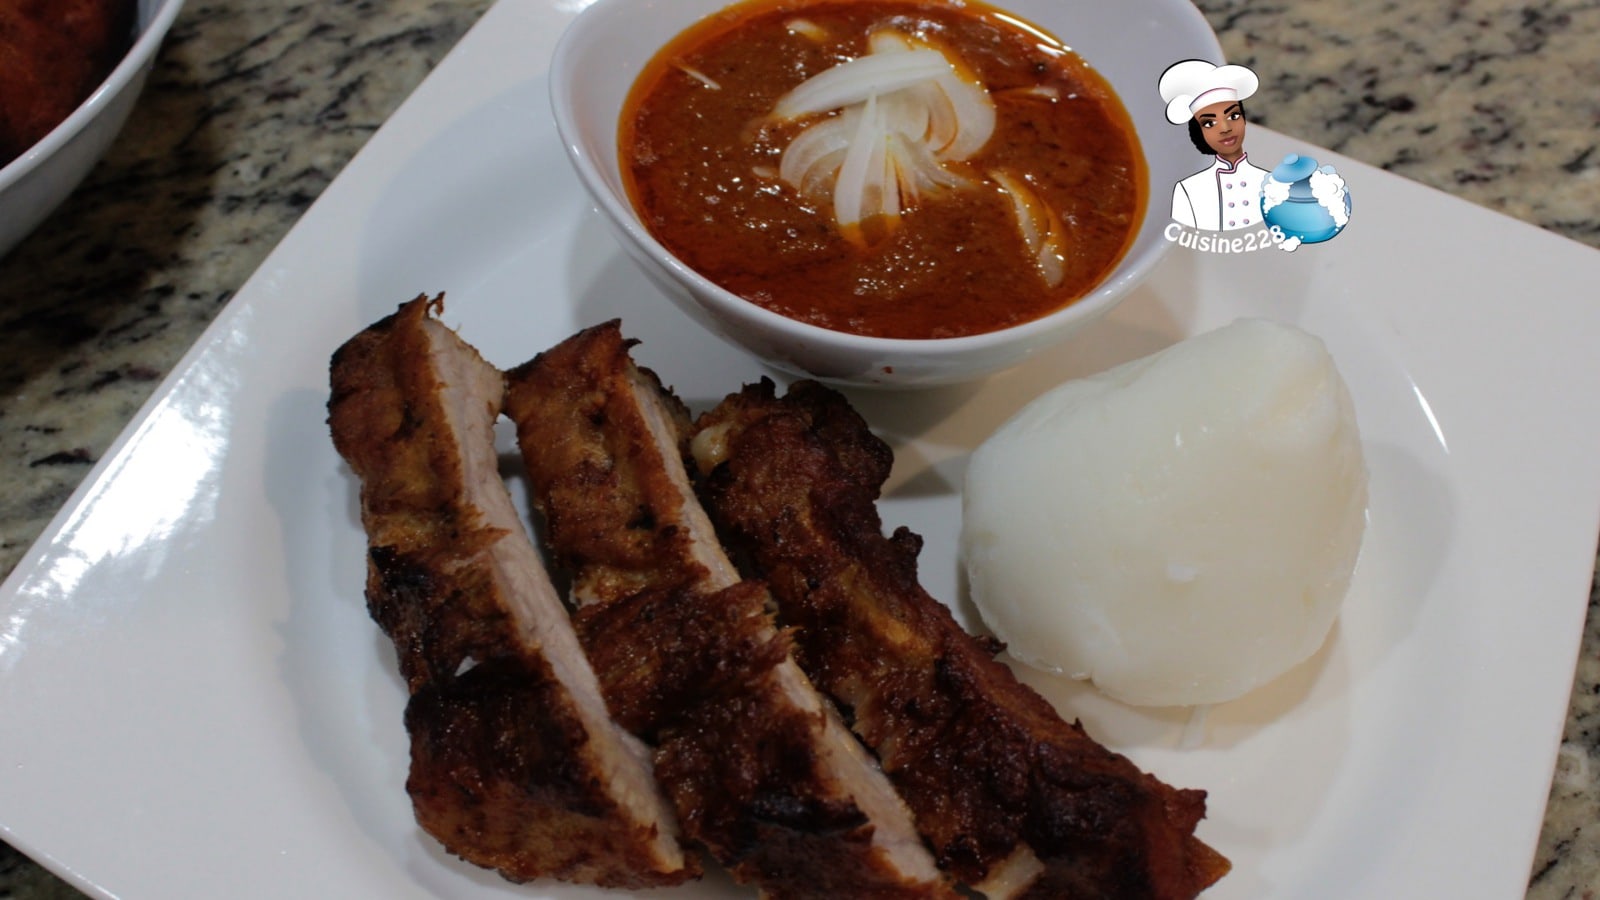
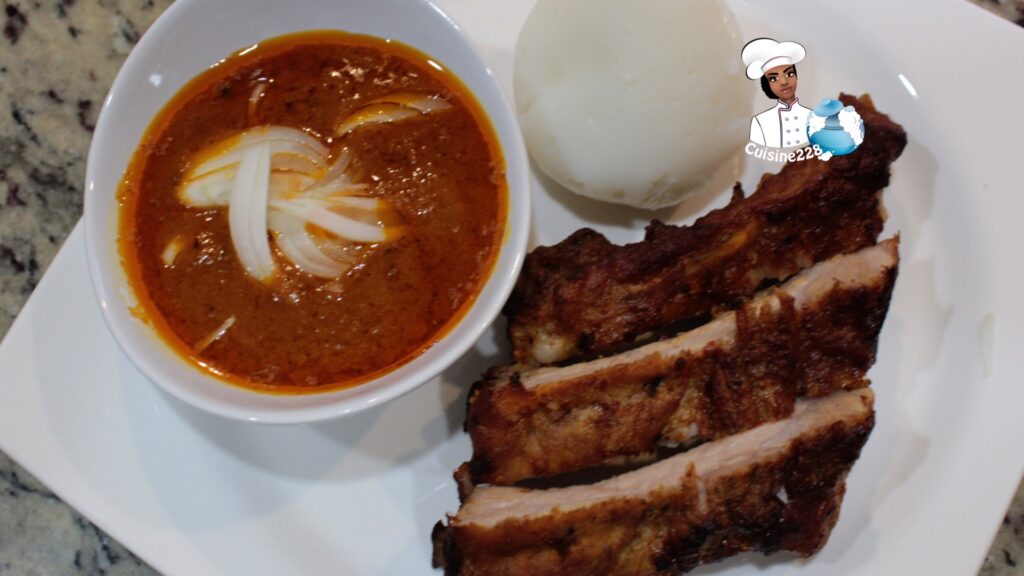
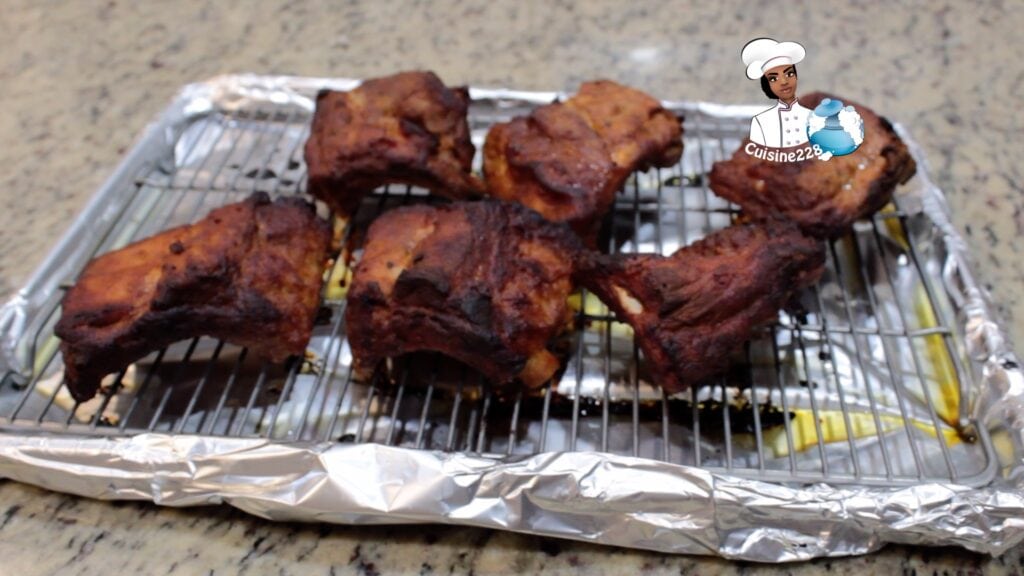
This Barbecue spare ribs in the Oven are delicious, flavorful and tender, with the meat falling right off the bone. The ribs are seasoned with aromatic spices like garlic, paprika, pepper and sweetened with brown sugar, honey and ketchup. Furthermore, the acidity in the tomato and cider vinegar balances out the sweetness and give the spare ribs slightly tart flavor. You can also use your favorite spicy chili flakes or powder to add heat and quick.
The spare ribs are steamed to breakdown the meat, and oven baked (or grilled them). In this demo, I cut the ribs to fit my Insta Pot, but you can leave it whole and cook it in the large saucepan. After steaming the ribs, I bake them to get a crispy exterior and concentrate the flavor on the ribs. I use this technic when I have big family barbecue. I steam and refrigerate the ribs and I grilled them once my guests arrive. The spare ribs cook fast. My guests can enjoy this delicious Barbecue Ribs nonstop and I am able to mangle.
Ingredients
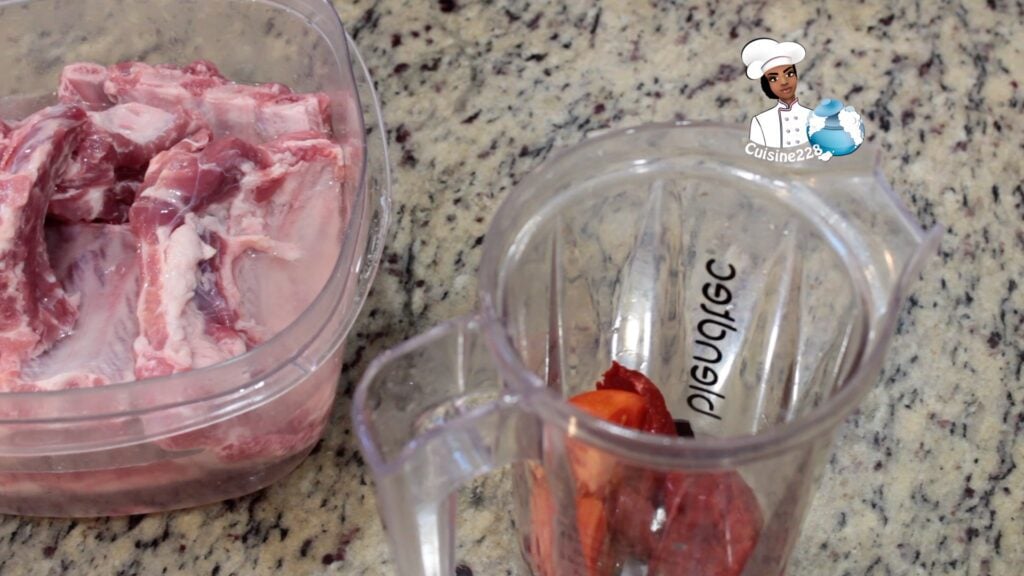
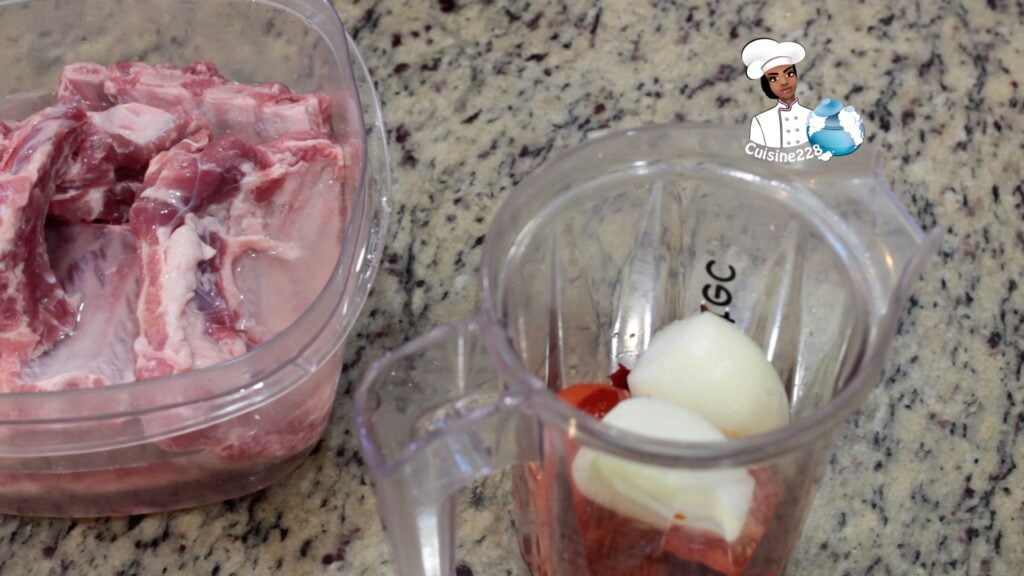
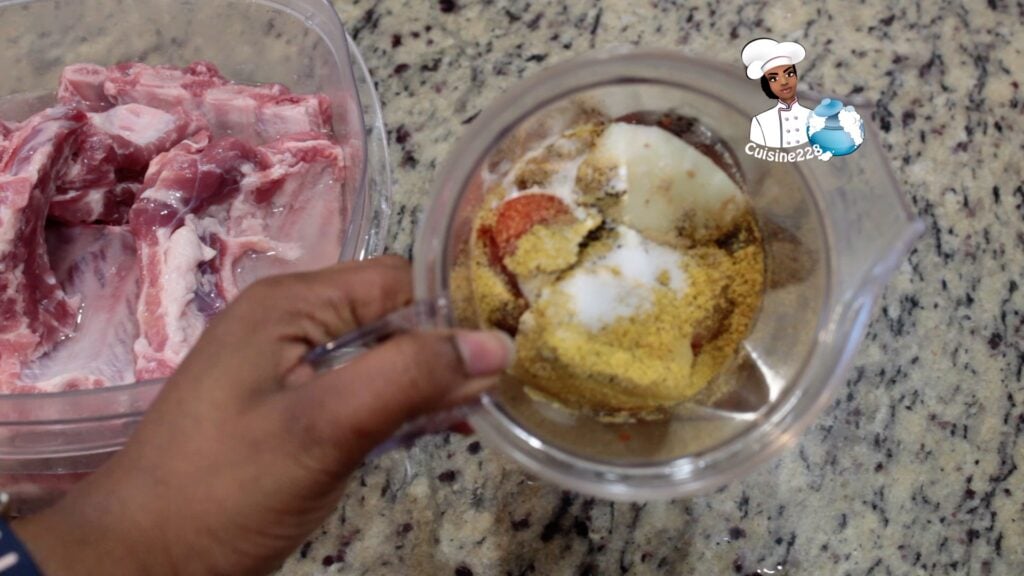
3 lbs baby back ribs
2 tablespoon tomato paste
1 tomato
1/2 onion
2 teaspoon ketchup
1/3 cup apple cider vinegar
5 tablespoons brown sugar
2 tablespoons honey
2 tablespoons Worcestershire sauce
2 teaspoons smoked paprika
1/2 teaspoon garlic powder
1/2 teaspoon salt
1/2 teaspoon pepper
1/4 teaspoon hot sauce (optional)
How to make Barbecue spare ribs in the Oven?
Preheat oven to 375°F.
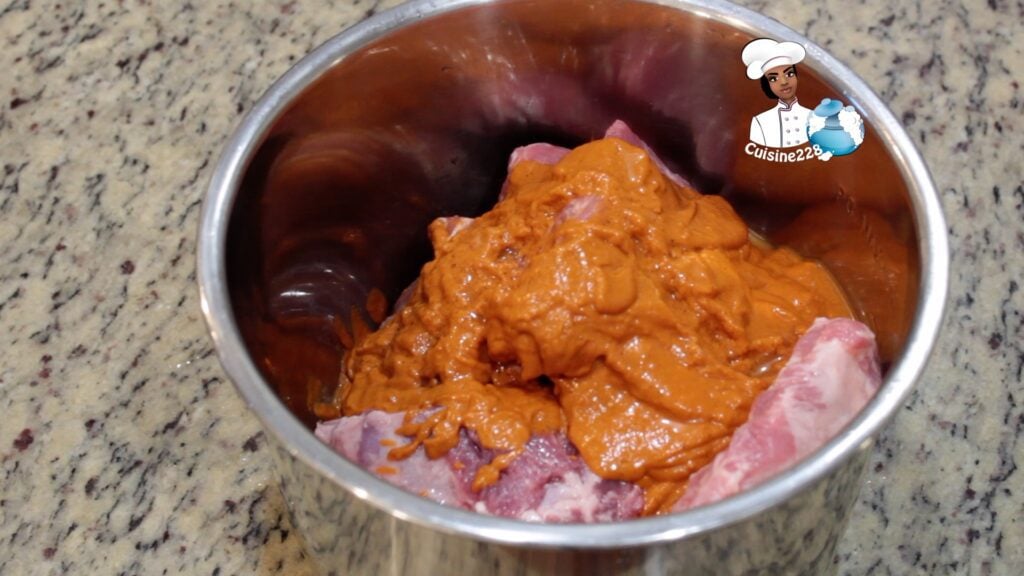
Blend all the ingredients except for the ribs.
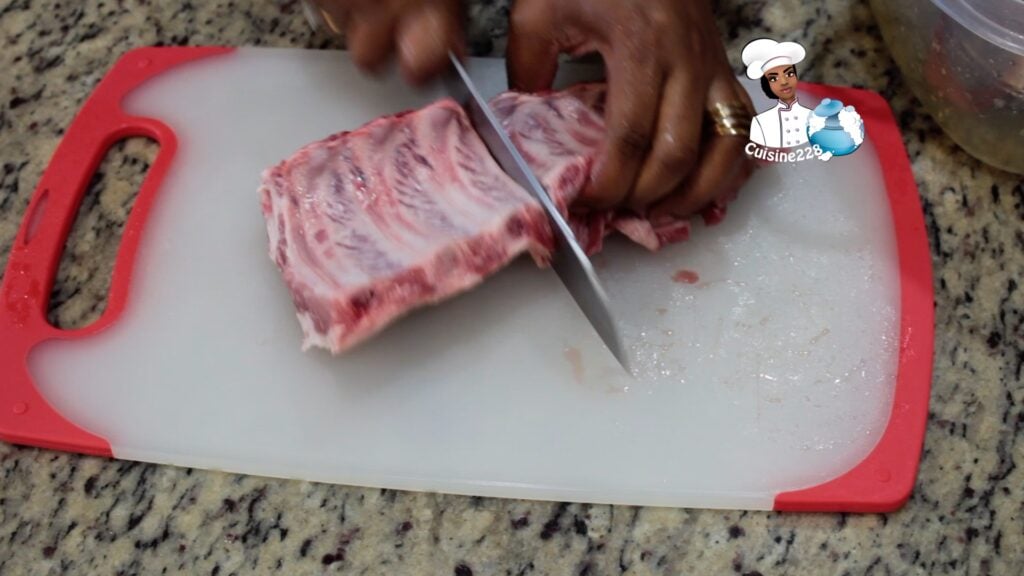
Remove the white membrane from the back side of the ribs (the side with less meat). It should pull off easily. Rinse ribs under cold water and lemon
In a saucepan, mix the rib and the blended ingredients. Cook for 40 mins.
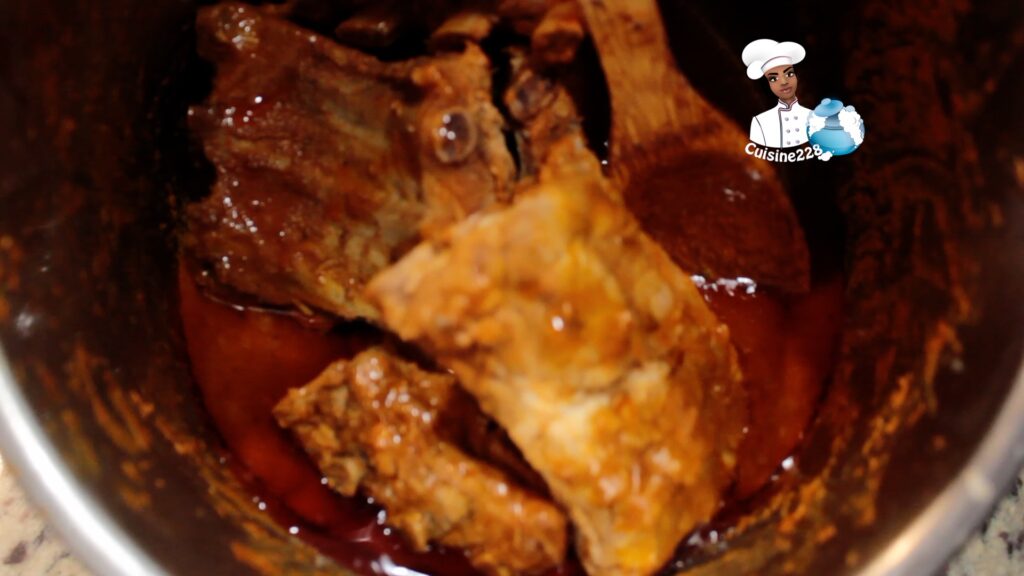
Remove the ribs and save the tomato mixture.
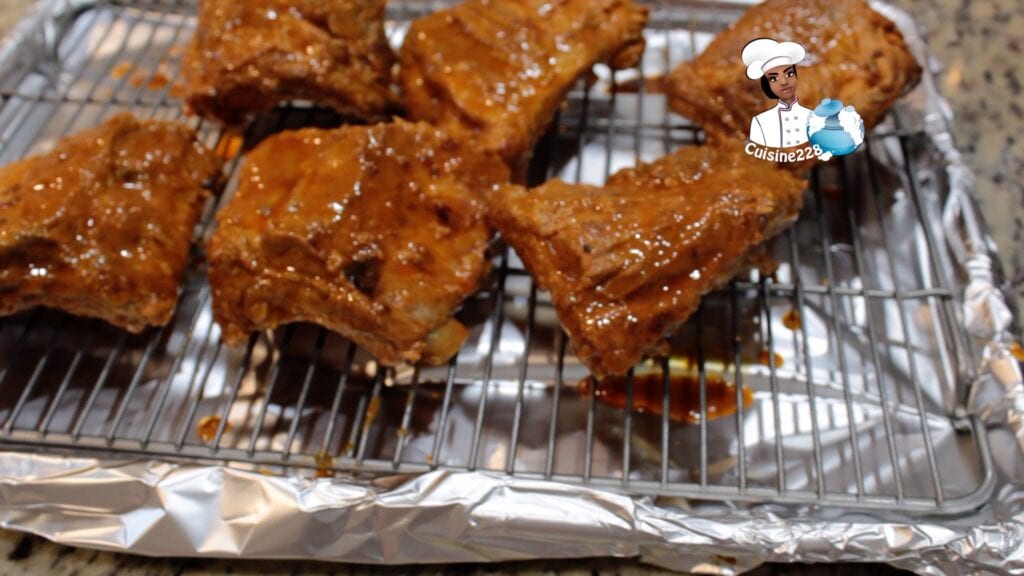
Place ribs on a foil lined tray. Bake ribs for 30 minutes.
Grill or broil over medium high heat 5-10 minutes
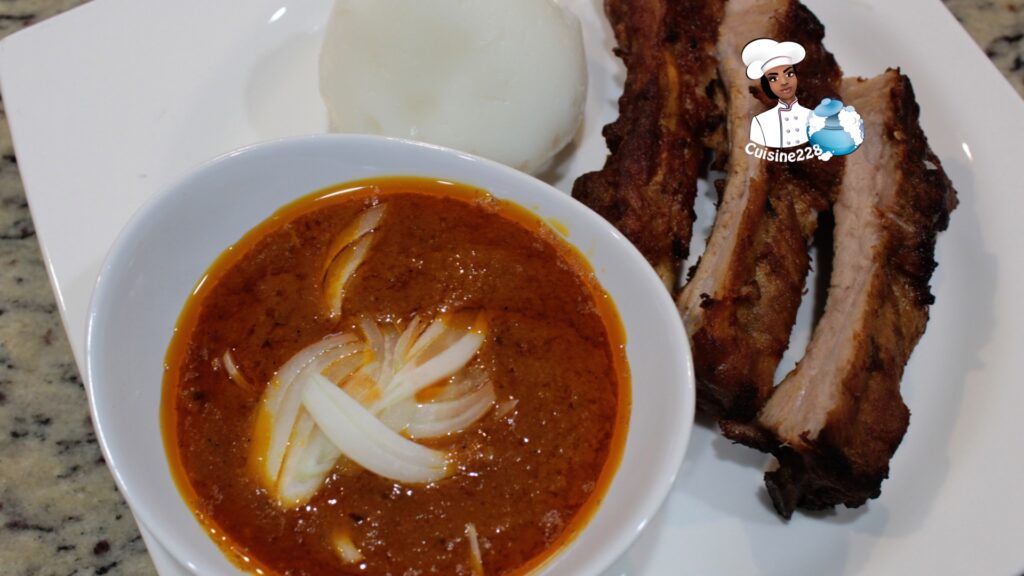
Serve warm with the tomato mixture Akpan, Ablo, Jollof rice, Alloco…
This recipe of One-pot Baked Chicken and Jollof Rice start
on the stove and finishes cooking in the oven. This One-pot Baked Chicken and
Jollof Rice is also a combination of west African and Indians of terrific aromatic,
spices and flavors. The little thing that makes all the difference in this
recipe is the fried anise, allspice pepper, bay leaf, cinnamon and cloves
before adding the rice and well-seasoned chicken. This recipe of One-pot Baked
Chicken and Jollof Rice is outrageously delicious!
One-pot Baked Chicken and Jollof Rice Secret: “fried anise, allspice pepper, bay leaf, cinnamon and cloves”
One-pot oven Jollof rice
This One-pot Baked Chicken and Jollof Rice starts on
the stove because frying the anise, allspice pepper, bay leaf, cinnamon and cloves
ensure the best flavors possible in the most effective way. If your oil begins
to smoke, it is too hot and should be either removed from the heat source or
the heat source should be turned down. Once they become aromatic, add the onion
and cook until the onion is softened. Then, continue to add your other
ingredients as desired. When frying spices, it is extremely important to pay
close attention to them. Even if a single spice burns, the whole batch will be
tainted with that bitter, burned flavor. Stir the spices frequently and mind
the heat.
How to perfectly season the baked chicken?
For this recipe of One-pot Baked Chicken and Jollof
Rice, I use a whole chicken, but other part of the chicken can be used (like
the thigh, leg or wing). You can never go wrong with my combination of spices (1/2
teaspoon paprika, 1/2 teaspoon turmeric, 1 tablespoon garlic, 1/2 teaspoon
ginger, 1/2 teaspoon curry, 1 teaspoon bouillon cube, Salt and pepper) because
you get maximum depth of flavor for minimum number of spices. Plus, I always
have these spices on hand.
How did I partially cook it on the stove?
By partially cooking the One-pot Baked Chicken and
Jollof Rice on the stove to first bring out the maximum flavor out of the spices
and also allows me to bring the liquid to a boil before putting it in the oven.
The flavor is so much better because of the fried onion.
One-pot oven Jollof rice
Why add the chicken over the rice?
I added the perfectly seasoned chicken over the rice
because the dripping of the chicken add so much more flavor to the rice. The
result is a mouthwatering baked chicken coated in a beautiful rub, baked on top
of fluffy soft rice. Oven Baked Chicken and Rice all cooked together in one
dish is possibly one of the MOST loved family favorite dinners on the planet. I
know in my heart of hearts this will become your new favorite.
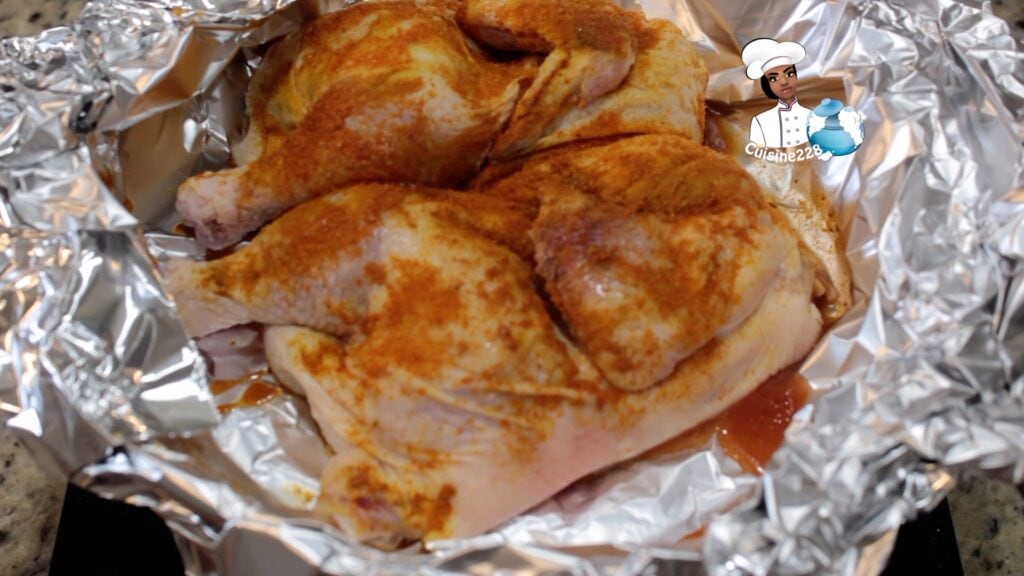
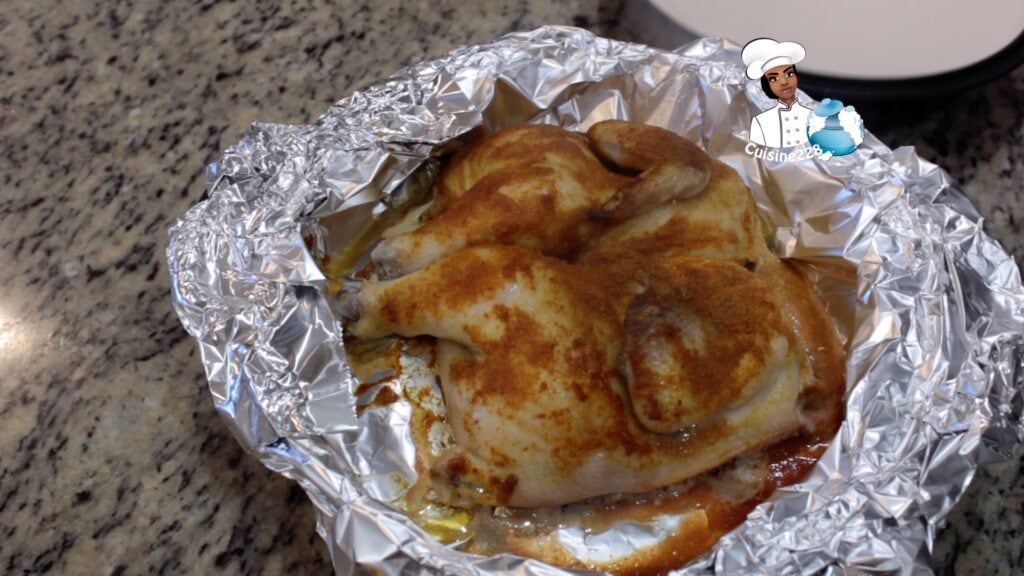
Season the chicken with teaspoon paprika, turmeric, garlic, ginger, curry, bouillon cube, Salt and pepper and set aside.
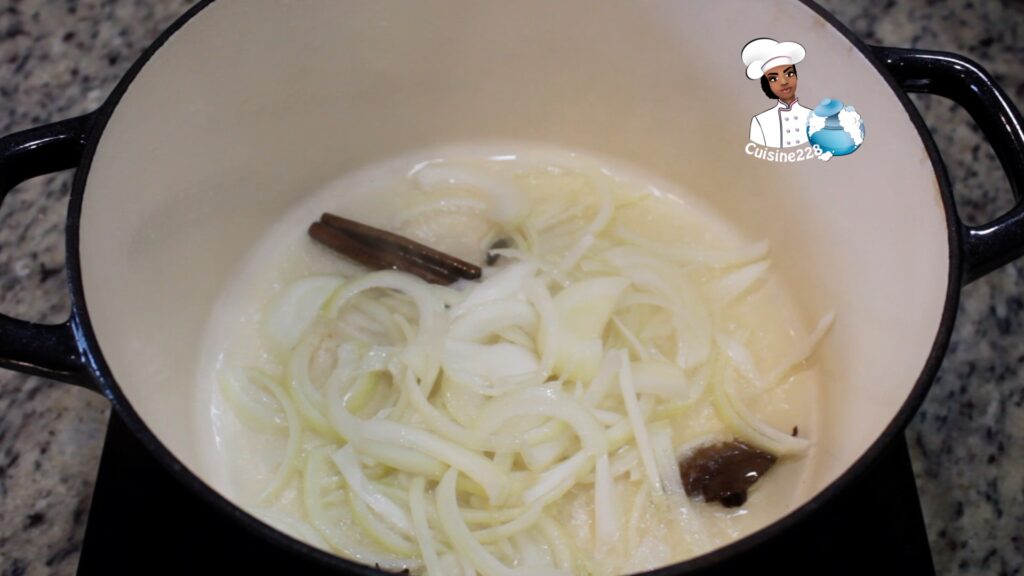
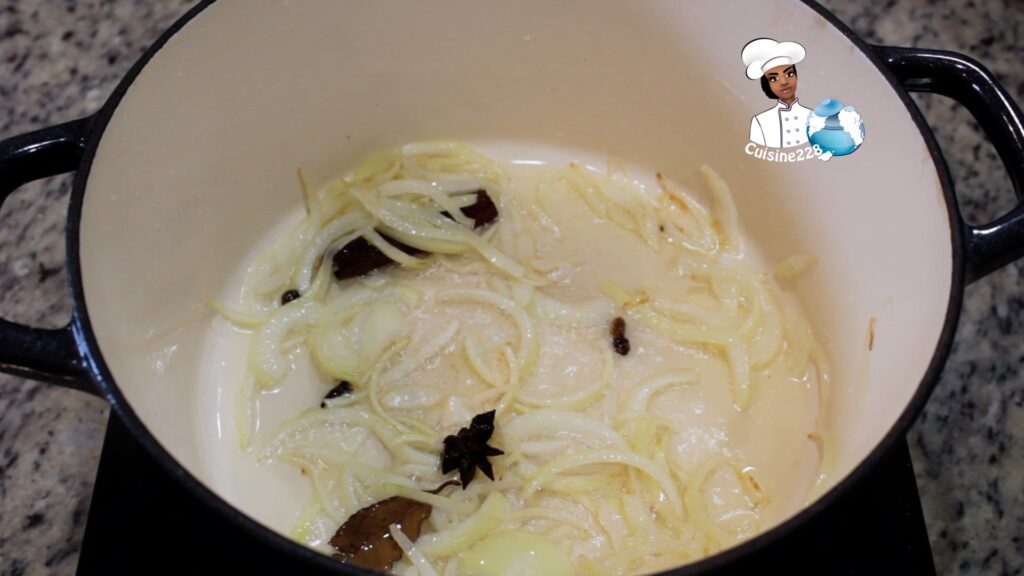
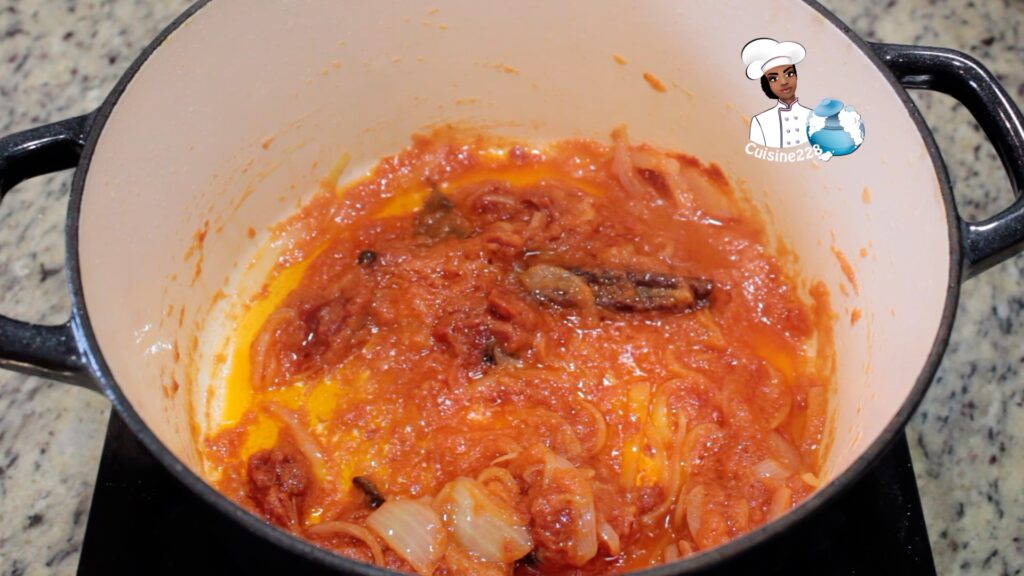
Heat a frying pan with the oil over medium heat and add the anise, allspice pepper, bay leaf, cinnamon and cloves. Cook for a minute
Add and fry the onion for about 7 mins until soft.
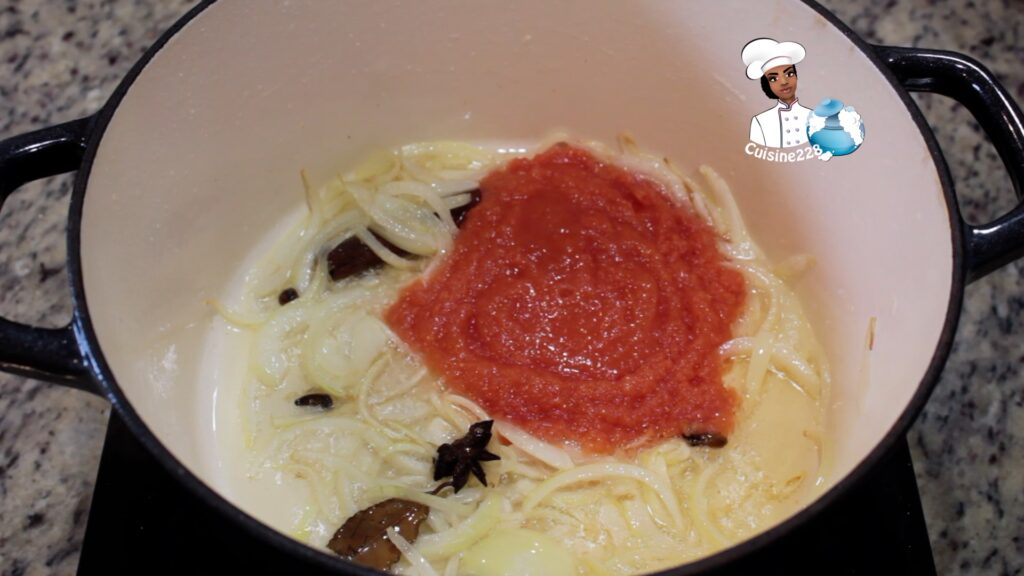
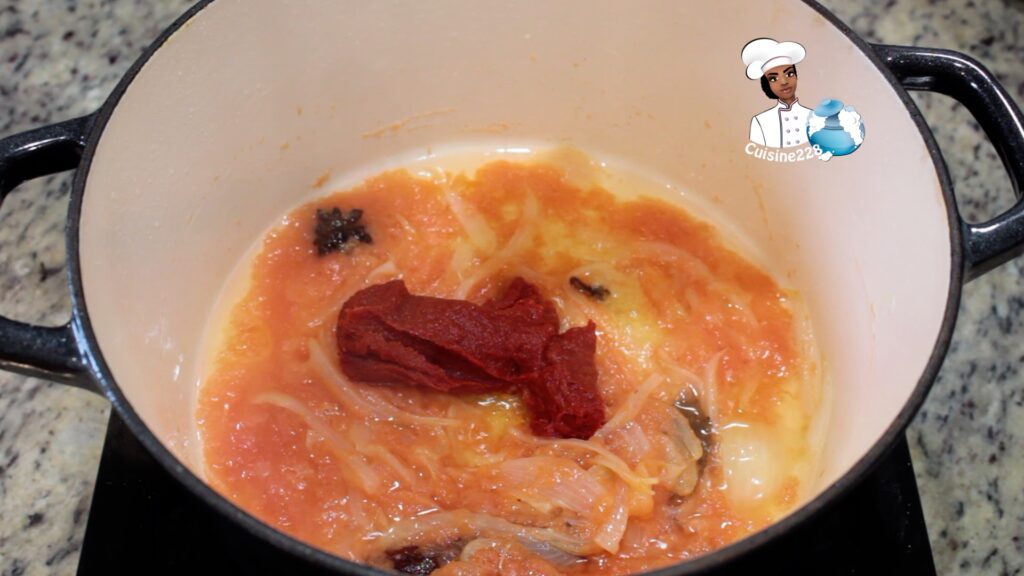
Stir in the tomato purred and the tomato paste, cook for 5 minutes.
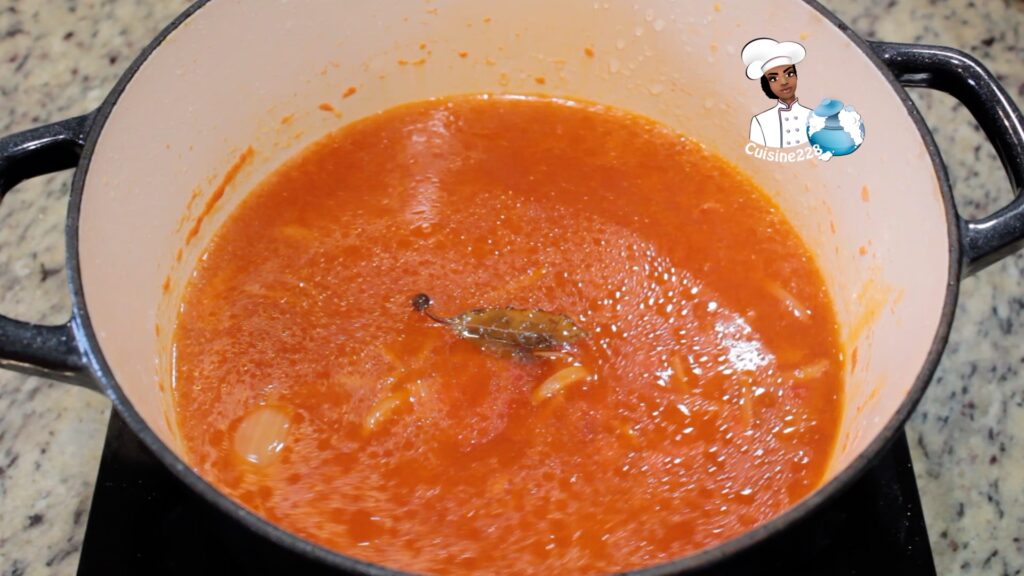
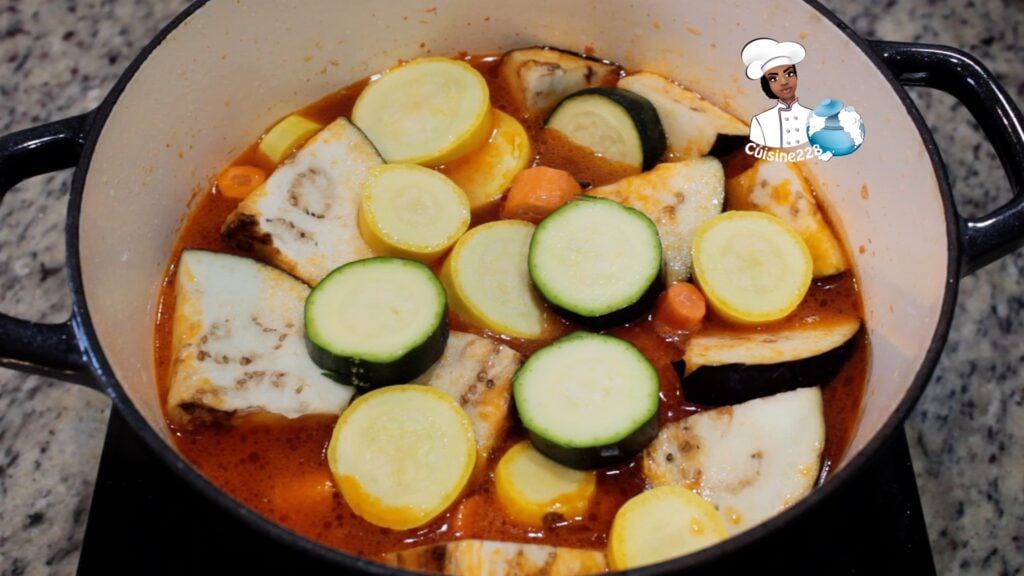
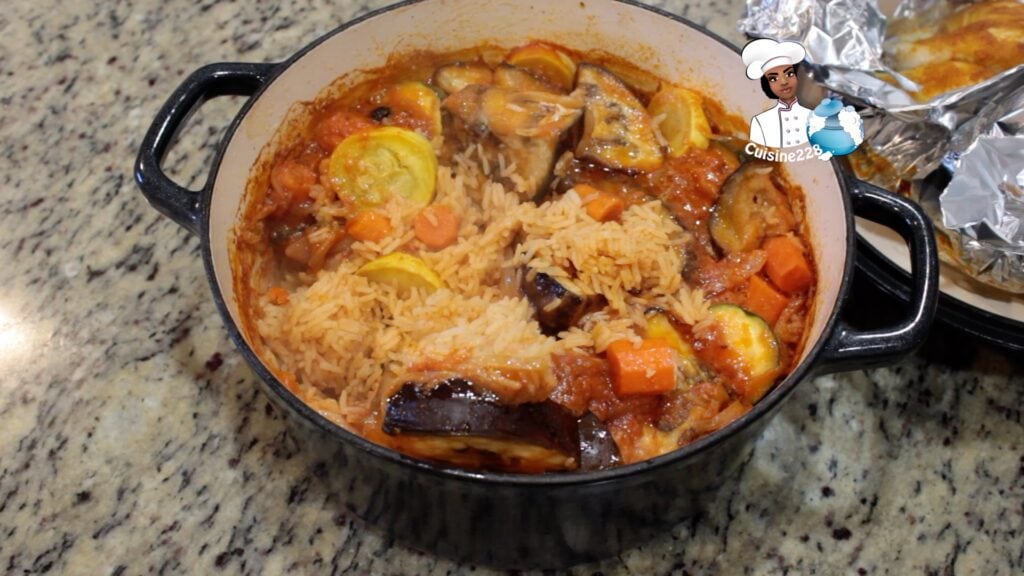
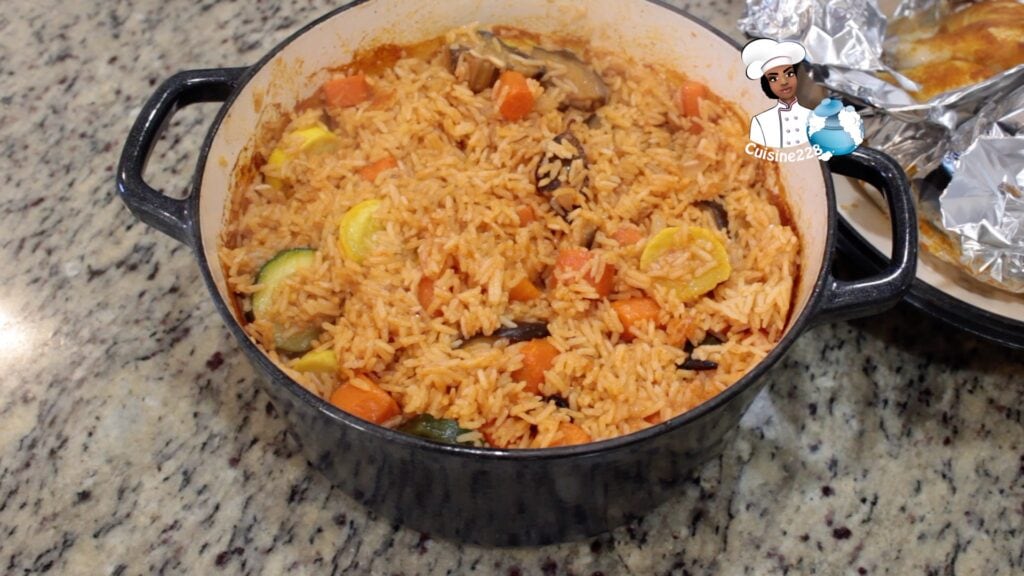
Add the water, vegetables (1 eggplant, 1 zucchini, 1 Summer squash, 2 carrots) and bring to a boil.
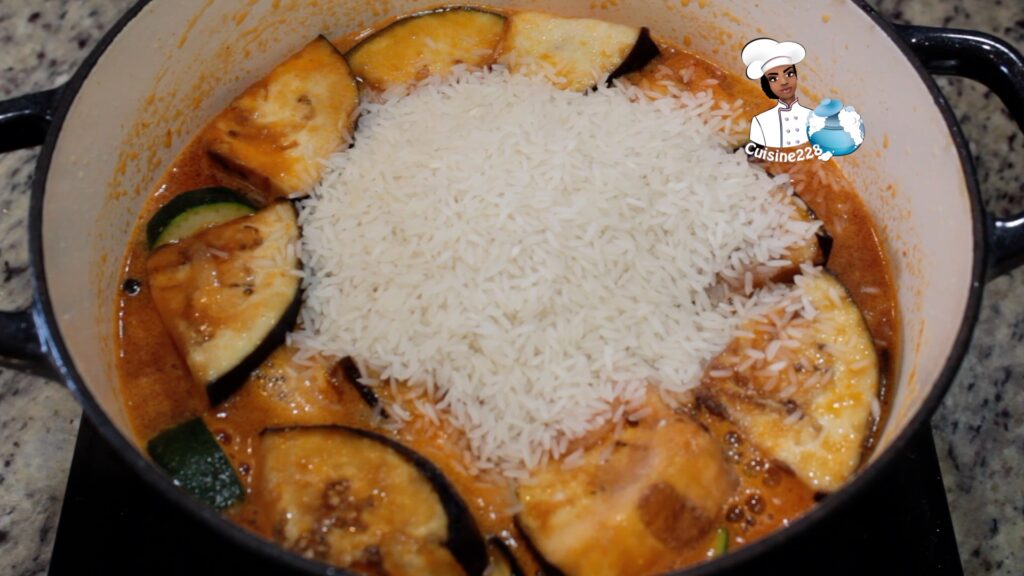
Mixing in the rice and mix until well.
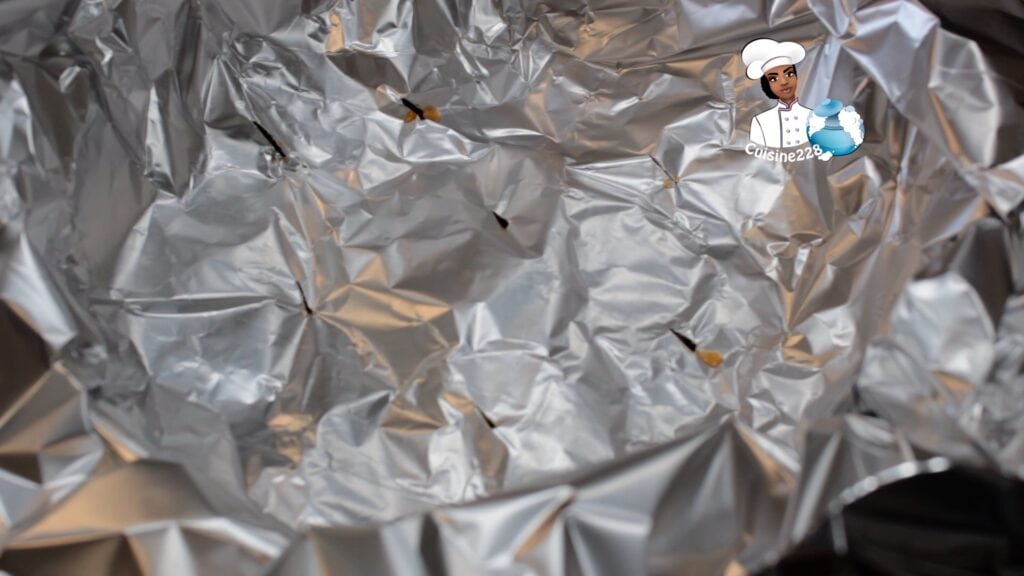
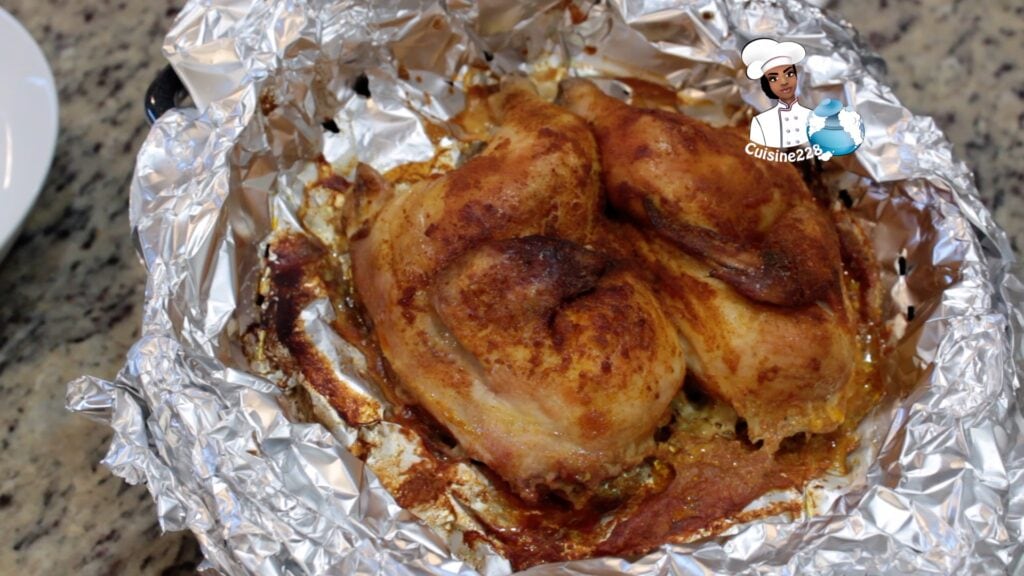
Add a layer of aluminum foil and make small incisions. Add the chicken and cover (Make sure the cover is over safe)
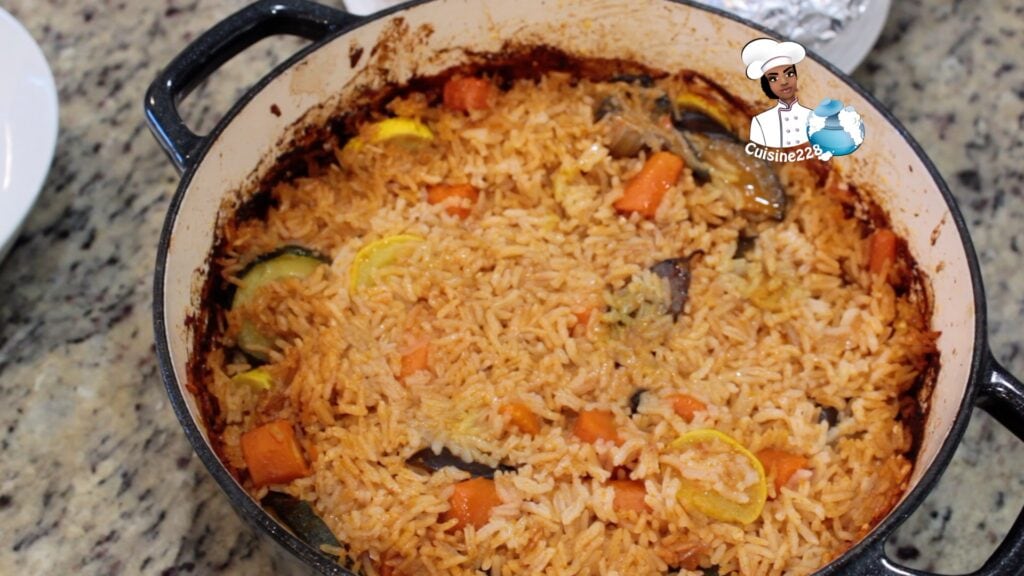
Transfer the Jollof rice mixture into the oven for about 20 minutes.
Remove from the oven stir and put back in the oven without the lid for 15-20 minutes or until the rice is soft and done.
When done take the rice out of the oven, fluff it and serve.
Serve hot
Tips to make perfect oven baked chicken and rice
For this recipe I recommend long jasmine rice. Basmati rice or Jasmine rice can be substituted with the same liquid ratio and cooking time. Please do not use short grain rice, medium grain rice, risotto, paella or minute rice.
If the rice cooks before the chicken, remove the rice from the oven, and transfer the chicken in an oven safe dish and put the chicken back in the oven.
For a better color on the chicken, it can be broiled for an extra 2-3 minutes just to get your chicken golden and browned with crisp edges, and an amazing buttery, crunchy crust on the top of your rice!
This milo cake is moist and tasty. Who does not love
milo? I grow up in Togo, even though most people drank hot coco made with milo,
I just enjoy eating milo right out of the can – I love it and My kids enjoy is
as well. Milo is crunchy, sweet, chocolate
and malt powder which is mixed with hot or cold milk to make a wonderful and
rich drink. Milo is made by Nestlé and here in the USA you can find it online
at Amazon.com or at your local Latin market (Extramarket, Supremo…)
Milo Cake
Why did I used Milo?
I was making my chocolate cake and I realize that most people bake home will have a hard time putting their hands on coco powder and I thought of making a cake with a more common ingredient: Milo. I was surprise on how delicious it actually turned out! Unfortunately, I used mascarpone in the icing, which may also be hard to find in Togo. Since Them I realized I should have made a condensed milk icing.
Ingredients
For the cake
3 eggs
1 cup powdered sugar
2 cups milk
1 cup oil (or melted butter)
1 teaspoon vanilla extract
1 cup flour
1/2 cup spoons of Milo
1 tablespoon baking powder
For icing
1 cup heavy cream
1/2 cup mascarpone
1/4 cup sugar
1 teaspoon vanilla extract
Chocolate sprinkles
1 cup milk
2 teaspoon sugar
How to make Milo Cake?
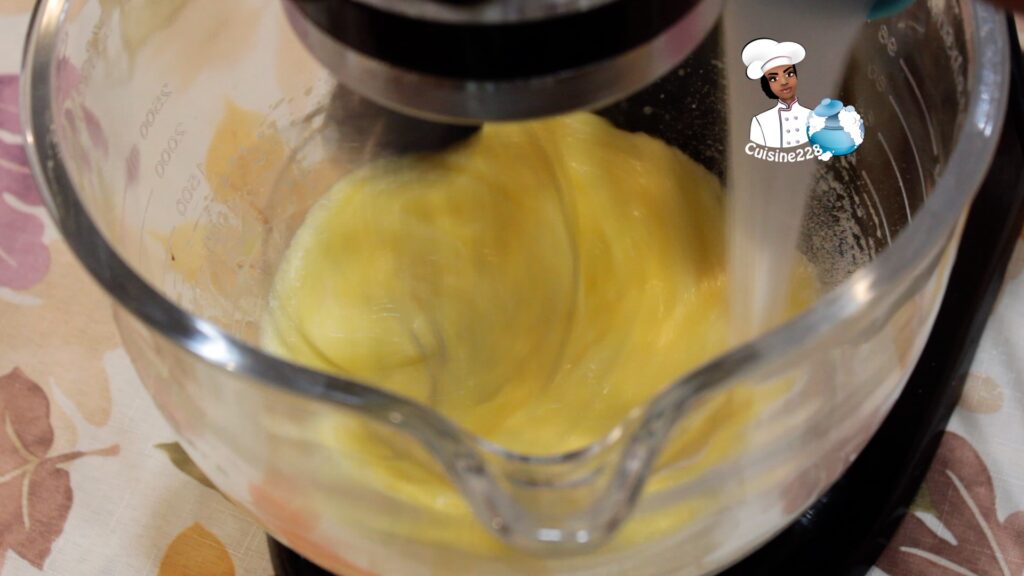
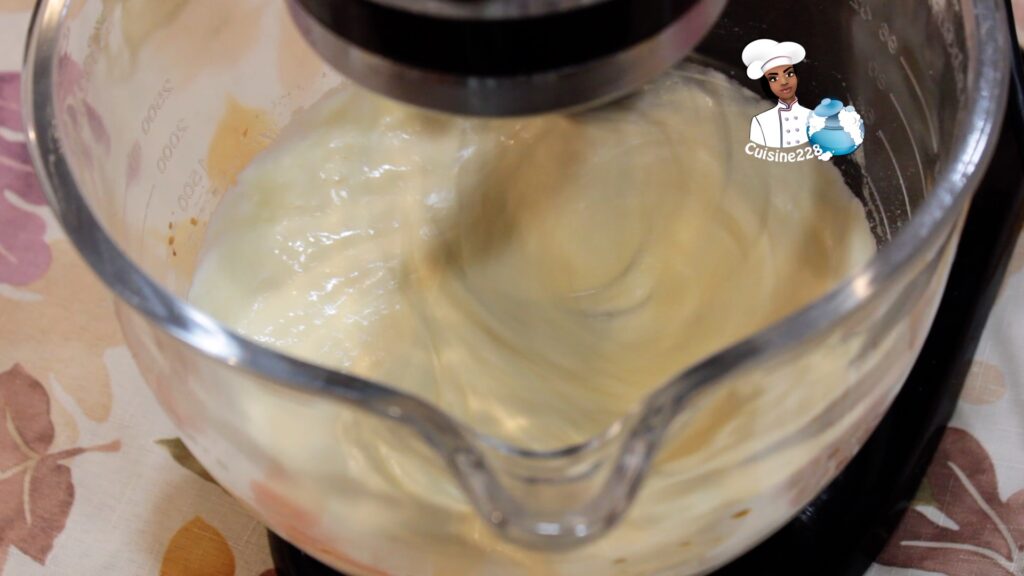
Beat the eggs and sugar in a deep bowl with a mixer until the powdered sugar is completely dissolved. The mixture will change from a bright yellow to a faded yellow.
Whisk in the oil, milk.
Add the sifted flour, milo and baking powder and mix with a wooden spoon or spatula.
To prevent the cake from sticking grease the bottom of the pan and add some flour. Tap out the excess flour. – I used a non sticking spray.
Pour the cake into the mold and smooth it with a spatula.
Bake the milo cake in a pre-heated 170 degree C or 350 degree F oven for 40 minutes. Let the cake cool.
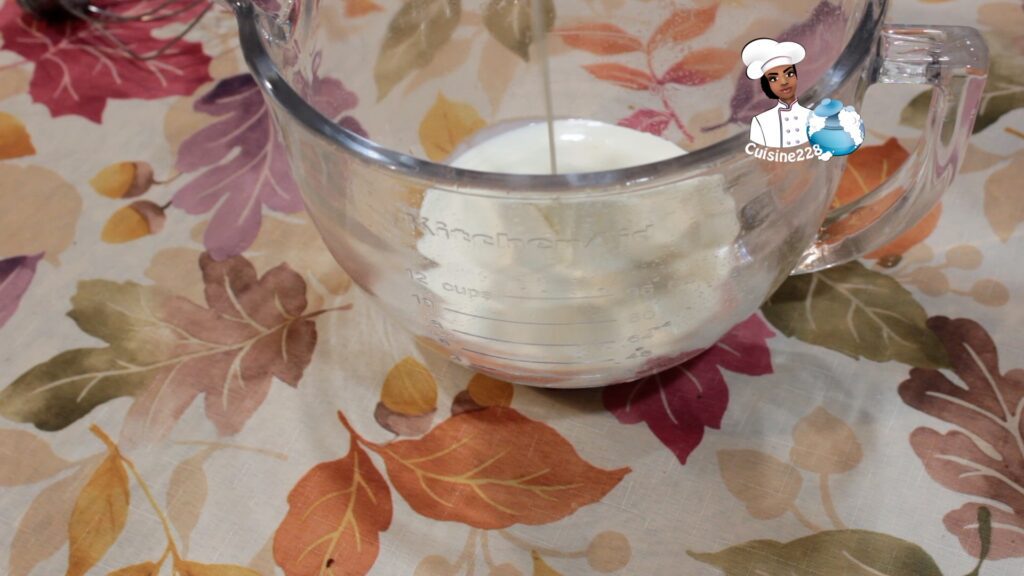
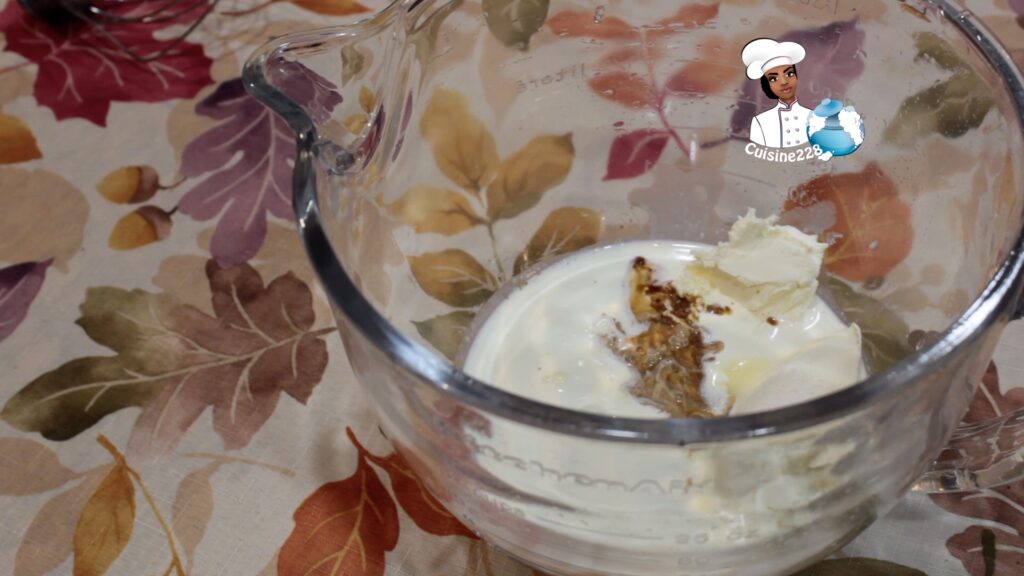
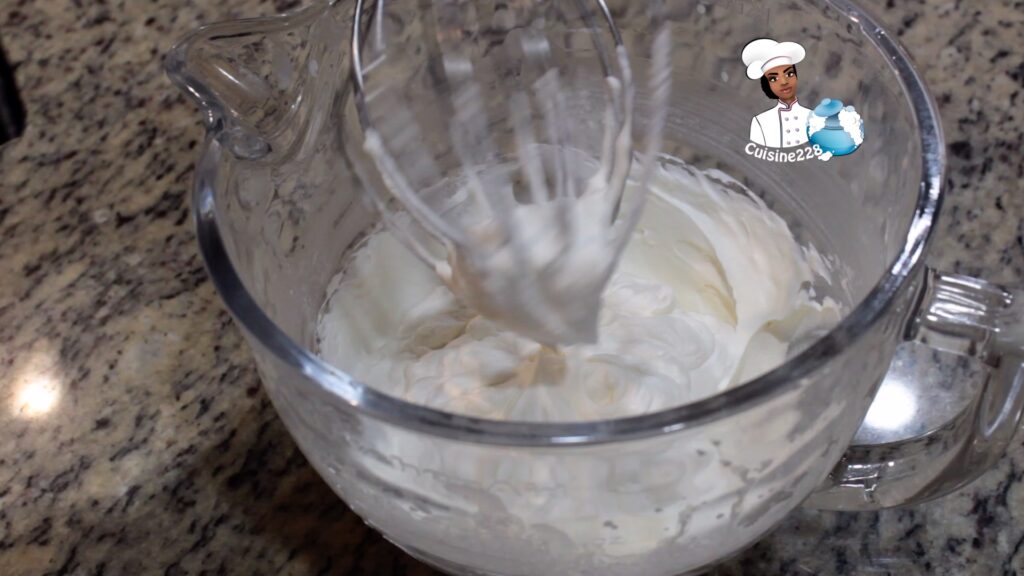
Whisk together heavy cream, mascarpone, sugar and vanilla extract (Careful not to over whisk).
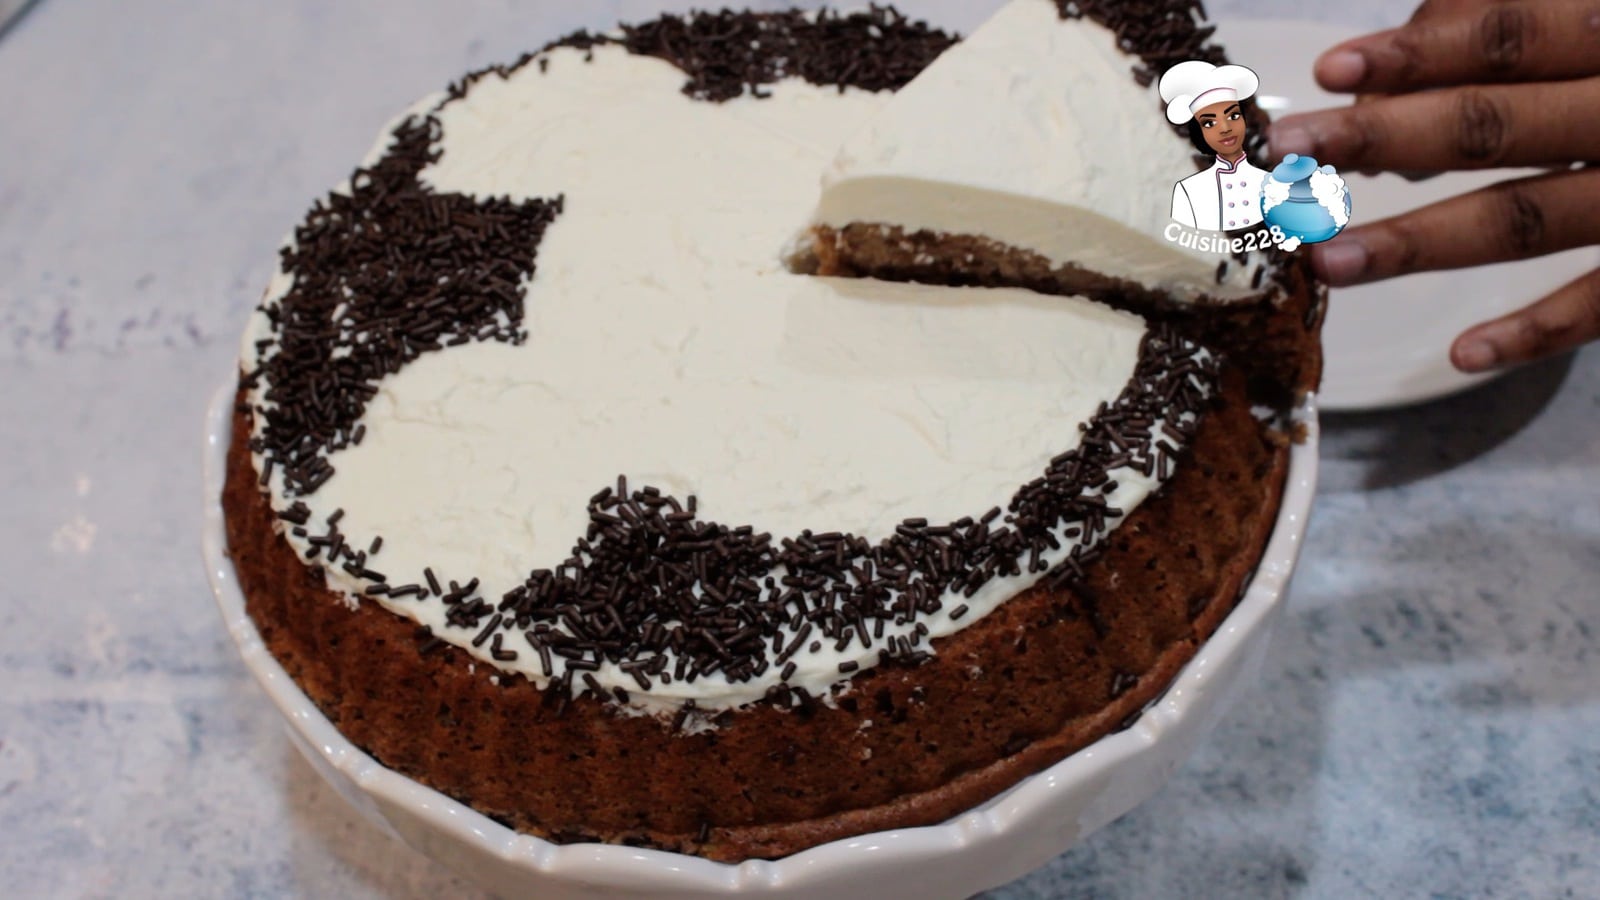
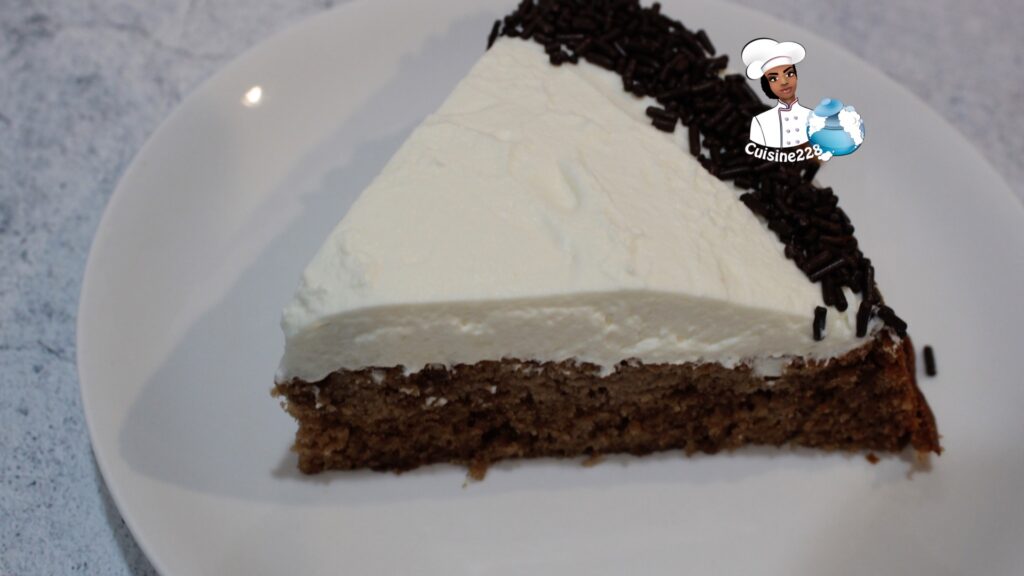
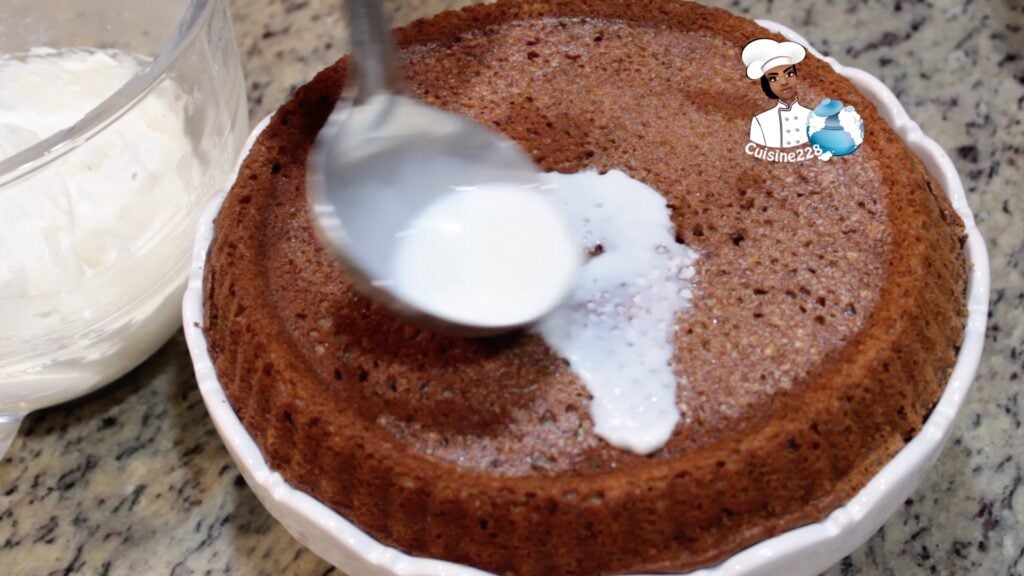
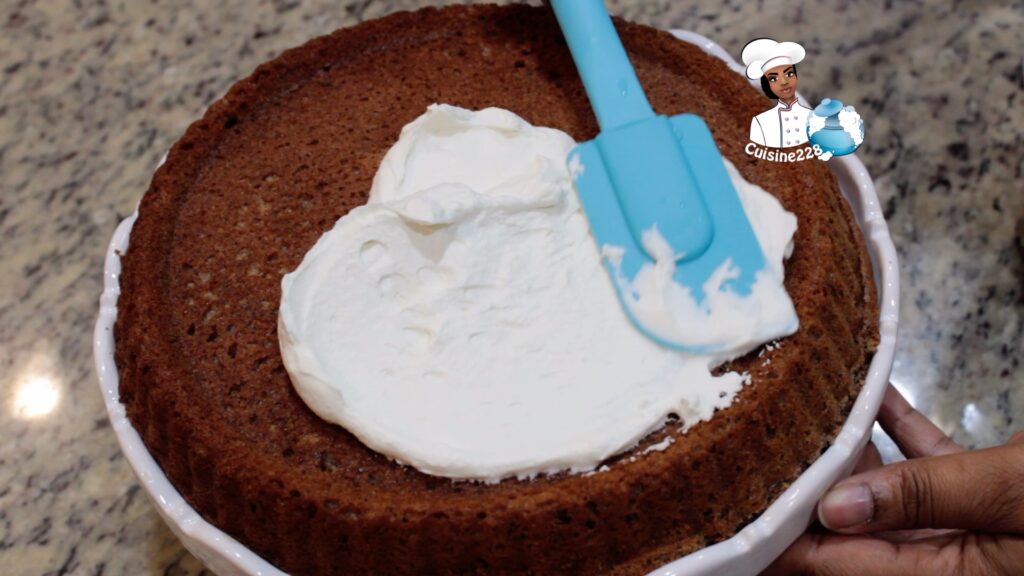
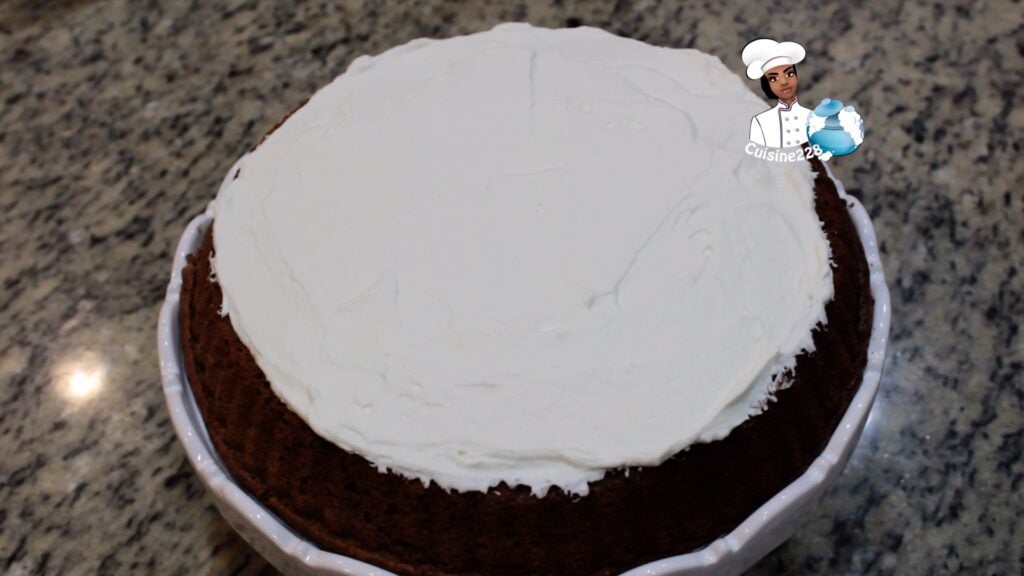
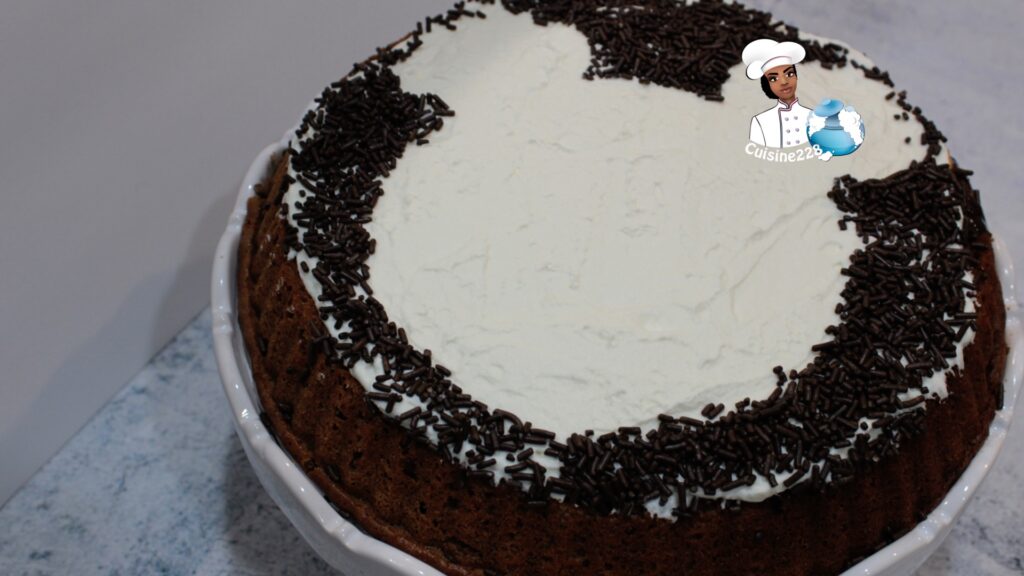
Once the cake completely cool down, add (1 cup milk and 2 teaspoon sugar), let the cake absorb it.Add the heavy cream and mascarpone and the sprinkles on top of the milo cake.
Milo Cake
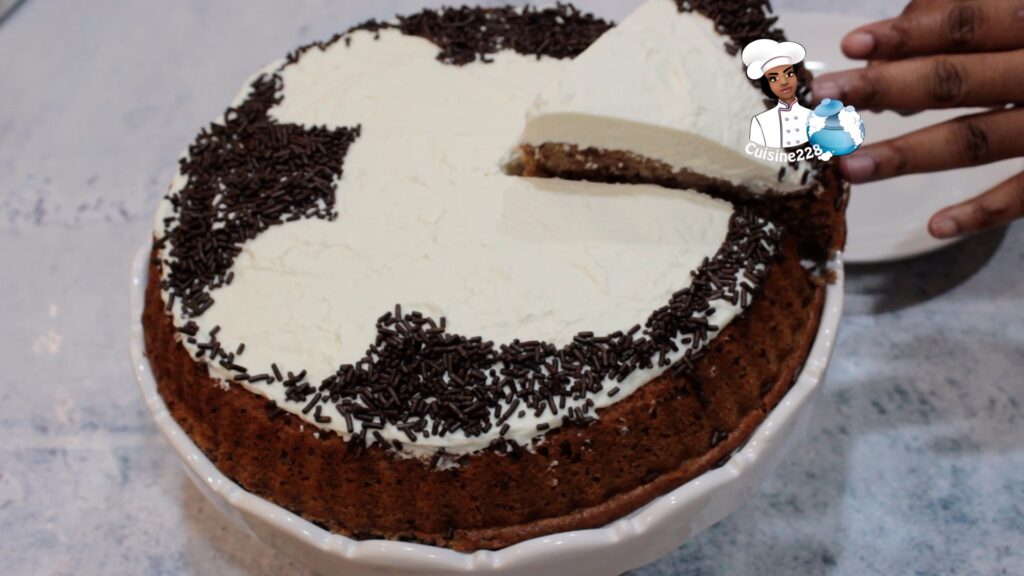
Share with your loved ones.
Milo Cake
Tips on how to make the best milo cake
Beat 275g butter, softened until creamy then gradually add 625g icing sugar, sifted and 397g tin condensed milk. Once the cakes have cooled completely, add the icing at room temperature.
If you don’t have the sprinkles, you dust the iced cake with some milo. With time the Milo sprinkles on the outside of the cake will absorb moisture from the icing and become sticky so it’s best eaten on the day you make it.
In Togo, we serve a delicious sandwich made fish (Akpala or Mackerel)
baked, smoked with veggies and seasonings and served with small French
baguettes (The size of hot dog bun). For this recipe of Mackerel stuffed Buns,
I have decided to combine a bun and the fish mixture. For this recipe you can use
beef, chicken, pork, lamb, goat etc. as the filling.
The bread a versatile recipe that makes soft, delicious
bread rolls for hot dog buns, hamburger buns etc. So it’s perfect for these Mackerel
stuffed Buns as well. The dough is really soft here, so if it’s too sticky, you
will need to flour your hands to make it easier to handle it and shape it.
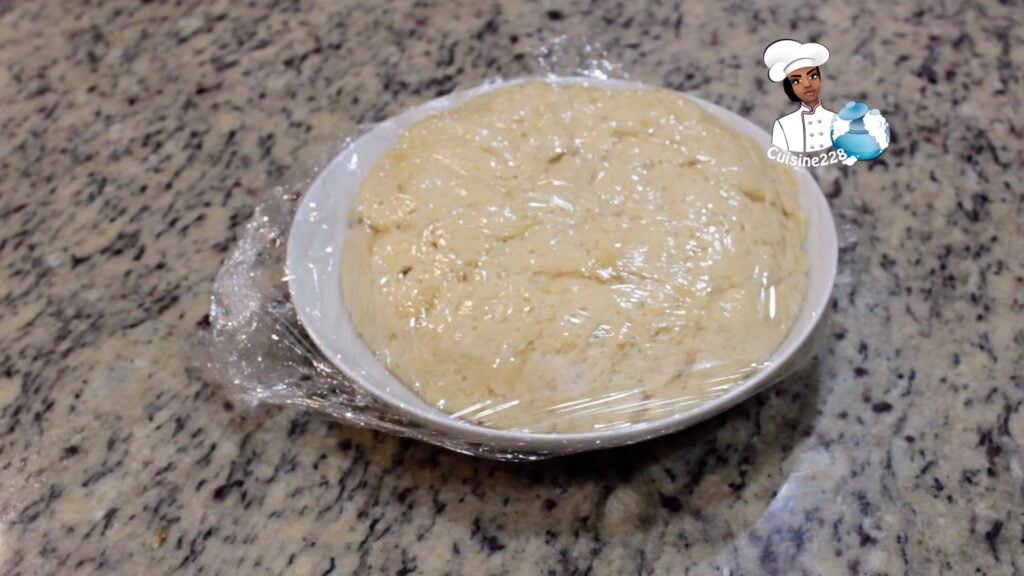
I prefer to let the dough rise overnight in the fridge,
because the chilled dough is easier to handle and less sticky. So it’ll be
easier to portion and shape the chilled dough the following day.
I use All Purpose flour for this Mackerel stuffed buns
recipe because I prefer really soft bread. But if you’d like to use bread
flour, that’s totally fine too. You may need to add extra water or milk to get
the right consistency again, so keep an eye on the dough to get that slightly
sticky, and shiny smooth ball of dough.
Using a stand mixer makes the whole process easier. If
you’re using your hands to knead the dough, make sure it lightly dust your work
surface and hands so that the dough doesn’t stick too much.
This recipe of Mackerel stuffed Buns take a lot of time but
it’s worth it. I do the whole process takes the whole day. First I clean and
smoke the Mackerel with some spices to remove the odor of the fish. While the Mackerel
is cooking I start with the bread. Once the Mackerel is cooked and cooled, I remove
all the fish bones and crumble fish. The next step is to cook the Mackerel with
vegetables and seasoning. Finally, stuff the buns with the Mackerel mixture.
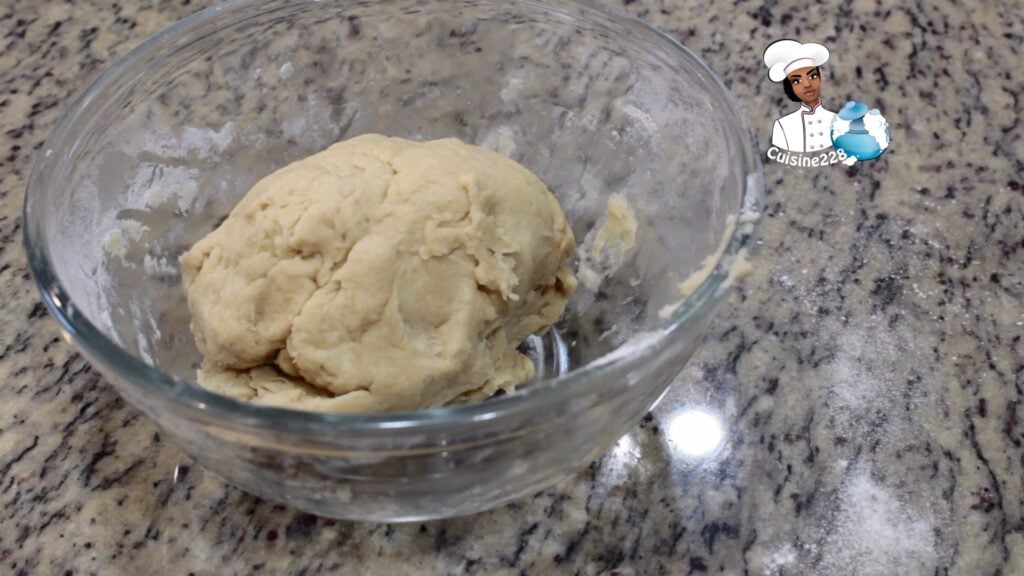
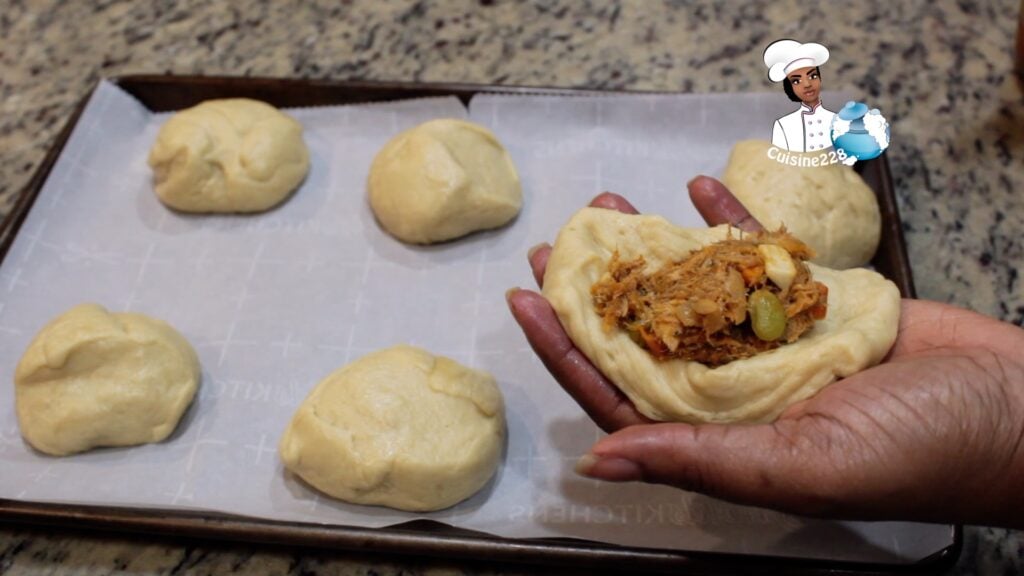
This bread dough is soft and stretchy. Use your hands to
flatten out the bread dough to a circle, with the edge thinner than in the middle.
Next, cup the bread dough piece in your palm; add 2 teaspoons of the filling in
the center. Since the dough is stretchy, you can press the filling into the
middle. Your cupped palm will help keep the filling in place.
Next, stretch the dough over the filling and pinch it
together to seal. Since the dough is sticky, it should seal easily. If not,
then use a dab of water to help seal the dough. After the edges have been
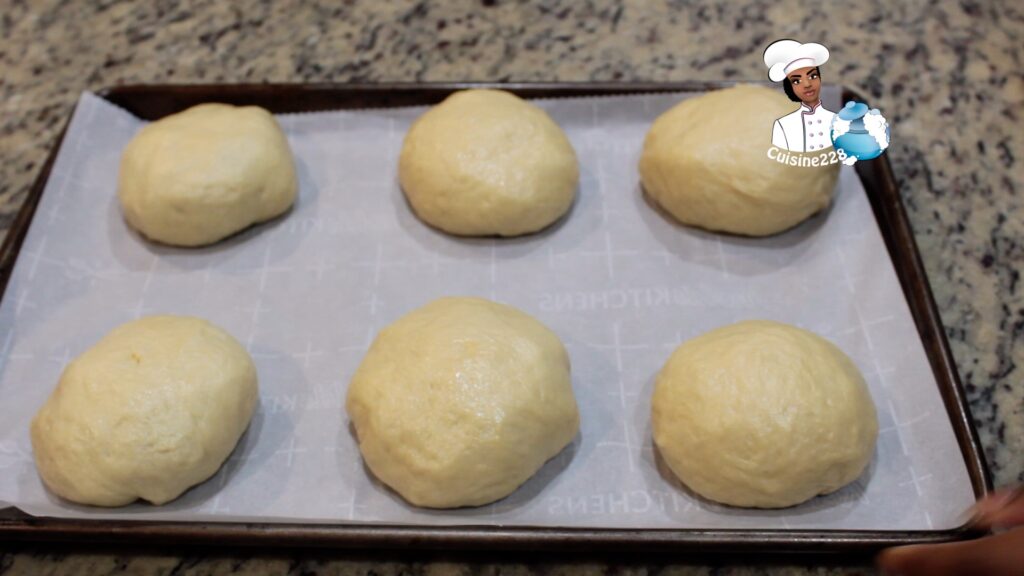
pinched together, roll the bun around in your palm a little, to smoothen out
the seams/edges. Then place the filled buns in the prepared pan with the seam
side down.
As I mentioned before, you can substitute the beef with
pork, chicken, lamb or goat meat. The cooking time may vary according to the
pan that you’re using, since you’re cooking the meat filling until the liquid
has completely evaporated. So it’ll take longer to cook in a smaller pan.
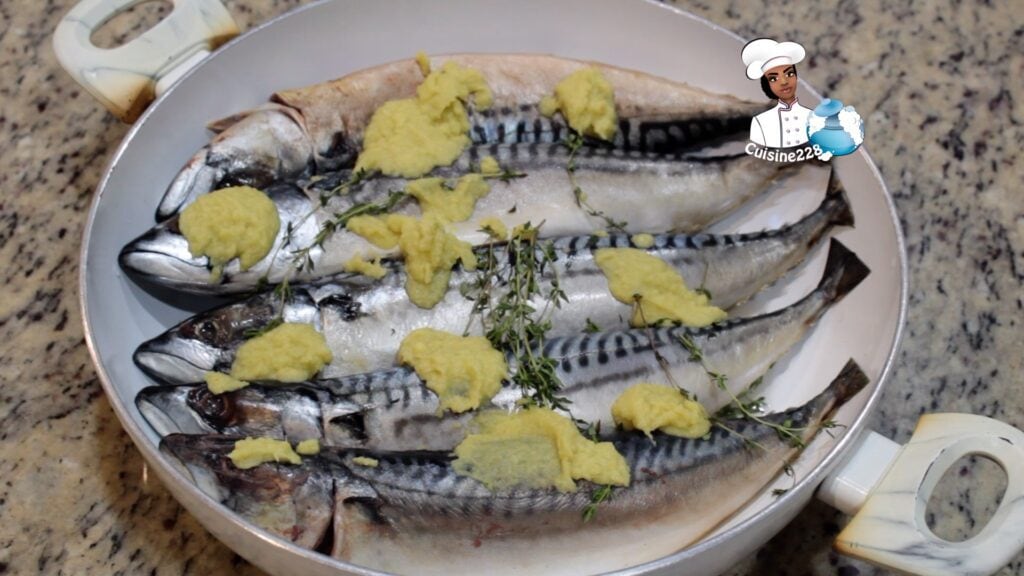
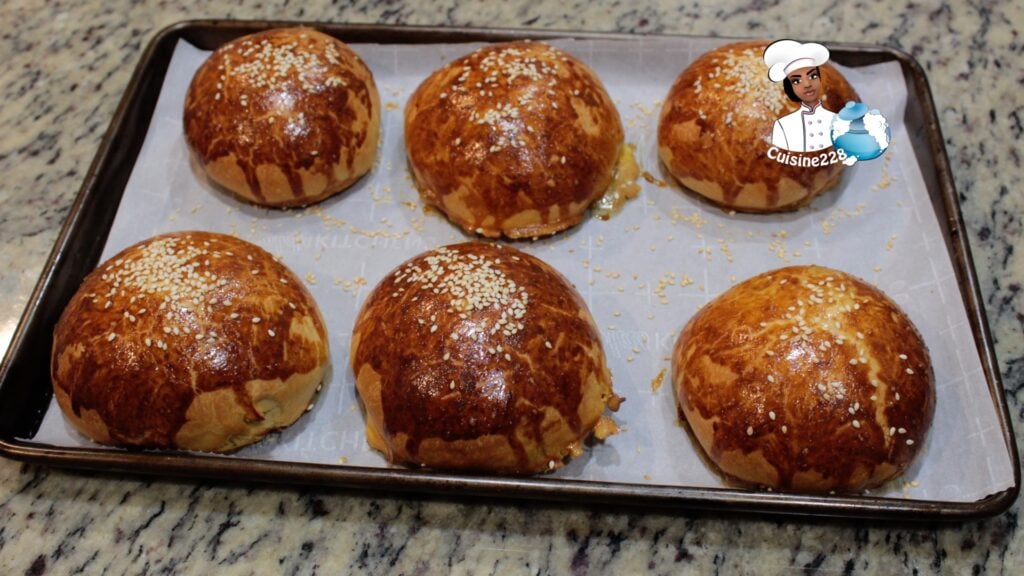
5 Mackerel, whole
3 tablespoon Gallic
2 tablespoon Ginger
5 thyme branches
Salt and pepper
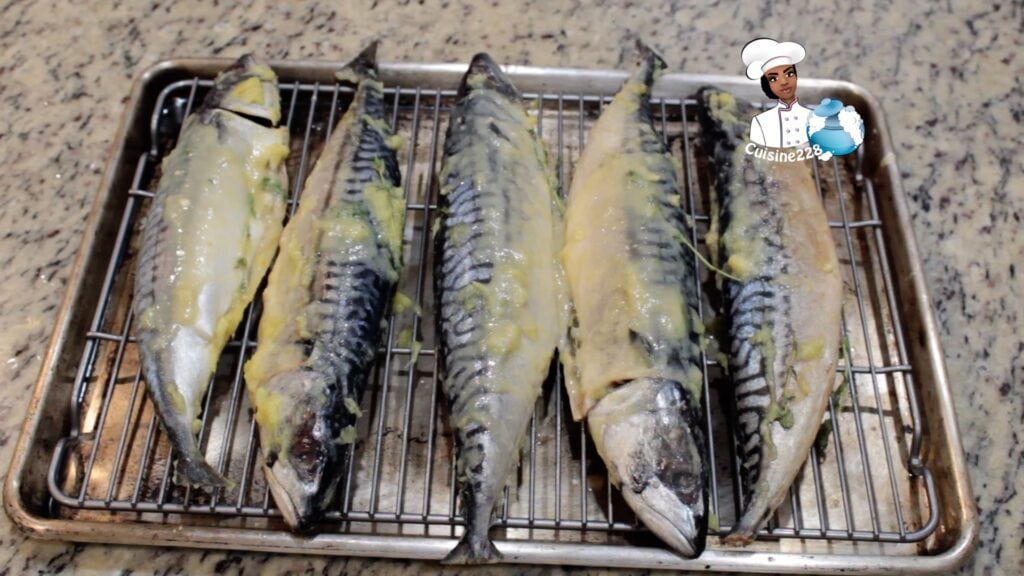
First, make sure your fish have been gutted and cleaned under cold water, then dried. Your fishmonger will do this for you.
Coat your cleaned fish inside and out with the Gallic, Ginger, Salt and pepper and let marinate in the fridge for about 45 minutes.
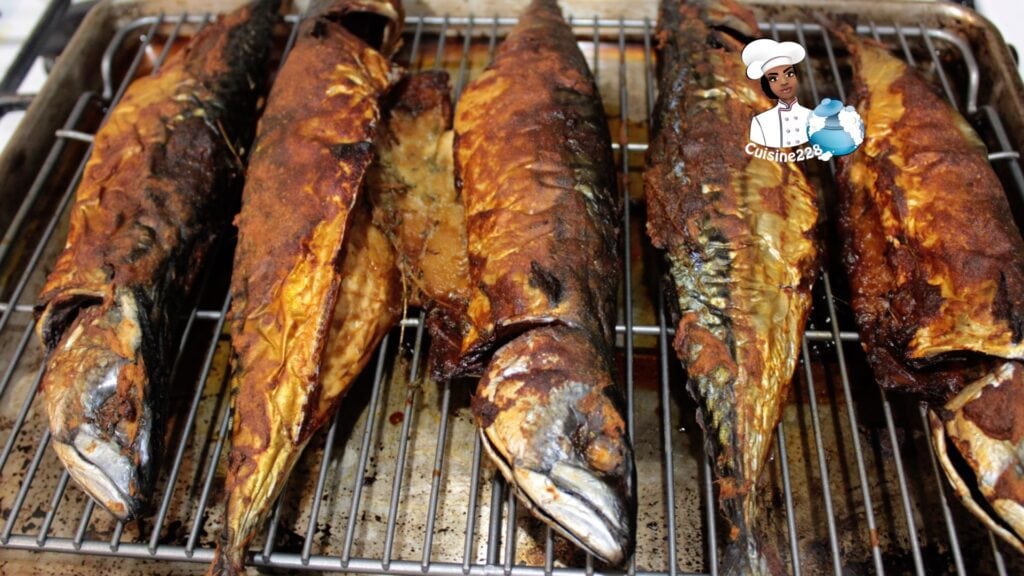
Place in the oven at 375F (190C) and cook for about 45 minutes.
5 smoked Mackerel
Salt and pepper
1/4 cup oil
3 onion
4 garlic cloves, chopped
1 bell pepper
2 teaspoons ginger
2 teaspoons turmeric
1 tablespoon paprika
1 tablespoon cayenne
3 cup de frozen vegetable
1 tablespoon tomato paste
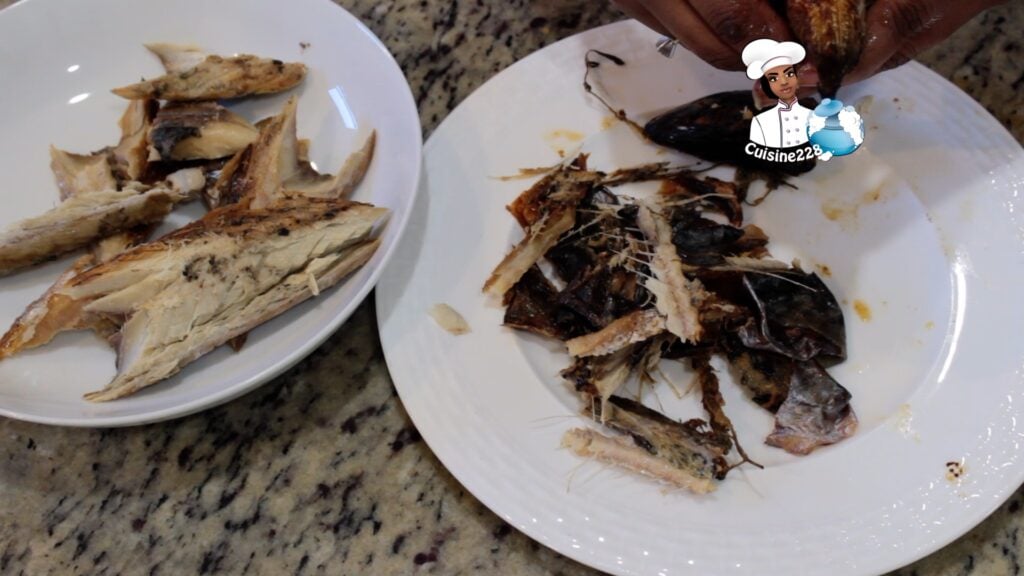
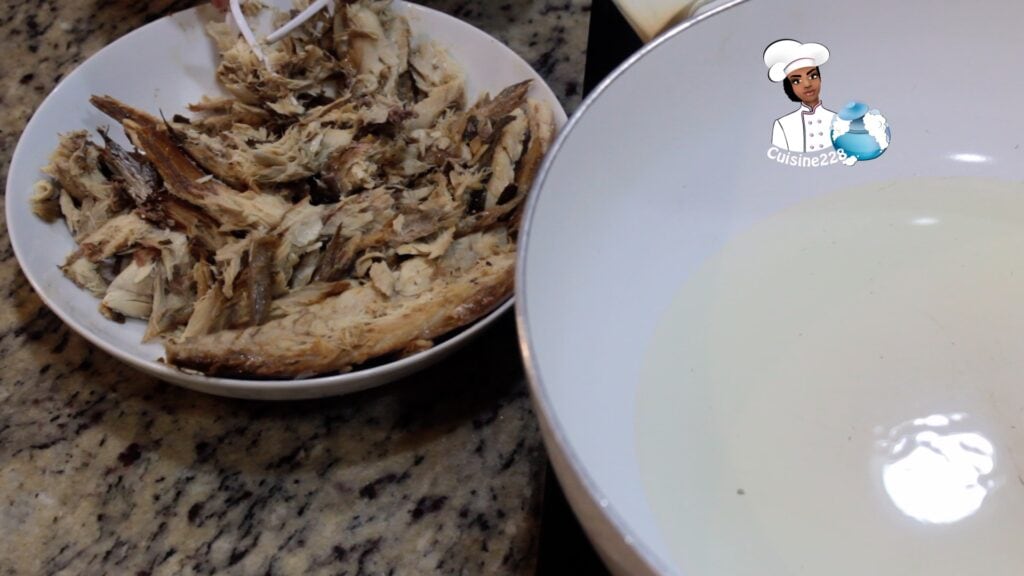
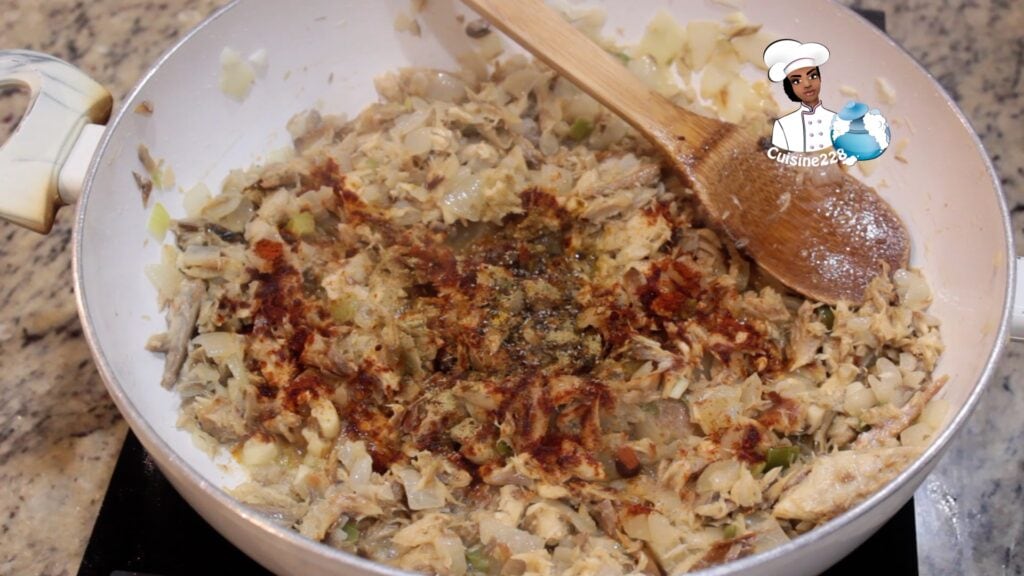
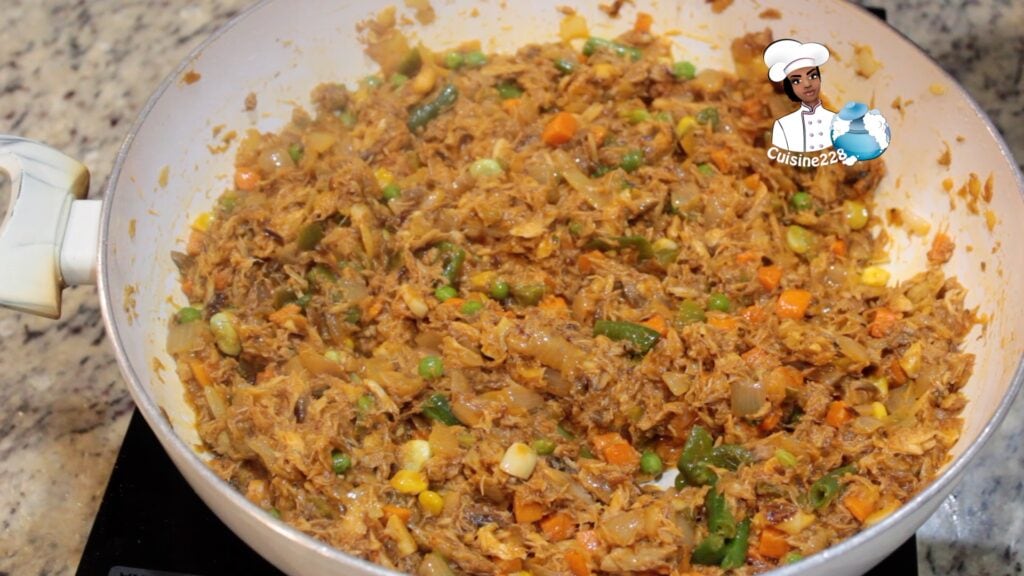
Remove the fishbones, and mash it with your fingers. Be Careful not to prick your fingers with the fishbone.
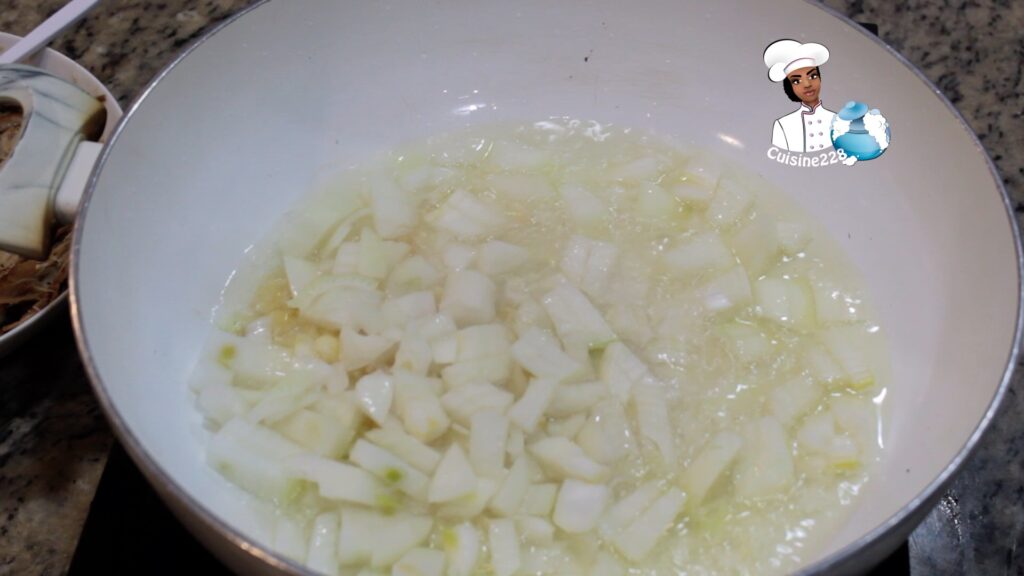
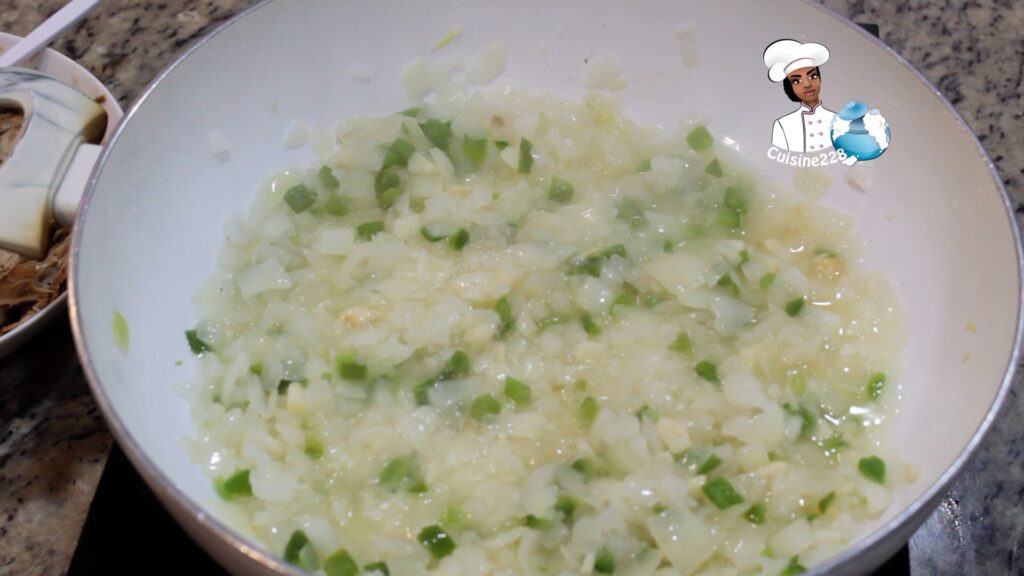
In a medium saucepan heat up the oil and cook the onion, garlic and bell pepper. Keep turning mixture with a spatula, until onion is softened and browned, about 10 minutes.
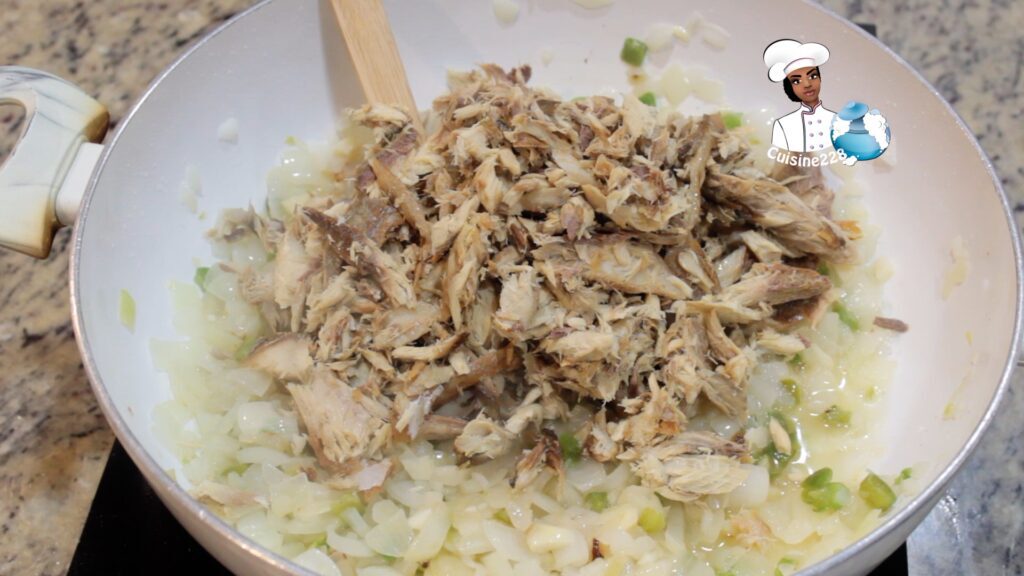
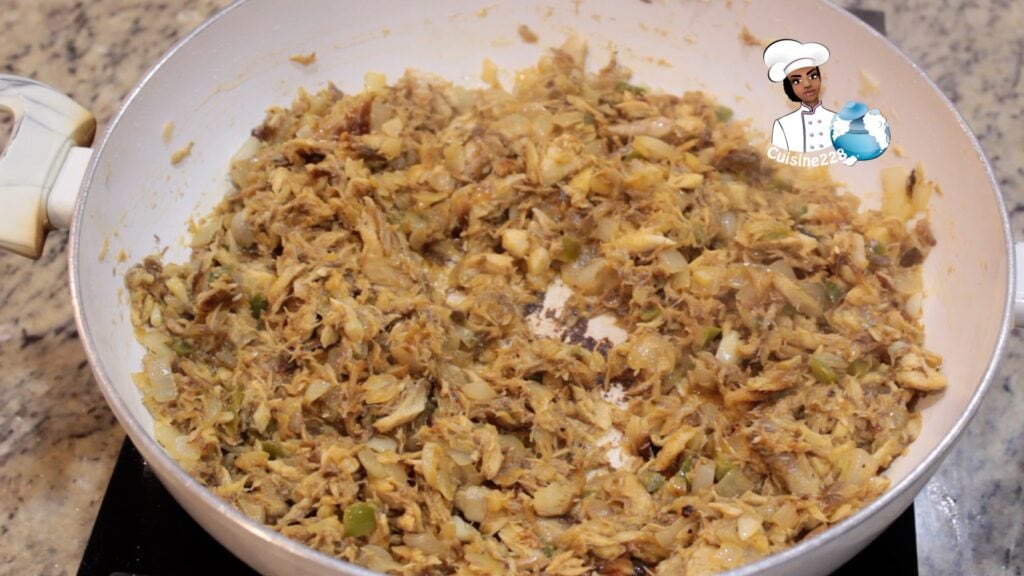
Add the fish and mix well to incorporate. (Add a little more fat in the pan if the mixture seems dry.)
Add ginger, turmeric, paprika, cayenne, salt and pepper and fry for another 2 minutes.
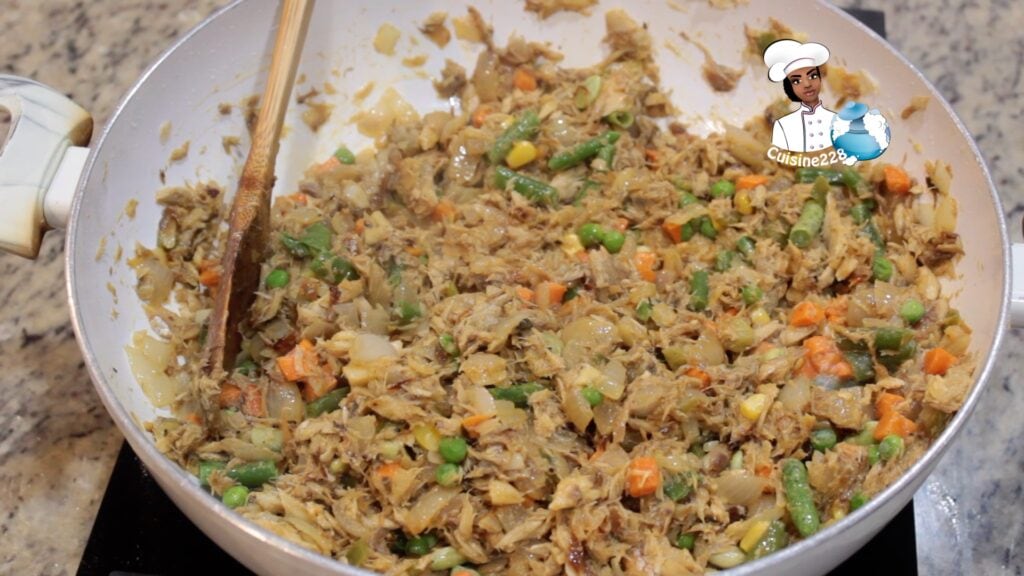
Add the frozen vegetables.
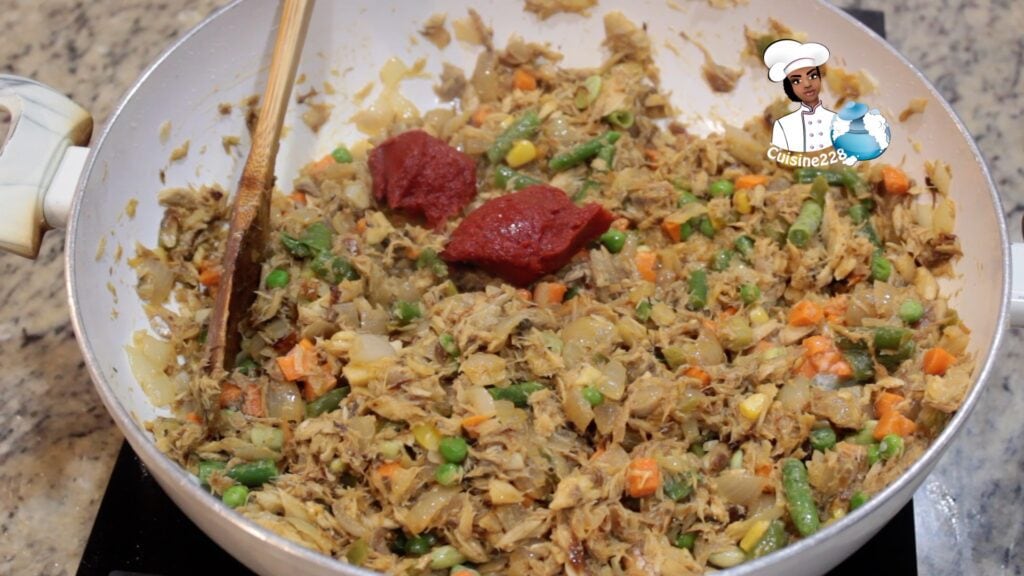
Stir in the tomato paste. Simmer, stirring well for 10 mins.
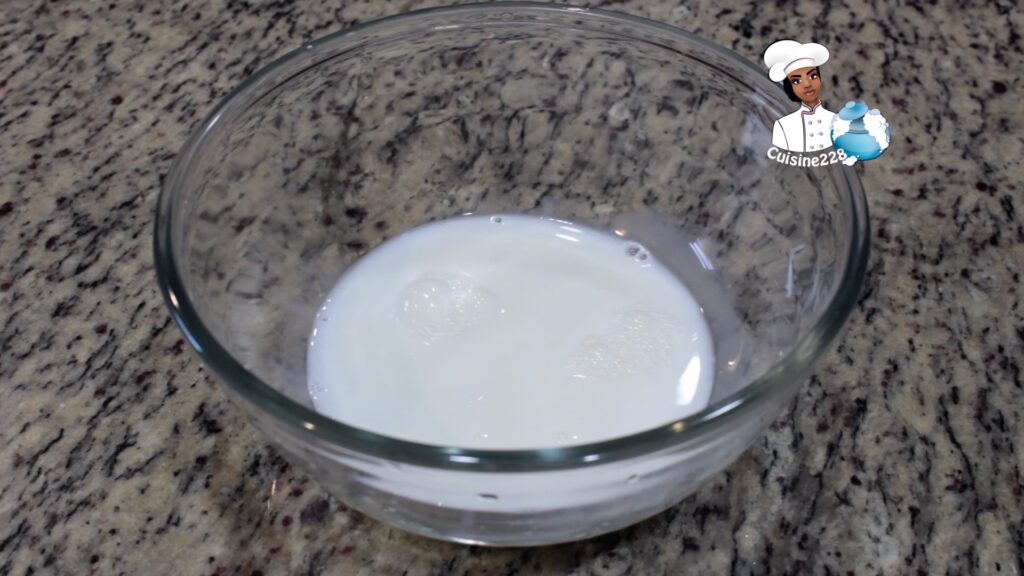
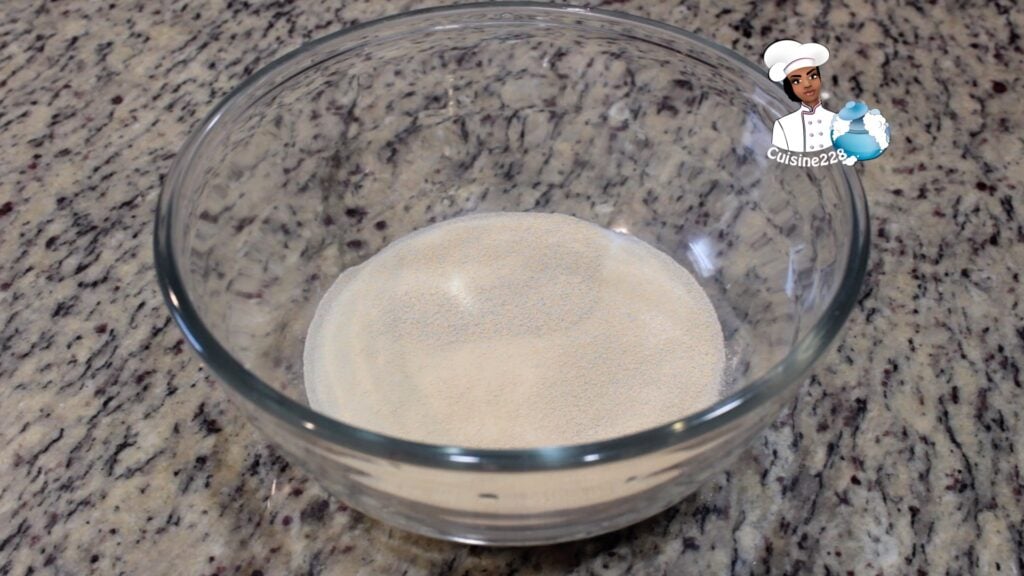
1 cup warm water
1 cup warm milk
1 packet of baker’s yeast
4 tablespoons of sugar
1 cup oil
1 egg
7 cups of All purpose flour
2 teaspoons salt
1 egg yolk
1 tbsp sesame seeds
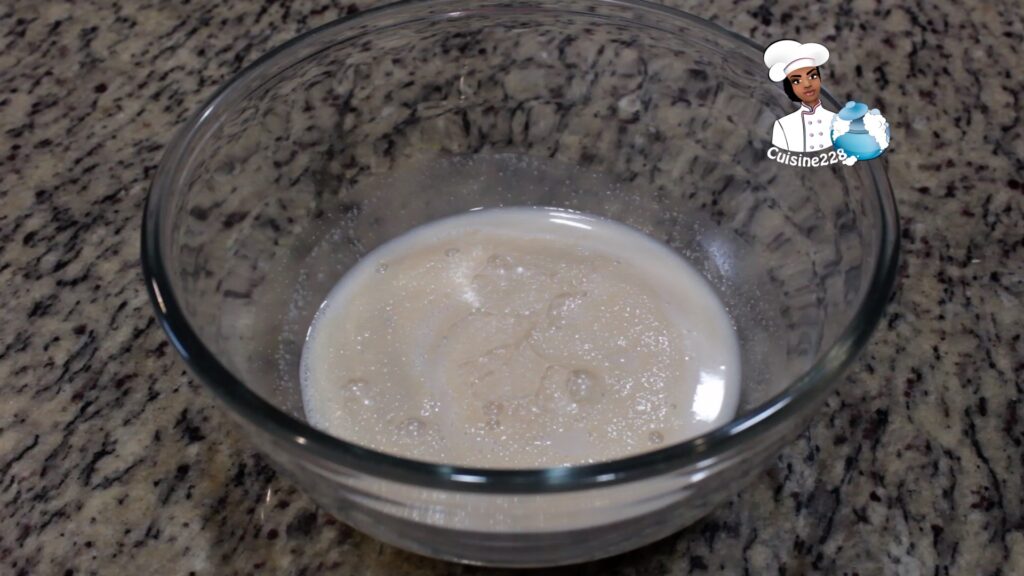
Mix the yeast, warm the milk and sugar in a bowl and let the yeast sit for 5 minutes to activate.
Add the oil, egg and wheat flour to the yeast mixture.
Be careful when adding flour. Add it slowly, do not go too far. Knead until you reach the consistency of your hands.
Take the dough in a bowl, pull the stretch film over and let it ferment for 45 minutes. At the end of the period, the dough should have doubled.
Knead the dough. Repeat and add the salt.
Knead the dough and divide the dough into 18 balls and add the fish mixture in the middle and close.
Brush the dough with the egg yolks on them and sprinkle with sesame seeds.
Leave in a warm place for another 15 minutes by heating the oven to 180 C or 356 F.
Put the baked dough in the oven and cook for about 25 minutes until golden brown.
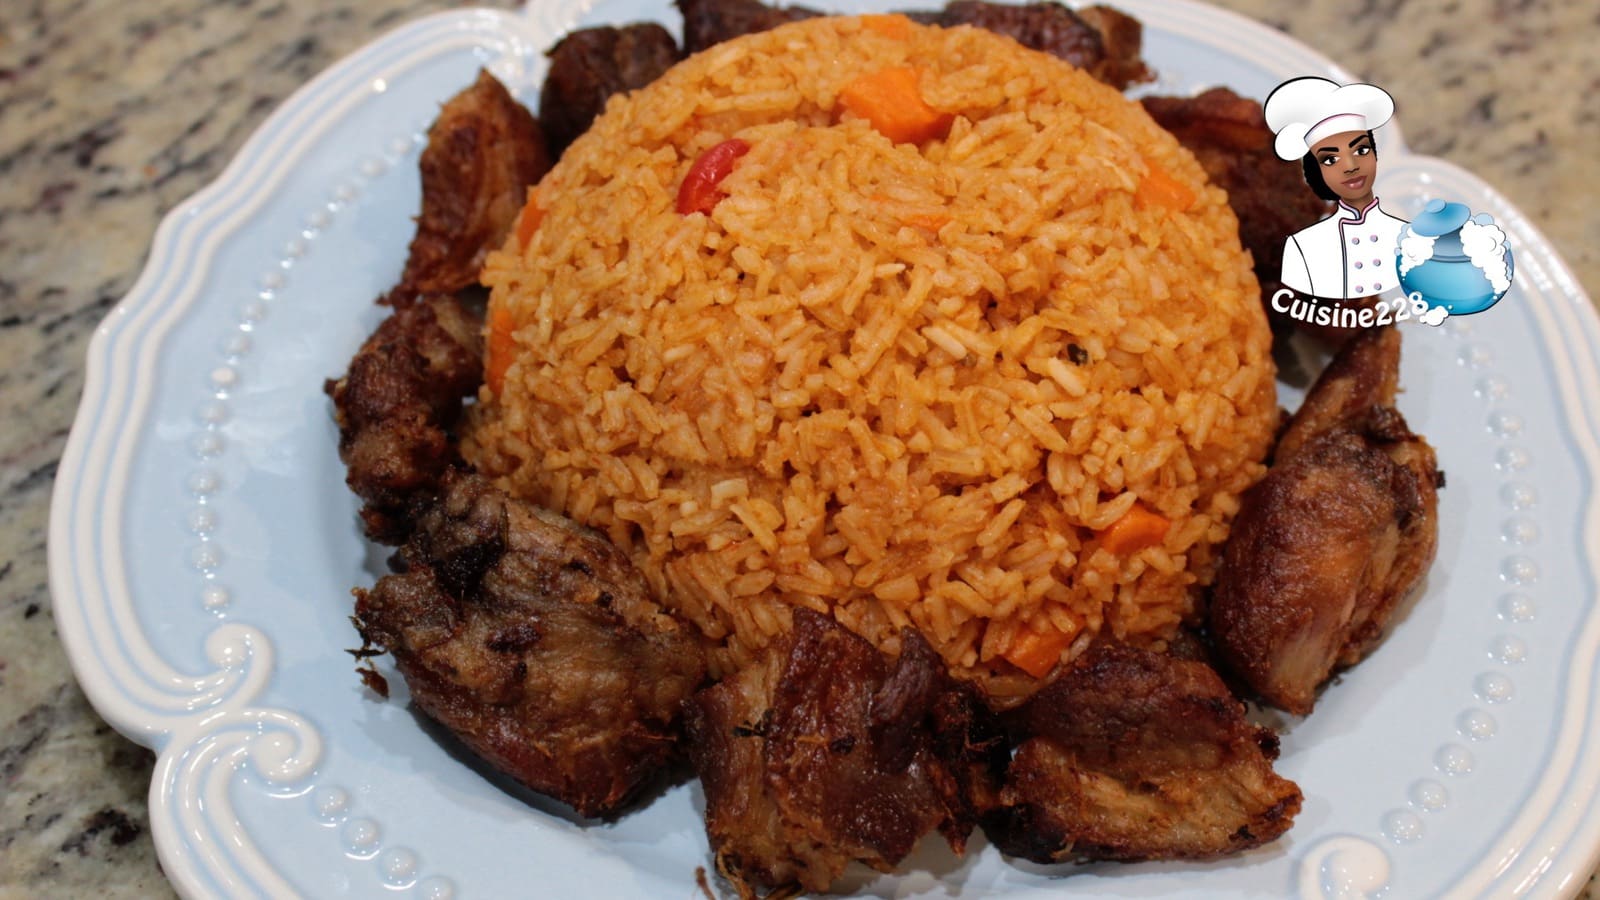
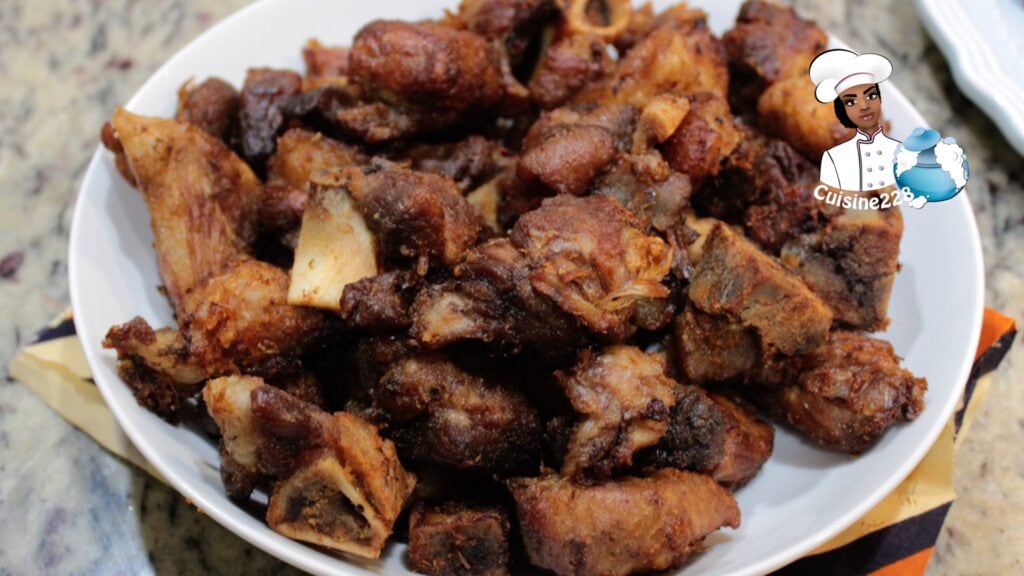
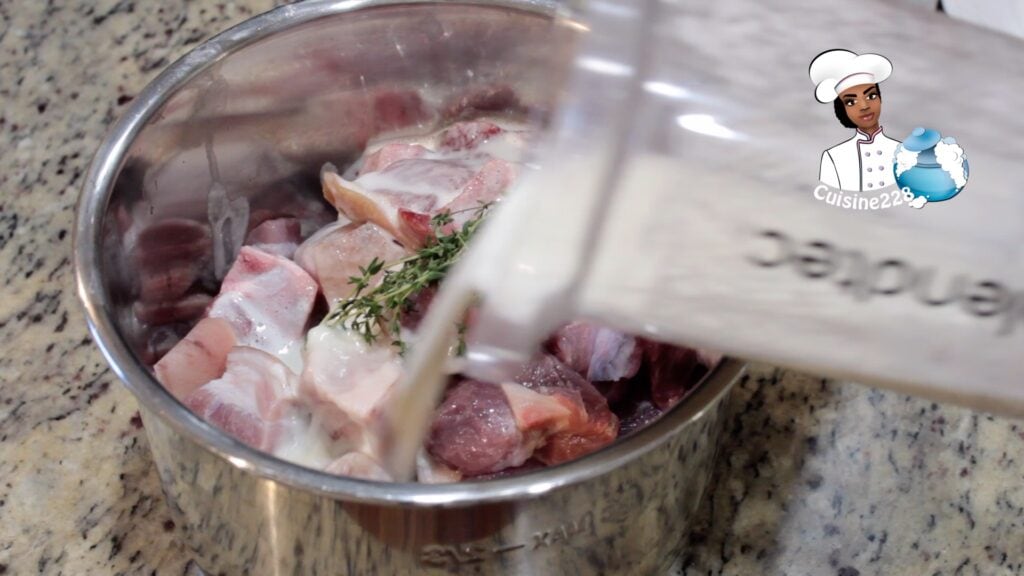
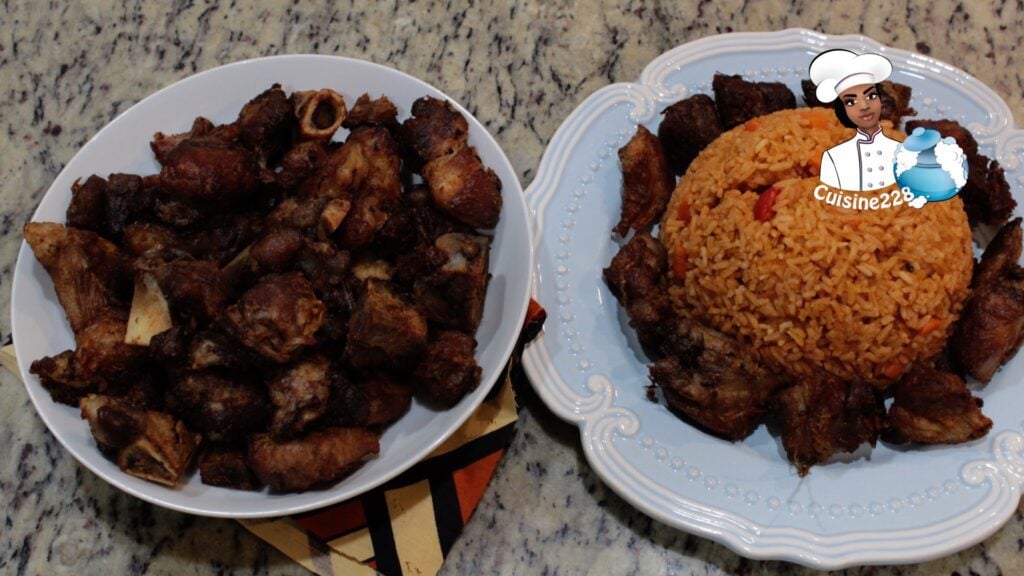
For this recipe of pork griot and Jollof rice, I combined my West African culture and Haitian experience. Pork griot is one of Haiti’s favorite’s dishes. To make the griot, big and fatty chunks of pork shoulder are marinated with limes juice, garlic, ginger, fresh thyme, onion, bouillon powder and salt, then boiled and finally fried until golden and crisp. Traditionally, the pork griot is served with Pikliz, which is a mixture of cabbage, carrot and chili pepper pickled. The acidity of Pikliz balances out the richness of the griot, but for this recipe I chose to serve it with some Jollof rice.
Haitian pork griot
How to make the a tasty a crispy pork griot ?
Do you know that Pork is the world’s most
popular type of meat? Yes, it is. Though not exactly a health food, moderate
consumption of properly prepared pork can be an acceptable part of a healthy
diet. For the griot, I love to season the pork overnight to guarantee a tasty
and tangy taste. Once the pork has being marinated overnight, it is browned,
the chunk of pork should be separated from the broth and cooled. Lastly, the marinated
– browned – cooled pork is fried in hot oil to obtain the griot.
What is Jollof rice for the griot?
The jollof is a pot of rice loaded with tomatoes,
tomato paste, onions, scotch bonnet peppers, salt, spices and vegetable oil and
more flavor than you’ll know what to do with. Furthermore, vegetables, meat or
meats and different types of local spices can be added to personalize it. The secret
to a good jollof rice is the flavor build in the tomato broth and oil coupled
with the perfect ratio of rice. As far as I can remember, jollof rice is served
at every west African party. The jollof
rice originated from Senegal and is a popular dish served in Nigeria, Cameroon,
Ghana, Senegal, Togo, and Sierra Leone. The recipe varies lightly from one
country to the next. The two main version are Ghanaian Jollof Vs Nigerian
Jollof.
Ingredients for Griot
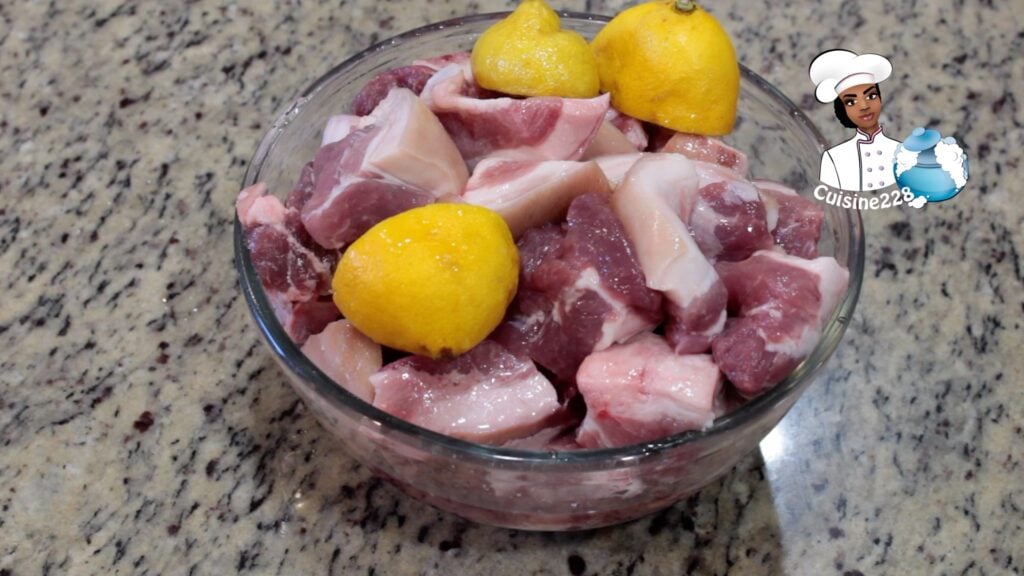
1.5 kg pork (shoulder Cut in bite size)
1-3 limes (juice) about 2 Tablespoons
5 teaspoons minced garlic
2 teaspoon ginger
3 teaspoon fresh thyme
1 medium onion sliced
1 tablespoon chicken bouillon powder
2 Teaspoons salt or more
How to make the Haitian pork griot?
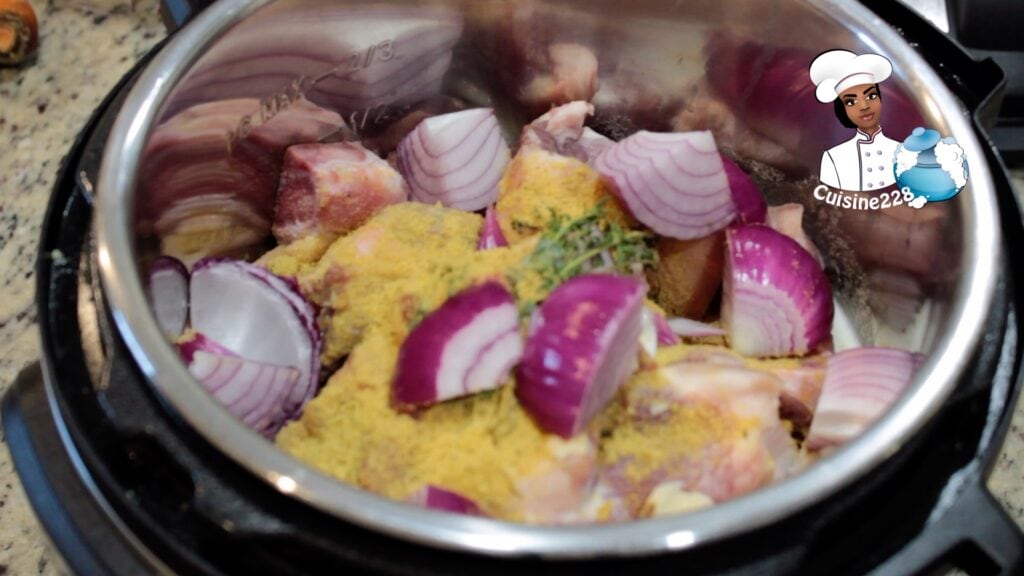
Marinate the pork with lime juice, salt, chicken bouillon, garlic, ginger, onions, thyme, scotch bonnet pepper (optional).
Let it rest in the fridge for about 2 hours or preferably overnight.
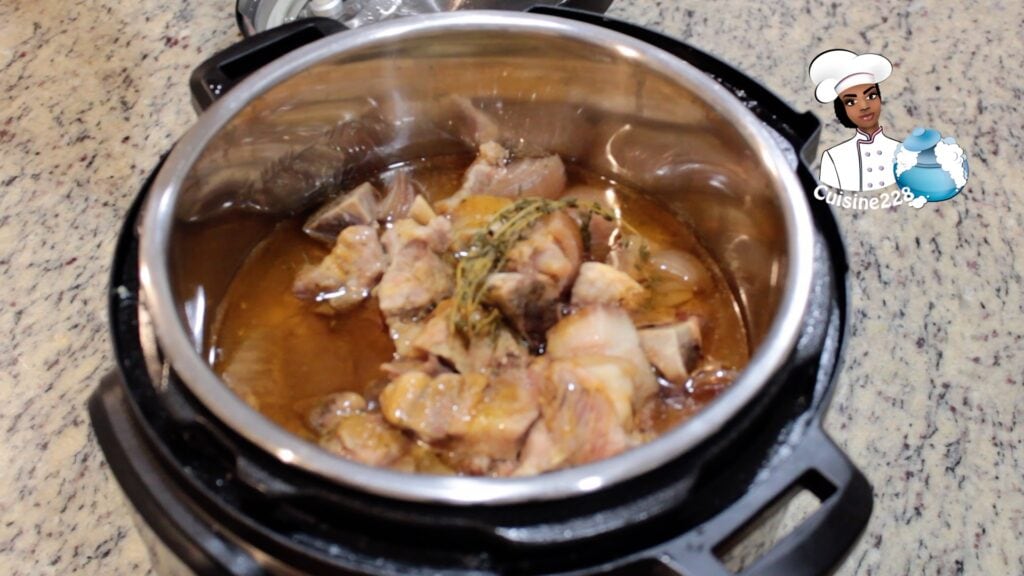
In a saucepan on medium heat, bring to a boil and simmer until tender for about an hour or more.
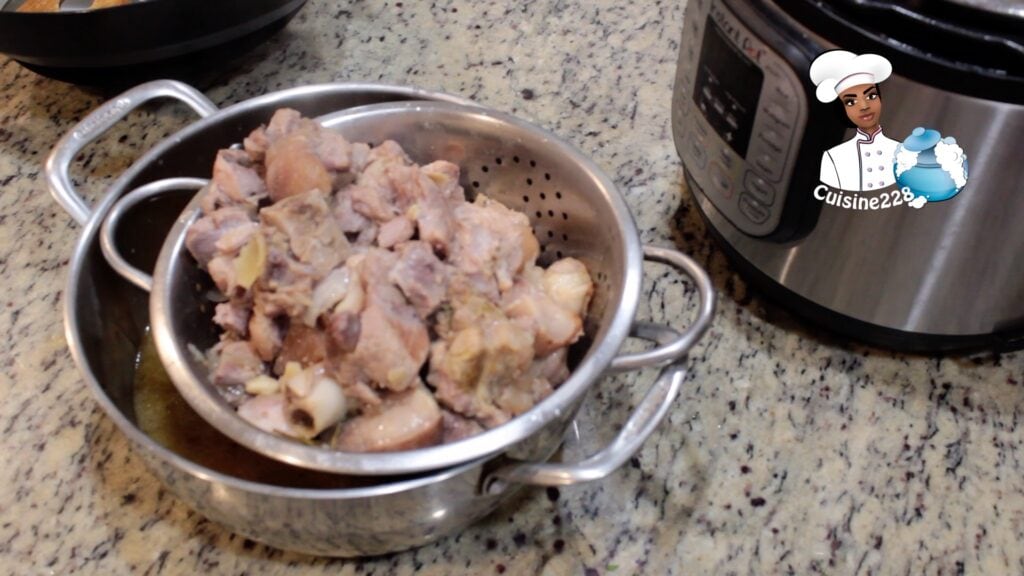
When pork is tender remove from liquid and any bits of spices, herbs of the pork. Set aside pork.
Fry the pork at 350F (180C) until the pork is crispy.
Using a sieve drain pork liquid, reserve the liquid and discard the rest of the herbs and spices. (I use ice to cool down the mixture and remove the excess oil)
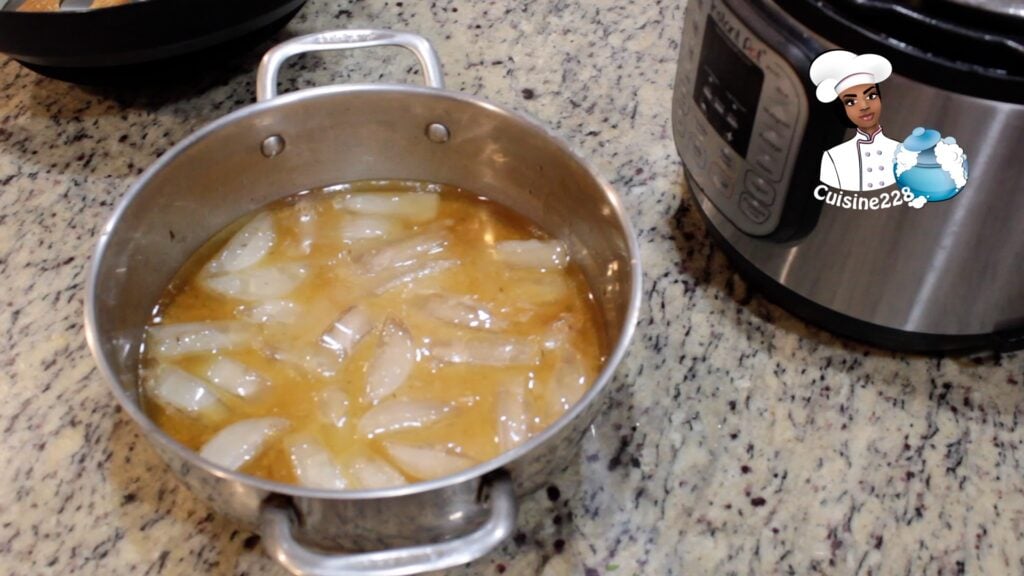
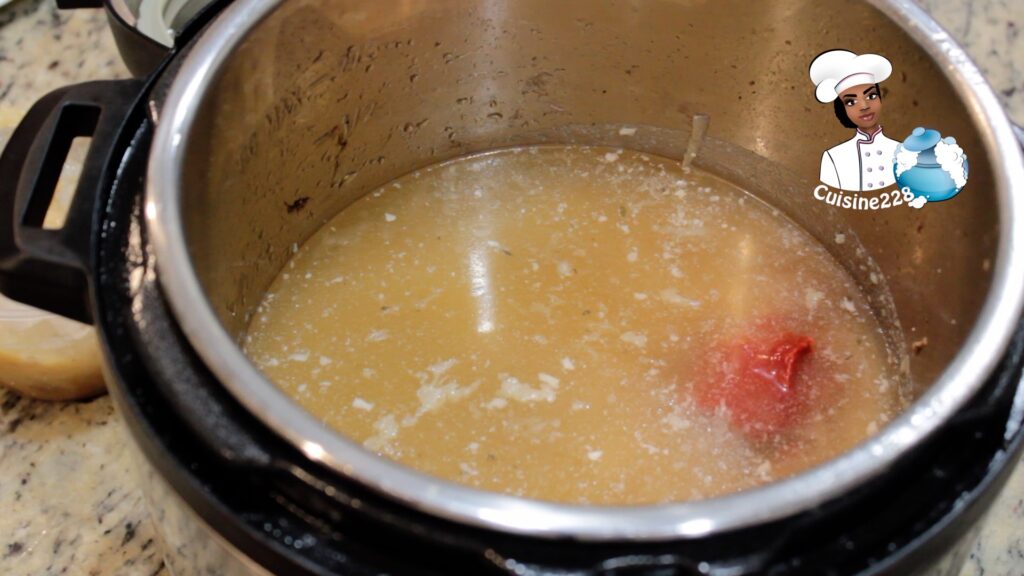
Place pork liquid in a small saucepan on medium add 1 teaspoon tomato paste, 1 cup tomato, 1/4 cup oil, sliced onion and bring to a boil.
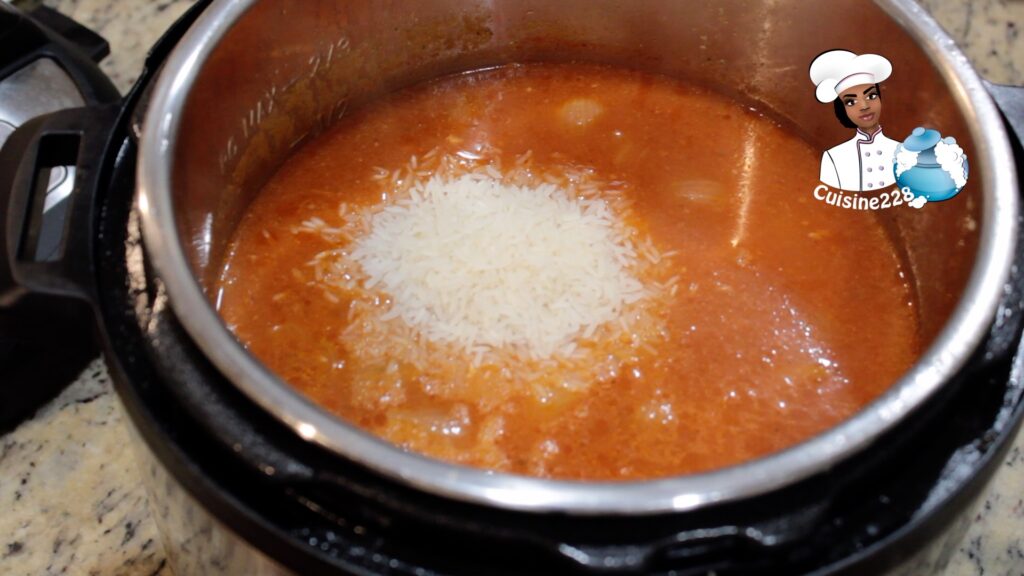
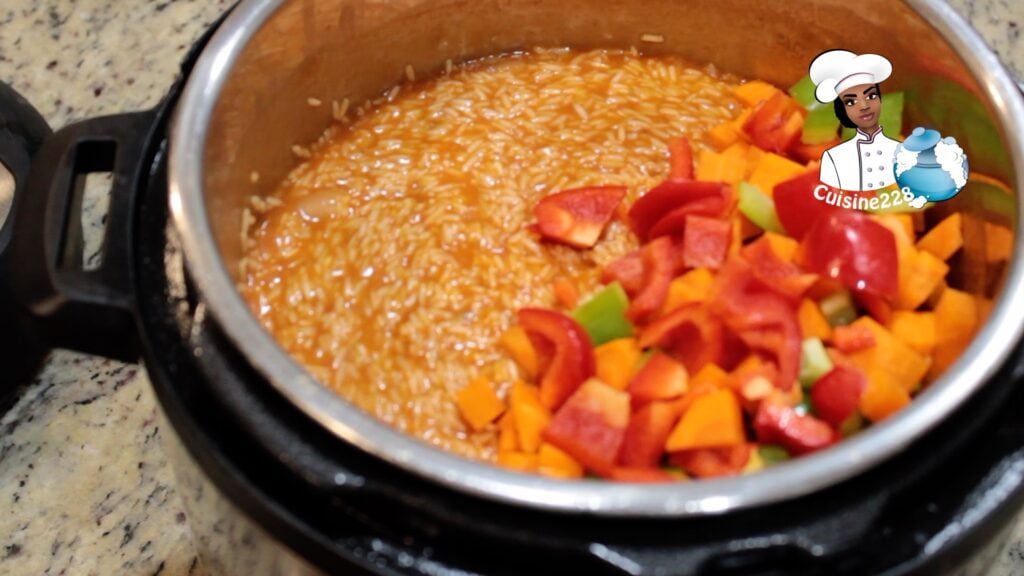
Add the rice (2 cups water for 1 cups jasmine rice). Salt to taste. Add the cut vegetables (carrots and bell pepper).
Stir in rice and boil over medium-high heat until the water evaporates
Be sure the lid fits tightly on the pot. Turn down the heat to its lowest setting. Let the rice simmer for about 18 minutes, then remove from heat and allow the rice to steam in the pot for another 5 minutes.
Haitian pork griot with jollof
Serve the rice with the griot.
Notes:
Cleaning the pork with vinegar or lemon juice is a test to see if the meat is still good. If the pork smells “off” even after its vinegar or lemon juice bath, chances are it’s not okay to cook.
The vinegar or lemon juice tenderizes the pork, cuts down on cooking time, and lets you store pork for a little longer in the fridge if you end up not cooking it the day you prep it.
The FDA currently does recommend against rinsing meat, however, in the African/Caribbean, there’s a common practice of rinsing off the meat and fish with a mild acid like lemon or lime juice or vinegar prior to cooking.
Before everyone owned a refrigerator, cooks would apply an acidic solution because they believed it killed any bacteria on the bird and to impart a little extra flavor. Currently, many folks use this same technique to get rid of any odors and add flavor to the meat.
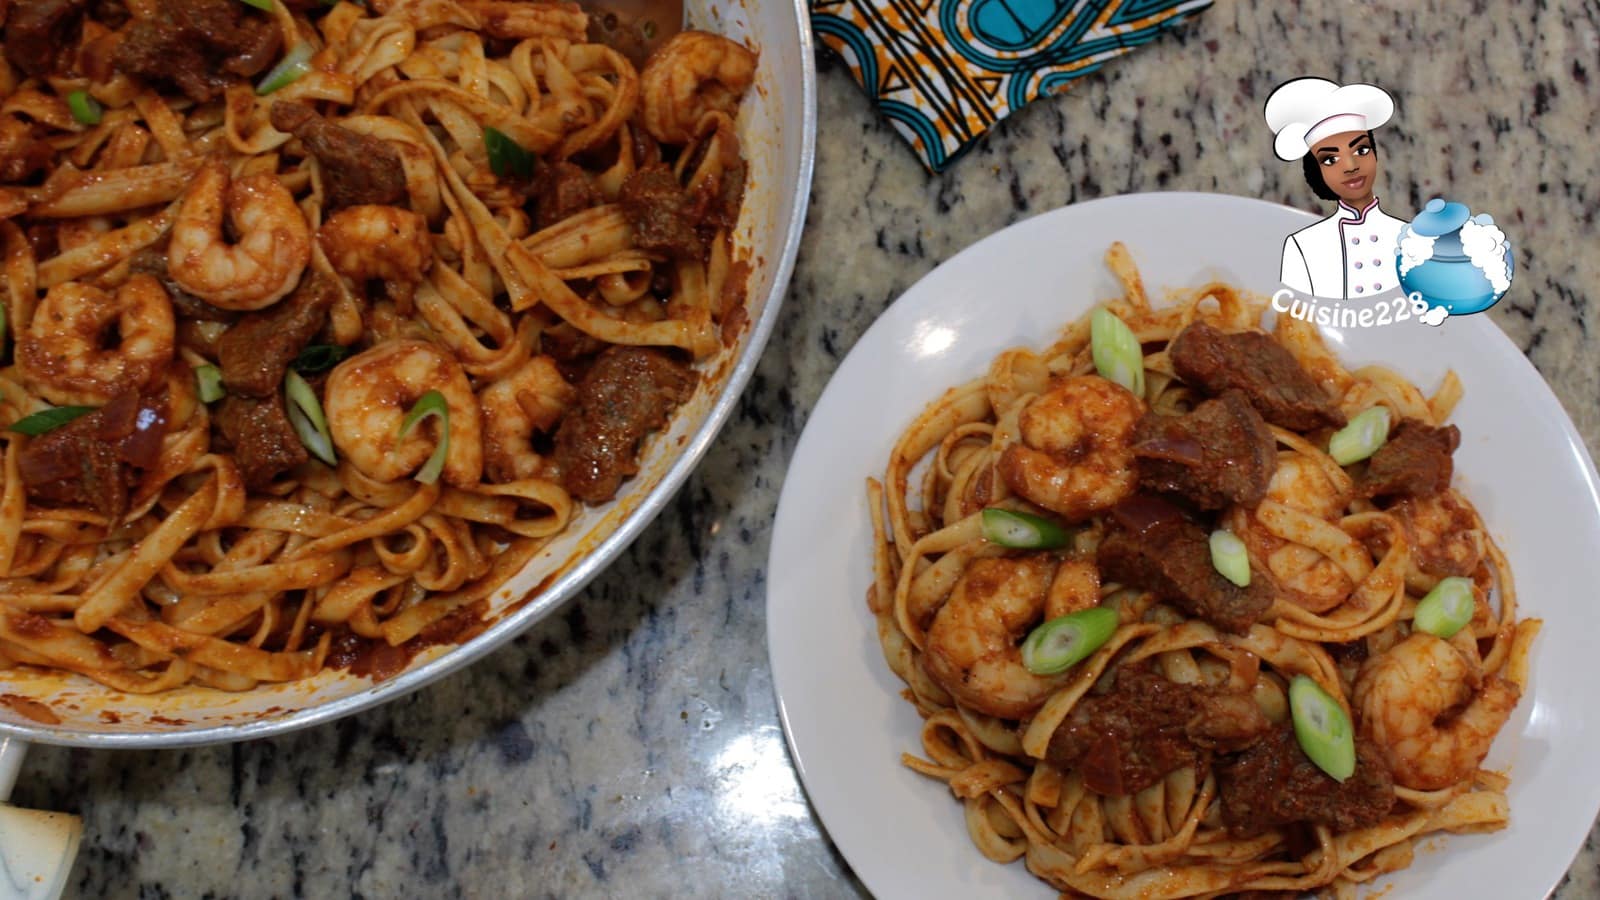
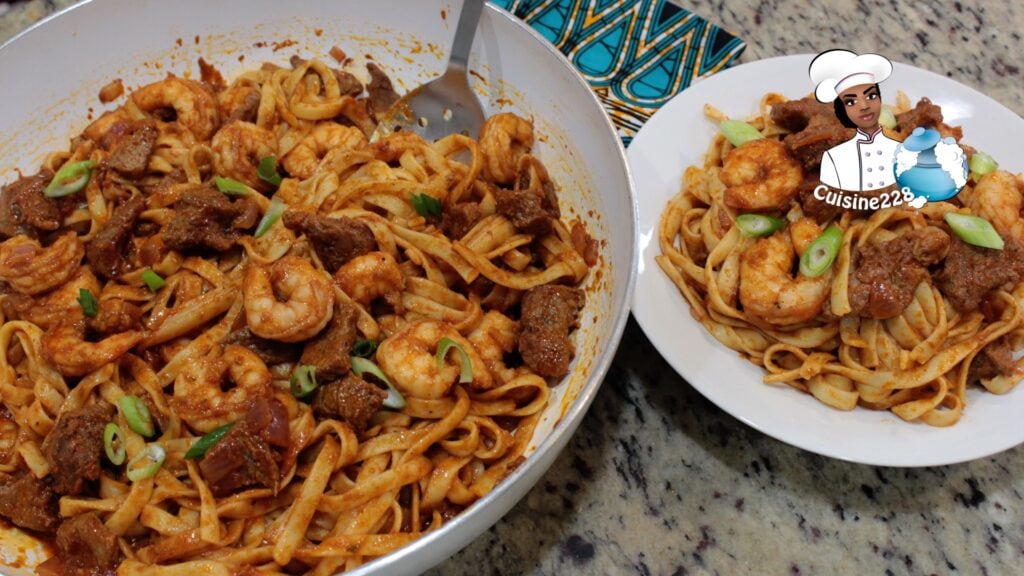
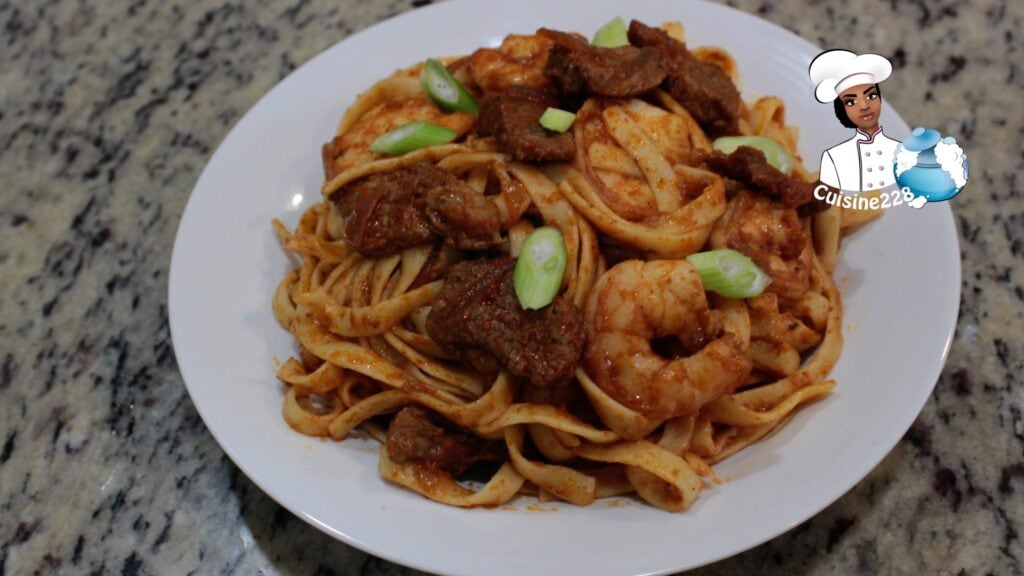
Jollof Tagliatelle Pasta is Tagliatelle Pasta cooked in flavorful
tomato sauce and you will have a delightful lunch or dinner you and your family
or guests can hardly forget. This recipe originated from west Africa and is a little
different from the western recipes. The sauce is made of cooked tomato, spices
and the meat of your choice. If you like jollof rice or jollof couscous, you
will appreciate this recipe. This delicious
Jollof Spaghetti recipe is very easy. You can choose to add vegetables. I
already have some Jollof rice recipes, click on any link below to view the
recipes if you’re interested.
1 box thin spaghetti (pre-cooked) – I used Collezione Tagliatelle Pasta
2 cup shrimps
1 lb kg beef
1 teaspoon garlic
1 teaspoon ginger
1 teaspoon chilli powder
1 teaspoon curry powder
1 teaspoon ground allspice
1 teaspoon paprika
1 tablespoon chicken bouillon powder
2 3/4 cups chicken stock
5 large about 2 lbs plum tomatoes
1 large onion
1 tablespoon tomato paste
3 tbsp vegetable oil
Salt to taste
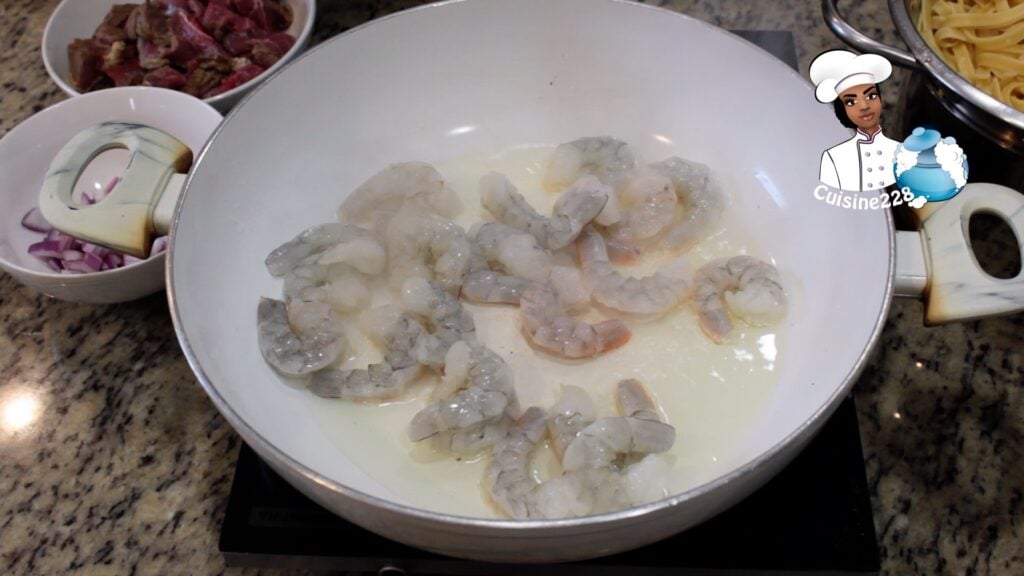
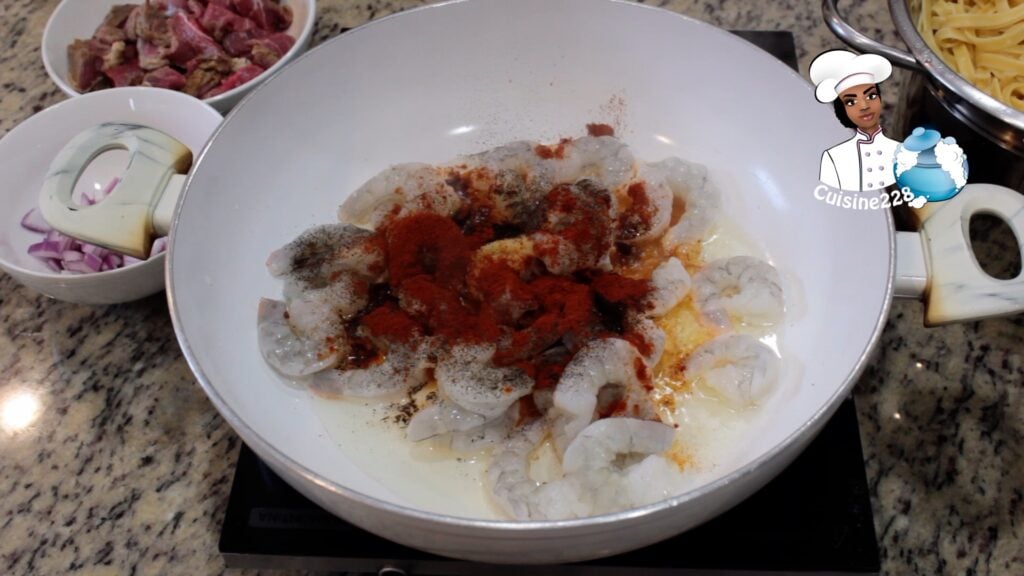
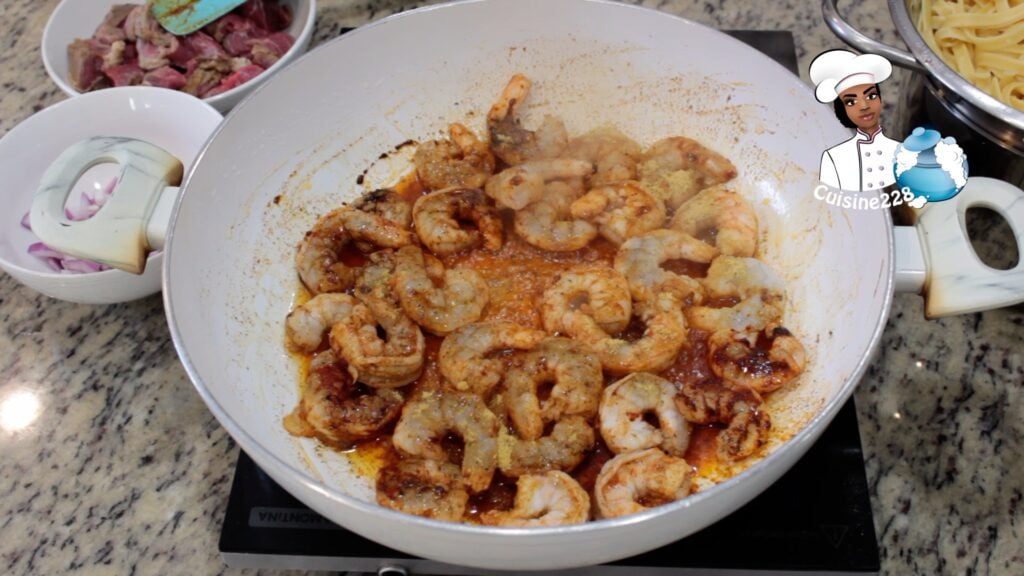
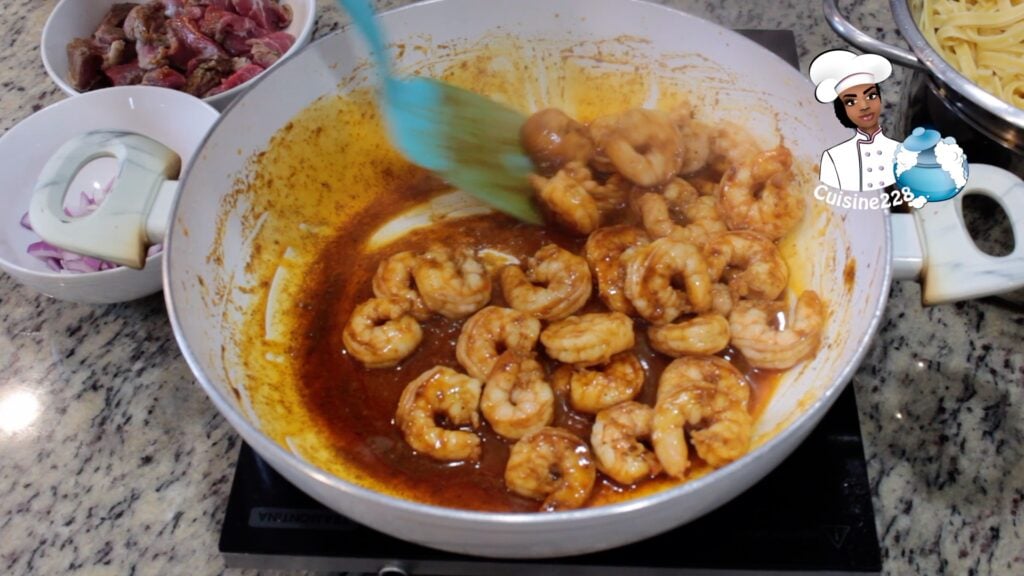
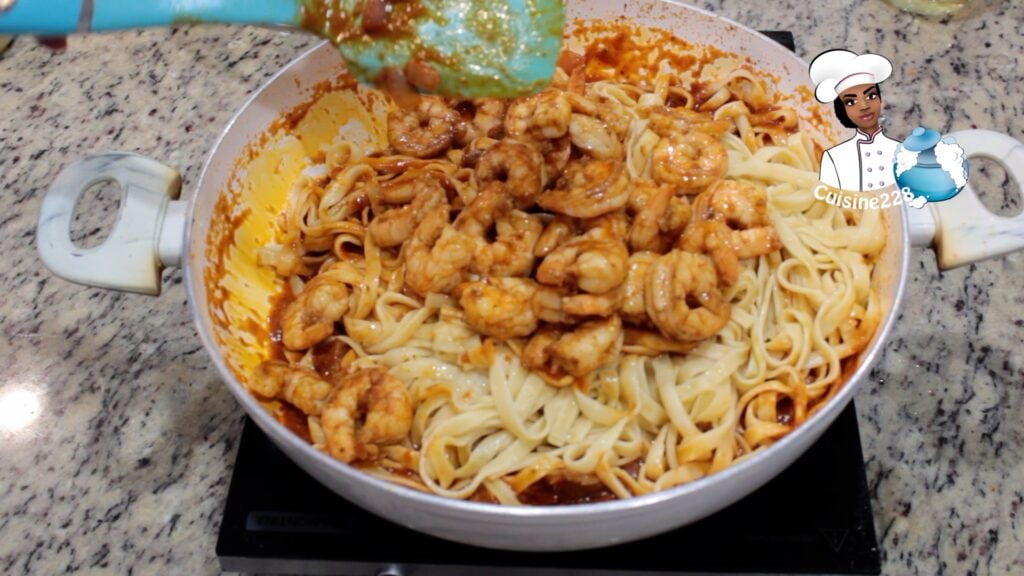
In a medium saucepan heat the oil and add the shrimp , garlic, ginger, chilli powder, curry powder, ground allspice, paprika and chicken bouillon powder. cook for 5 mins (until the shrimp turns pink).
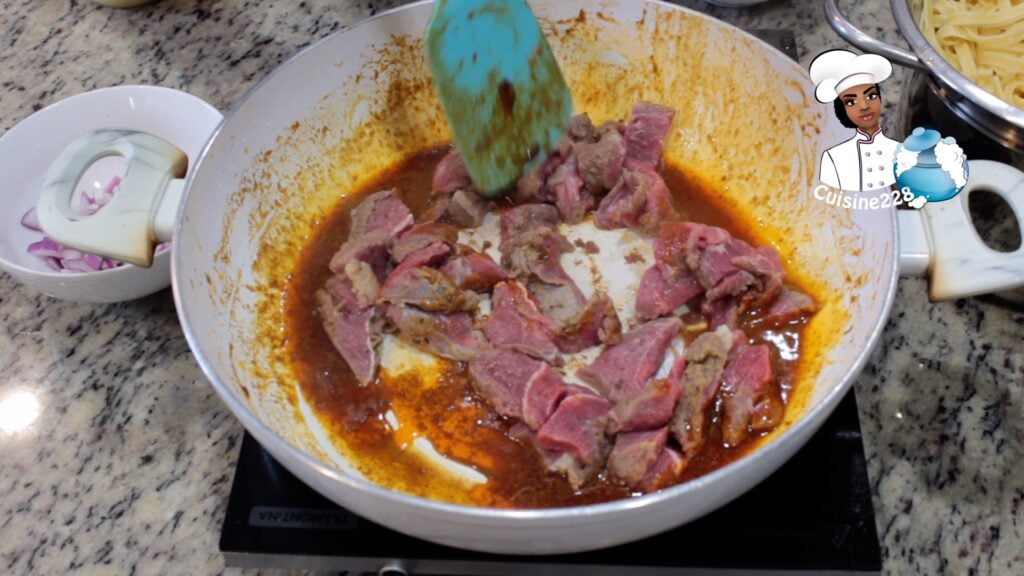
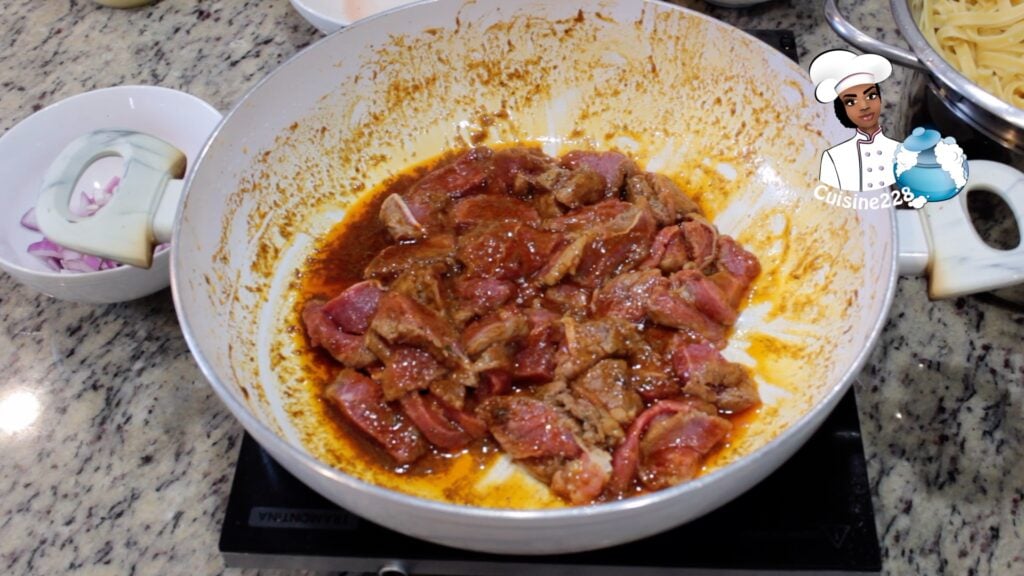
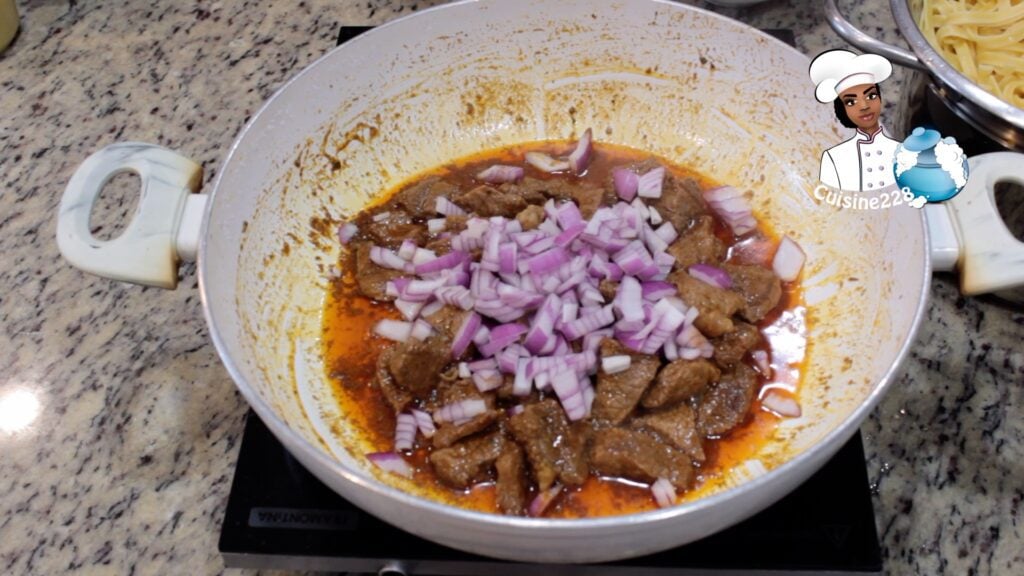
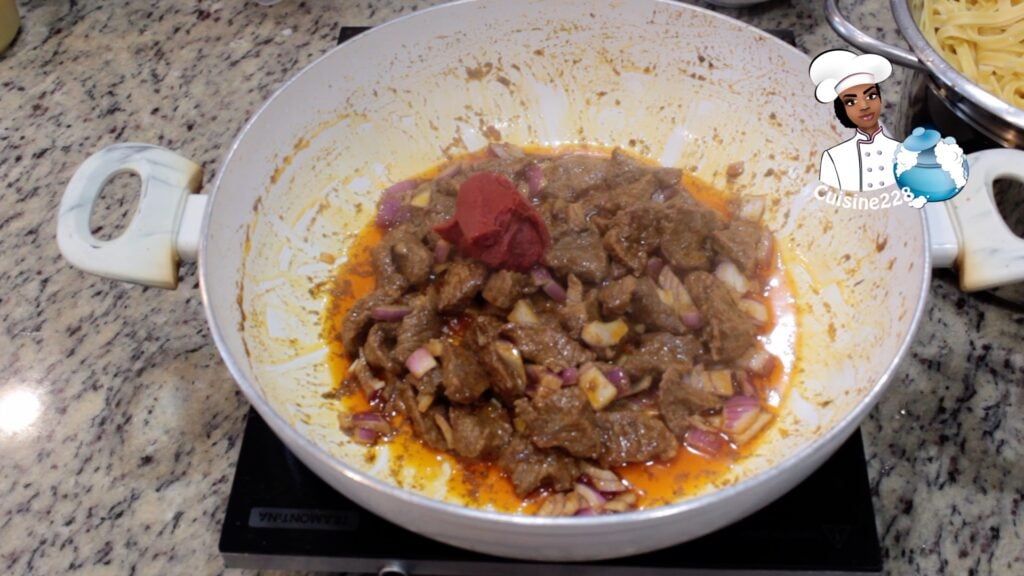
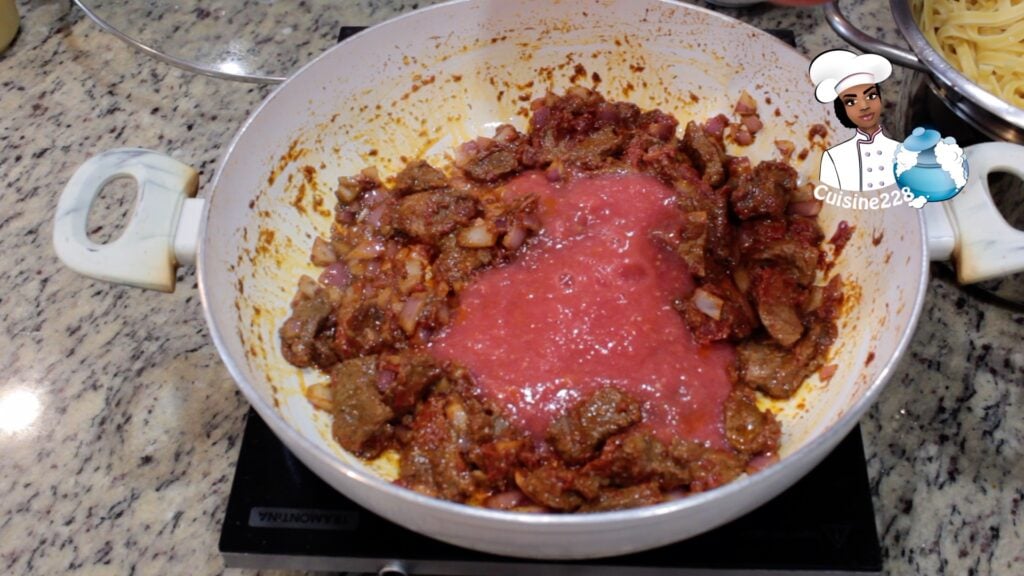
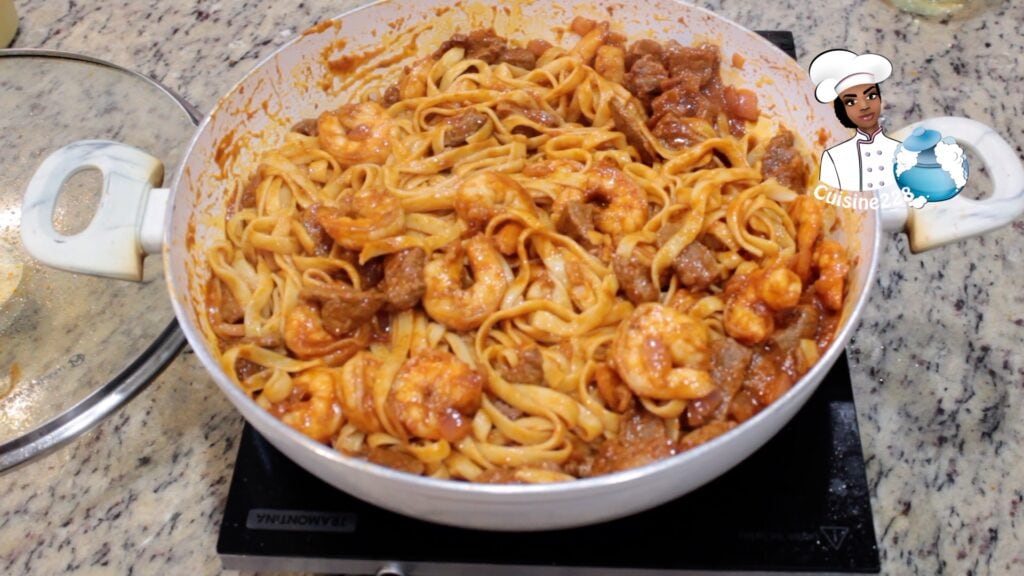
Remove the shrimp and add 1 lb beef. Cook for 5 mins.
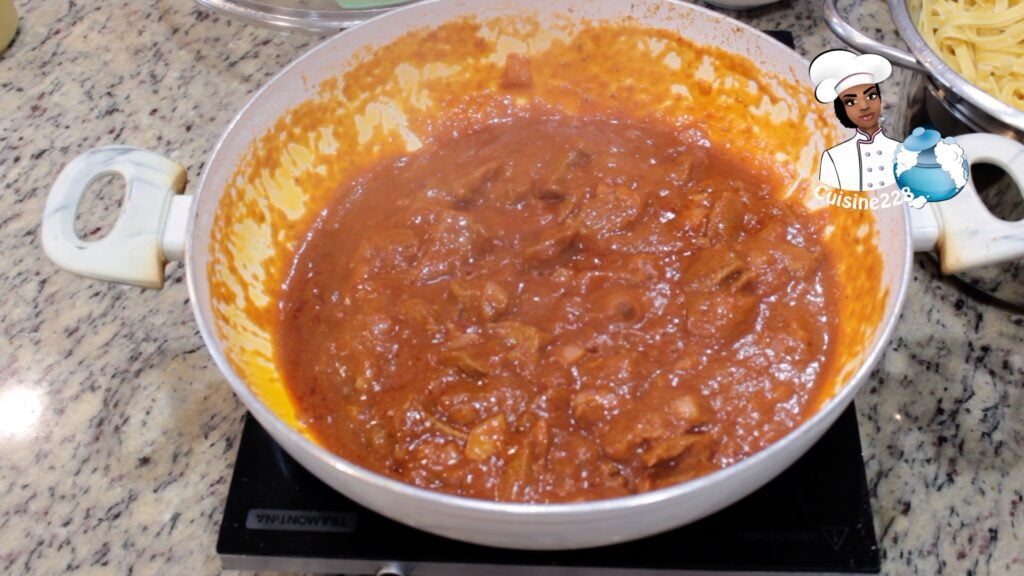
Add the chopped onion, tomato paste, blended tomato Add the chicken stock and cook until the beef is tender (sauce is about half the amount, and has thickened significantly to look like a paste). This takes about 15-20 minutes, depending on your beef.
Be sure to stir the sauce occasionally to prevent it from burning.
Once the sauce is reduced, taste the sauce and adjust for salt.
Add in the spaghetti and the shrimp. Cover and allow to cook for 3 minutes on low-medium heat.
Serve hot
How to cook the Tagliatelle Pasta?
To make a good Jollof Tagliatelle Pasta, the Tagliatelle Pasta need to be cooked to perfection. The first step is to boil a big pot of water and add a generous amount of salt (about 1 or 2 tablespoon). It should taste like the sea. Please remember to use a lot of water to avoid that the pasta sticks together. Once the water is boiling, add the pasta. As the pasta starts to cook, stir it well with the tongs so the noodles don’t stick to each other or to the pot. Cook the pasta 4 mins less that the cooking time on the package, but always taste pasta before draining to make sure the texture is right. Pasta will be cooked in the sauce for 4~7 mins to rewarm the pasta, get “al dente”—a little chewy. Drain cooked pasta well in a colander. I add a little bit of oil to help the pasta not stick together.
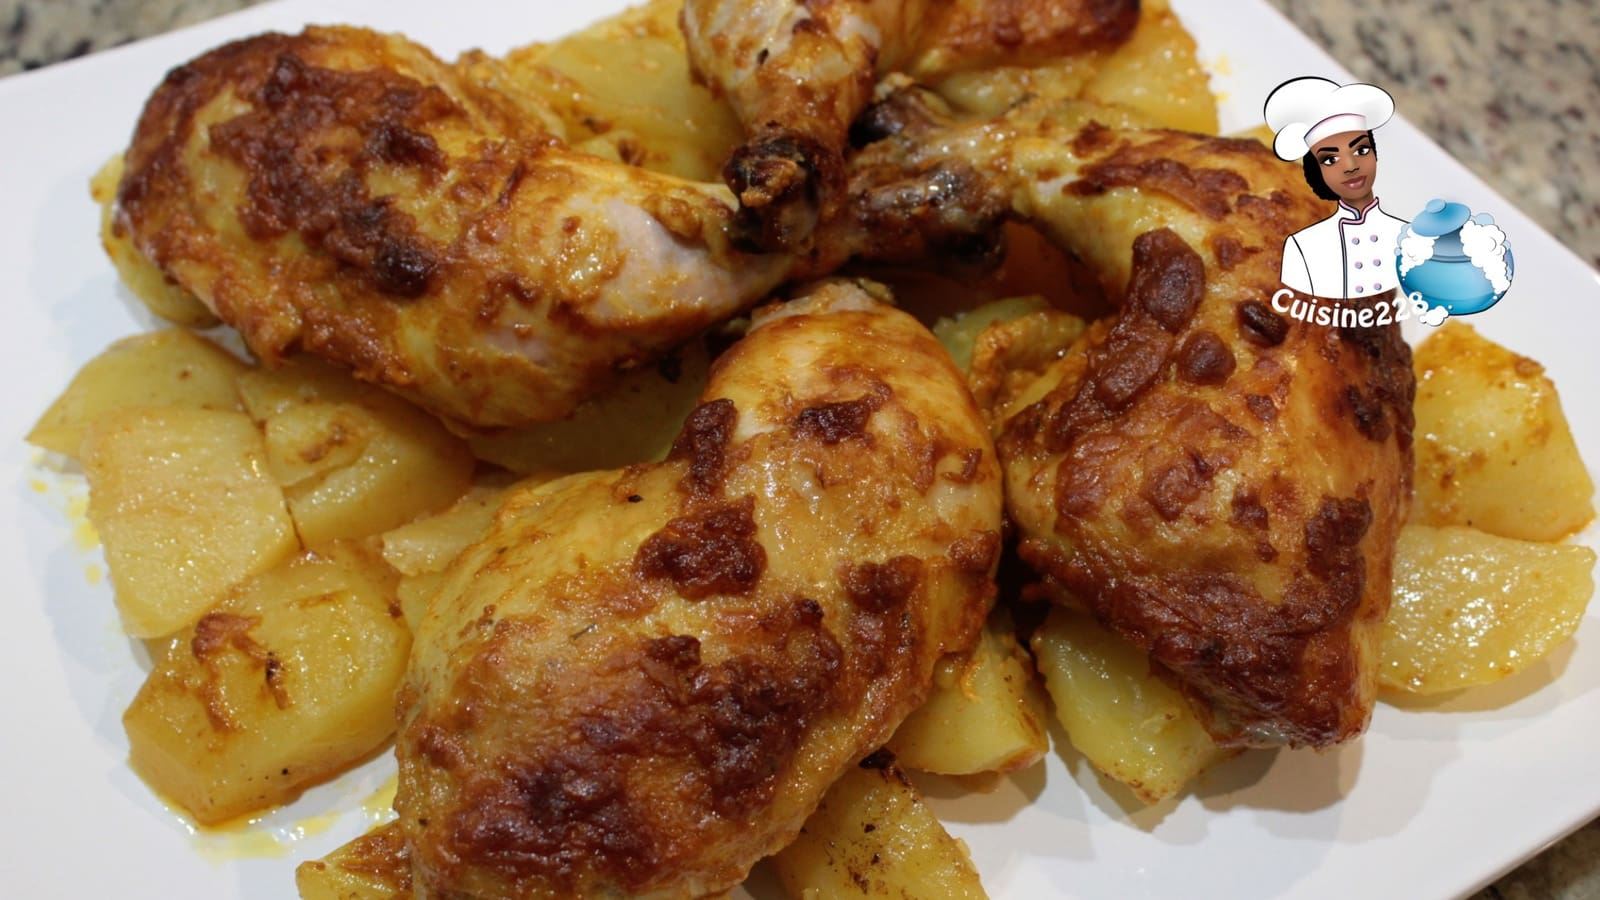
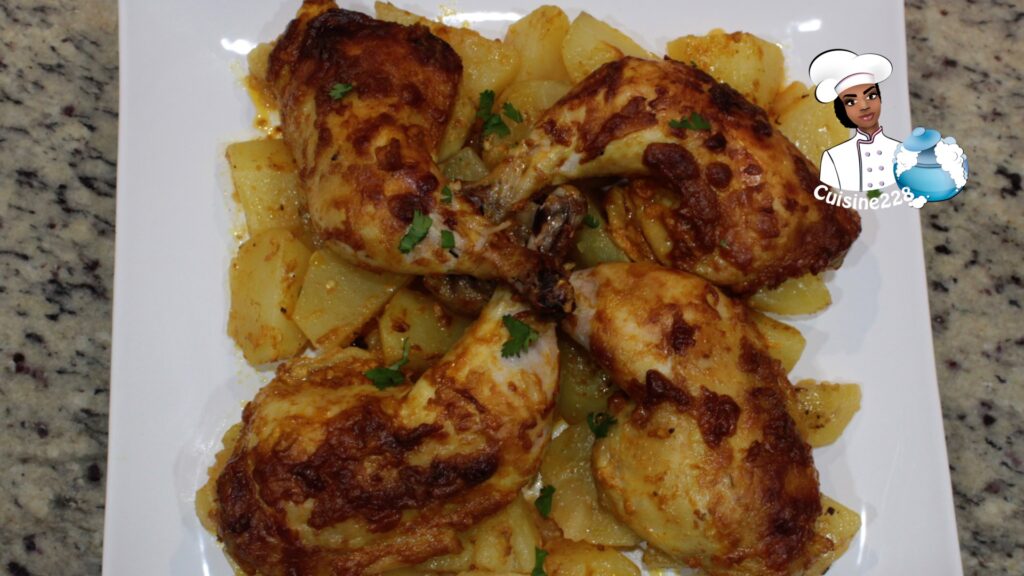
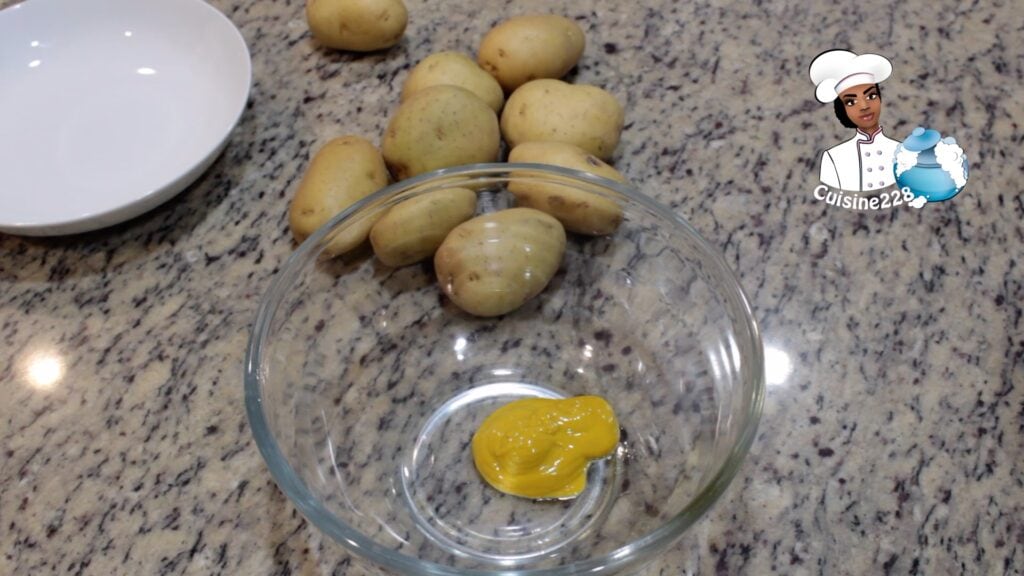
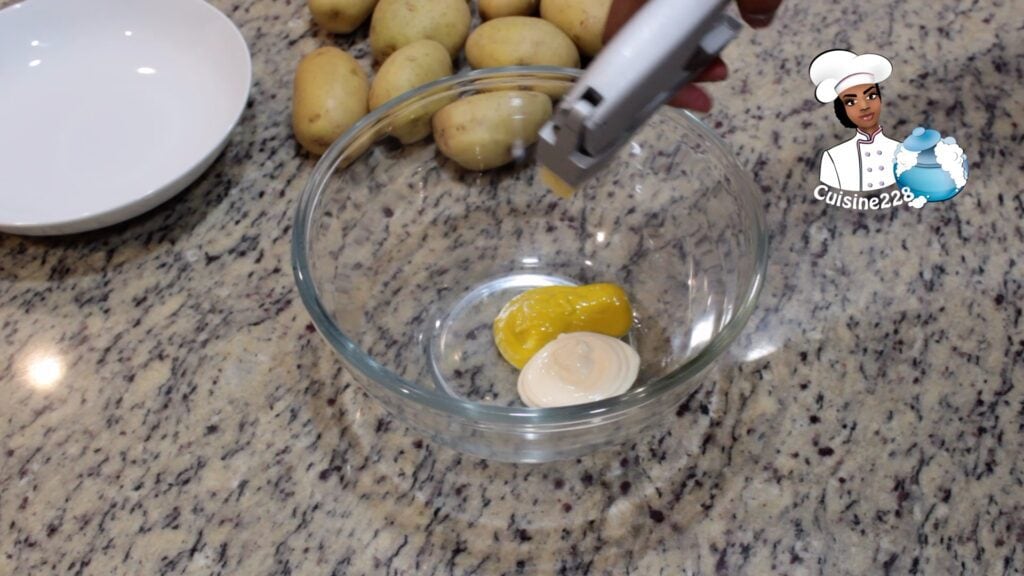
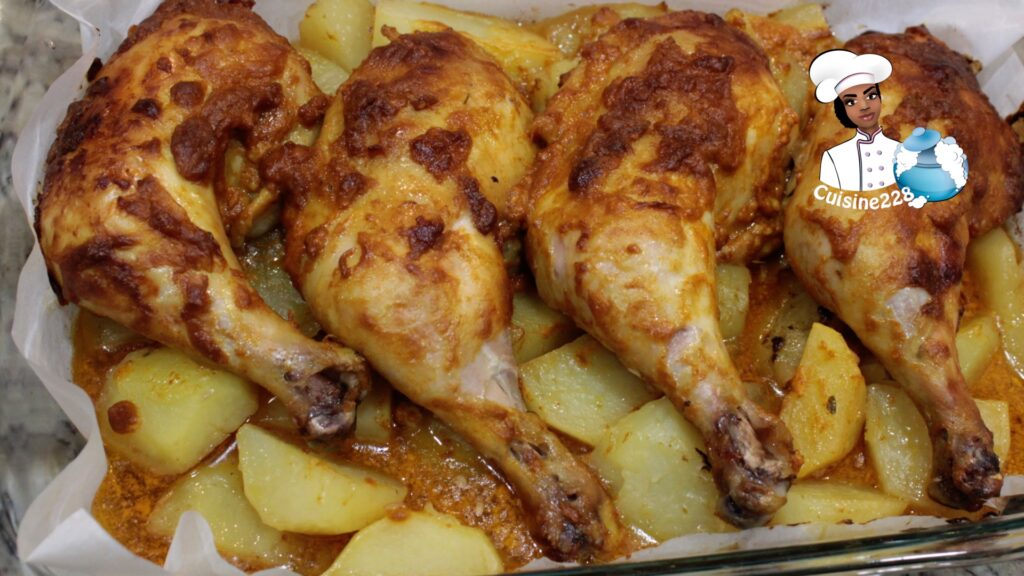
Today’s recipe is “Baked Mustard Chicken Legs and potatoes”. It’s very easy to put together and taste fantastic. I used chicken thighs in this recipe but you can also use a whole chicken, chicken wings, drumsticks… This recipe is one of my signature dishes where I cook chicken tights and drumsticks are in a pot with potatoes. Sometimes, I also add other vegetable like carrots, onion, green pepper… This meal is very inexpensive even though I used organic chicken and potatoes.
Baked Mustard Chicken Legs and potatoes
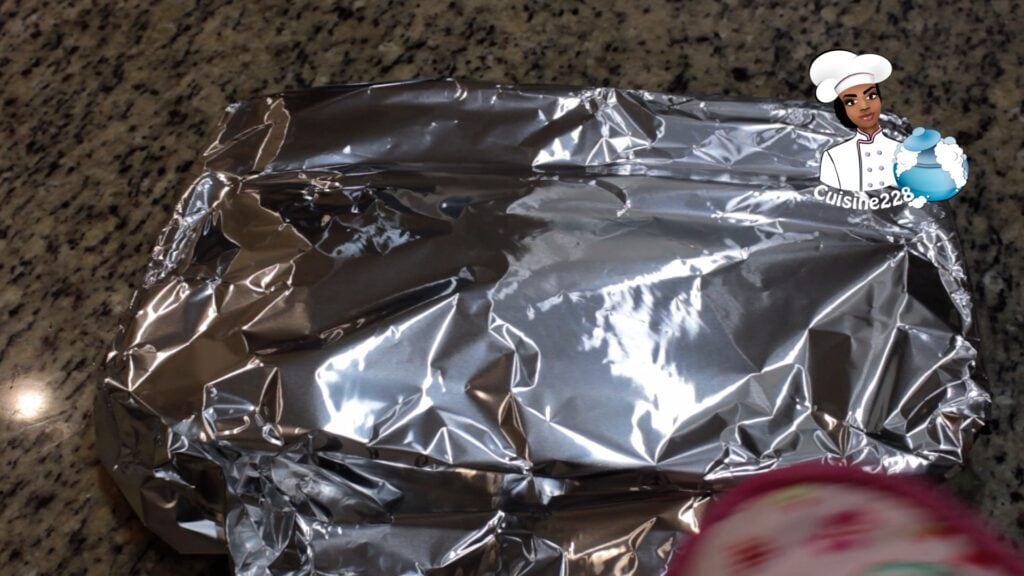
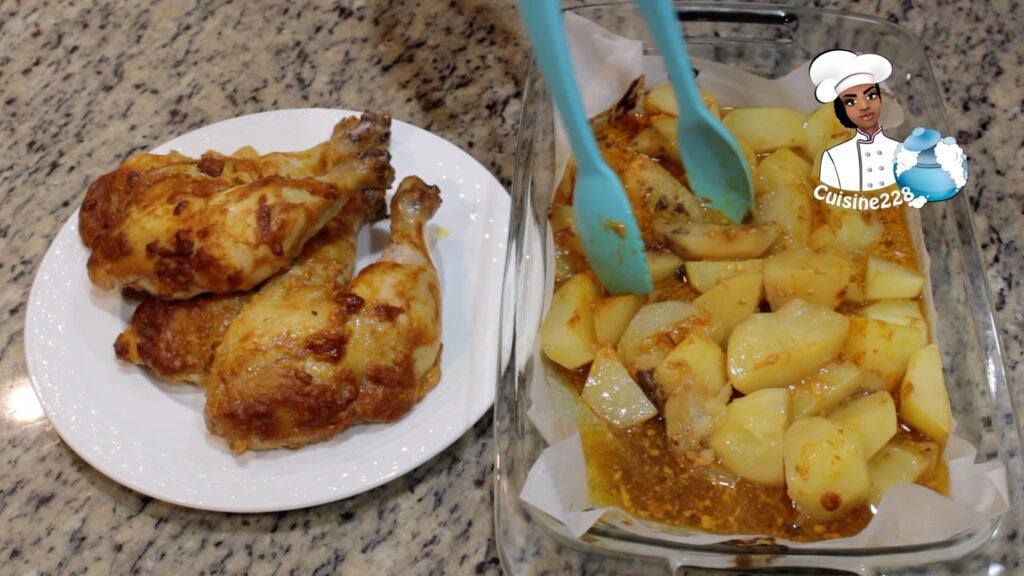
The recipe is simple: clean and season the meat; peel the potatoes, cut and season with salt; place them in a baking pan (I used Pyrex dish). The juice from the chicken adds water to the potatoes to soften them up. Cover with aluminum foil and bake at 400 F for an hour. Then uncover the pan and bake for another 15 minutes or until chicken turns golden and vegetables seem cooked.
Baked Mustard Chicken Legs and potatoes
4 chicken legs
3 teaspoons of strong mustard
3 teaspoons of mayonnaise
5 cloves of garlic
1 teaspoon red wine vinegar
1 teaspoon paprika
1/2 teaspoons ginger
1/2 teaspoons curry
1 teaspoons honey
Salt to taste
7 to 10 potatoes
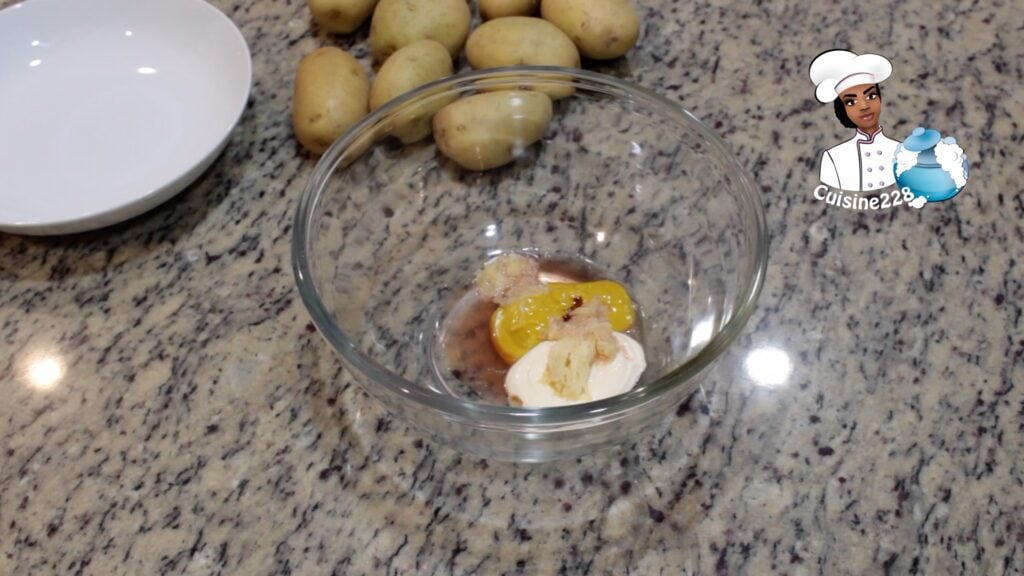
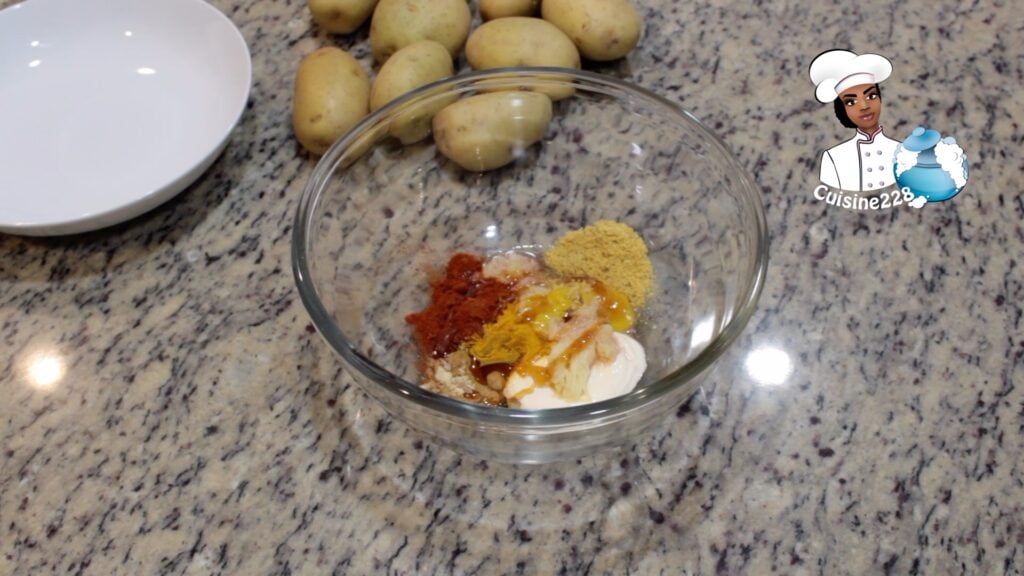
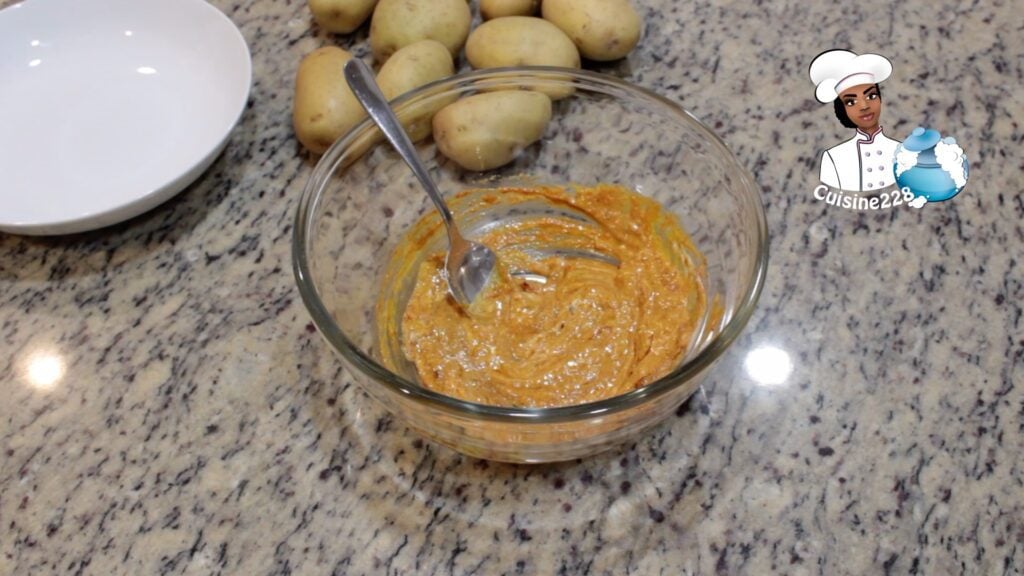
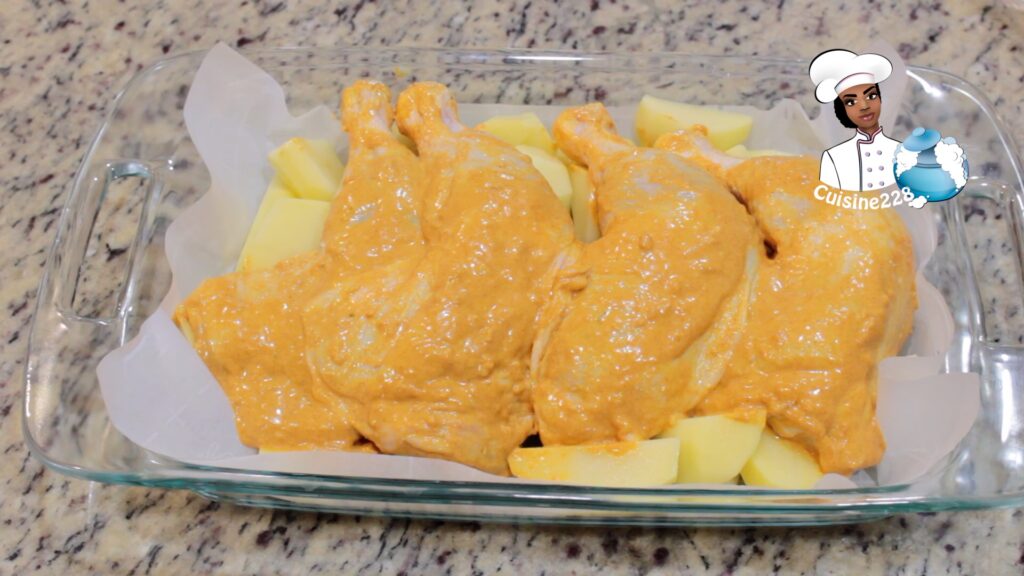
Marinade: In a salad bowl put the mustard, mayonnaise, garlic, red wine vinegar, paprika, ginger, curry, honey, salt and mix well until a homogeneous sauce.
Preheat the oven to 200 ° C (thermostat 6-7) 400 degrees F.
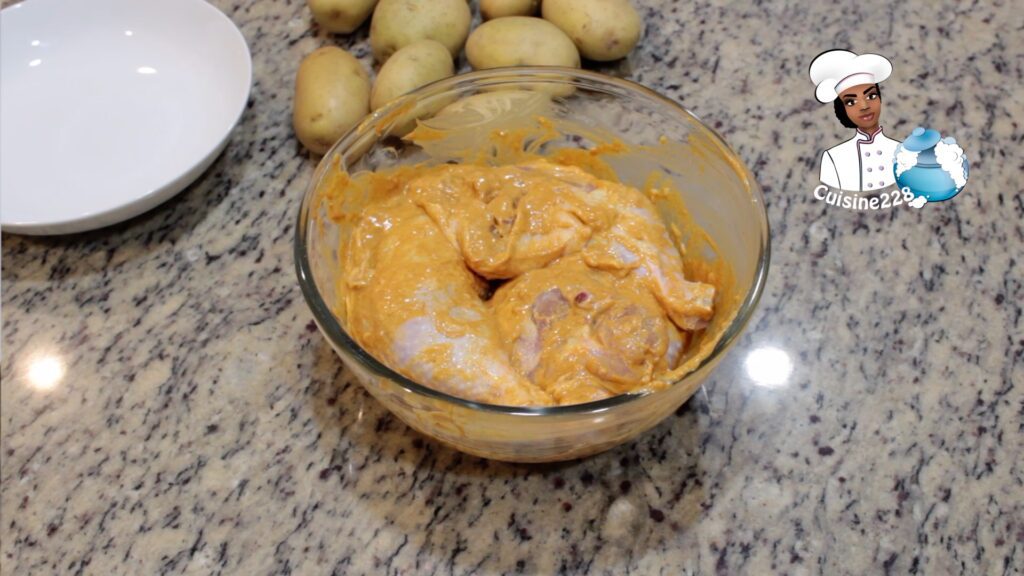
Brush the chicken with the marinade. Cover and refrigerate for 2 hours
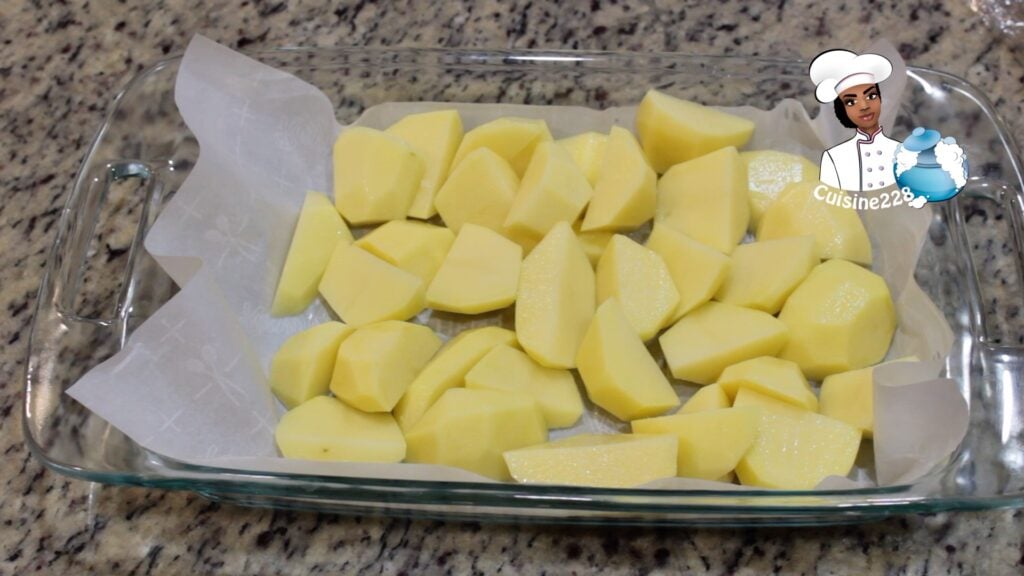
Cut the potatoes cut in D, drizzle with salt.
Arrange the potatoes, add the chicken legs, cover with aluminum foil and bake for 45 minutes (turning the thighs occasionally).
Remove from the oven, remove the cover and put back in the oven for 15 minutes to brown the thighs.
With the tip of a knife check the cooking of the potatoes (the blade must sink without resistance), add a little water if necessary.
Simple and delicious, this one pot chicken with
potatoes and vegetables is the perfect way to enjoy other parts of the chicken
like thighs.
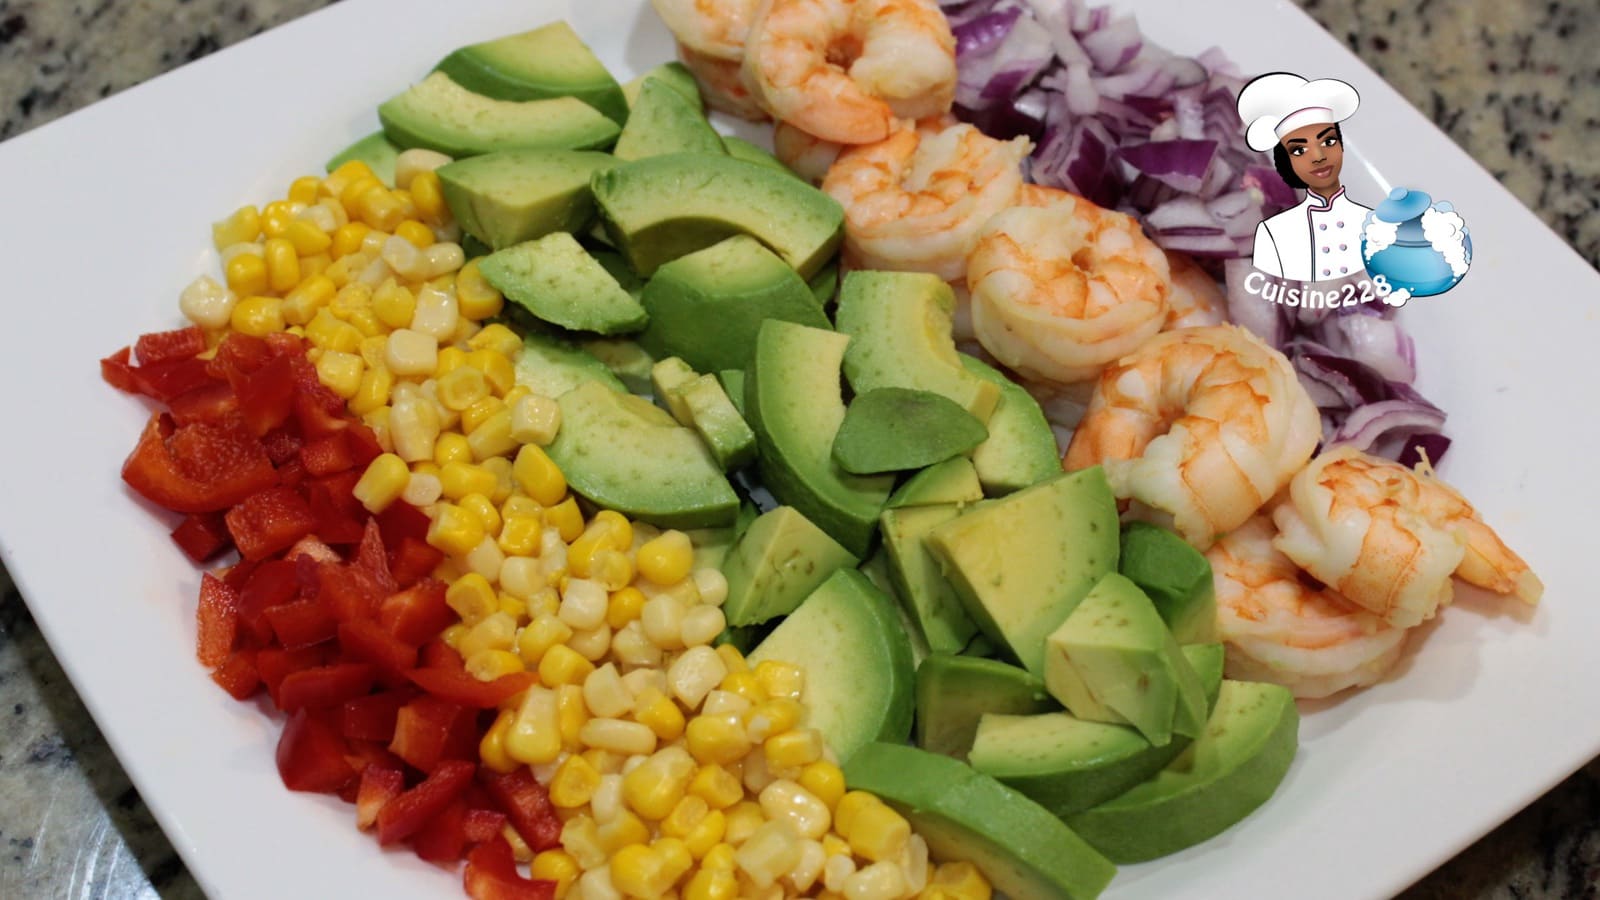
I can
live off of this Shrimp Avocado Salad. I love avocado, I love shrimp and this
recipe is the perfect refreshing marriage of shrimp and avocado. This Shrimp
Avocado Salad is light, delicious and refreshing and top it all it does not
required any cooking time.
Shrimp Avocado Salad
This
version of Shrimp Avocado Salad is made with fresh shrimp, avocado, red onion,
bell pepper and corn. I used canned corn because it was the winter time, but
roasted corn can also be used during the summer. I tossed my salad in virgin
olive oil, garlic powder, parsley, Dijon mustard, salt and pepper.
Ingredients
Avocado Salad
2 cup shrimp peeled and deveined (1 teaspoon garlic and salt)
2 avocados cut into large pieces
2 tablespoons diced red onion
1 cup red bell pepper
1 cup sweet corn
Dressing
1/4 cup extra virgin olive oil
1/2 teaspoon garlic powder
1 teaspoon parsley chopped
1 teaspoon Dijon mustard
salt and pepper to taste
How to make Shrimp Avocado Salad?
Boiled the shrimp with the garlic and the salt. Let cool down.
Add shrimp, corn, bell pepper, avocado, and onion to a large bowl.
In a 2-cup measuring cup, mix together ingredients for the dressing. Whisk until well-combined.
Add dressing to shrimp avocado salad until it has the amount you desire. Serve additional dressing on the side.